Creating a professional free landing page doesn’t have to be expensive—or complicated! In this guide, you’ll learn how to design a stunning, high-converting landing page for free using Systeme.io. You don’t need coding skills—just a bit of time and creativity. Let’s get started!
Table of Contents
What is a Landing Page, and Why Do You Need One?
A landing page is a single, focused page designed to capture leads or encourage your visitors to take a specific action—like signing up, downloading your free guide, or clicking a button. Getting your landing page right is crucial; otherwise, your visitors might leave within seconds. It needs the right structure, fast loading time, and stability.
If you’re considering hiring someone to create a landing page for you, be prepared to spend hundreds or even thousands of dollars. But don’t worry—today, I’ll show you how to create one yourself, completely free, using Systeme.io!
Step 1: Setting Up Your Free Account on Systeme.io and Create a Sales Funnel
I highly recommend Systeme.io if you’re looking for something fast and hassle-free. For me, it’s the best option 99% of the time when I need to quickly log in and start creating.
- Sign Up: If you don’t already have an account, create one here.
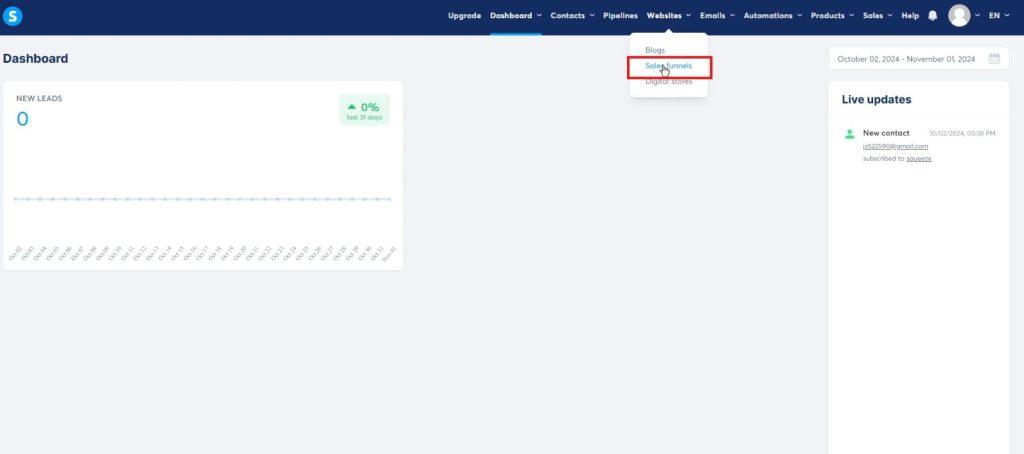
- Navigate to the Dashboard: Once logged in, head to the “Websites” section and select “Sales Funnels.”
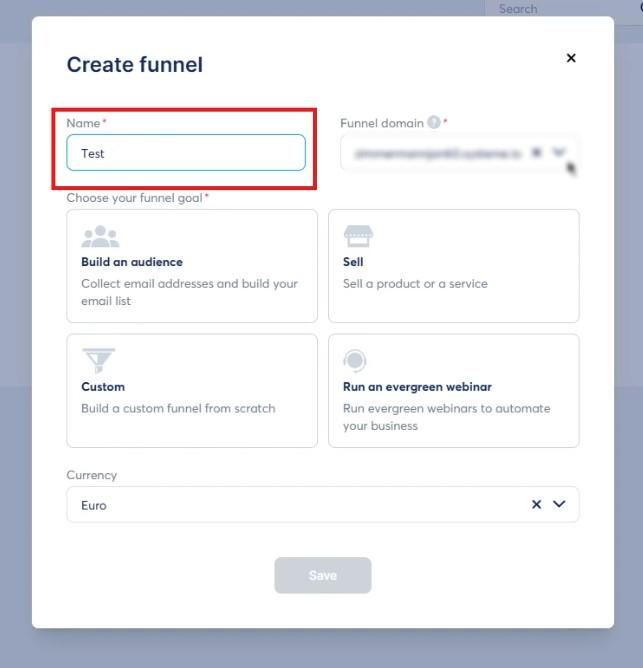
- Create Your Landing Page: Click “Create,” name your page (e.g., “Test”), and select a domain. Systeme.io provides a free domain, but you can also use a custom one for better branding.
Pro Tip: If you’re serious about your online presence, I highly recommend using a custom domain. Need help setting it up? Check out our tutorial here.
Step 2: Choosing and Customizing a Template
So, you’ve created your page—but how should it look? The great thing is, you don’t need to be a professional designer to create a beautiful landing page. Systeme.io offers a variety of pre-made templates that are ready to use with just one click.
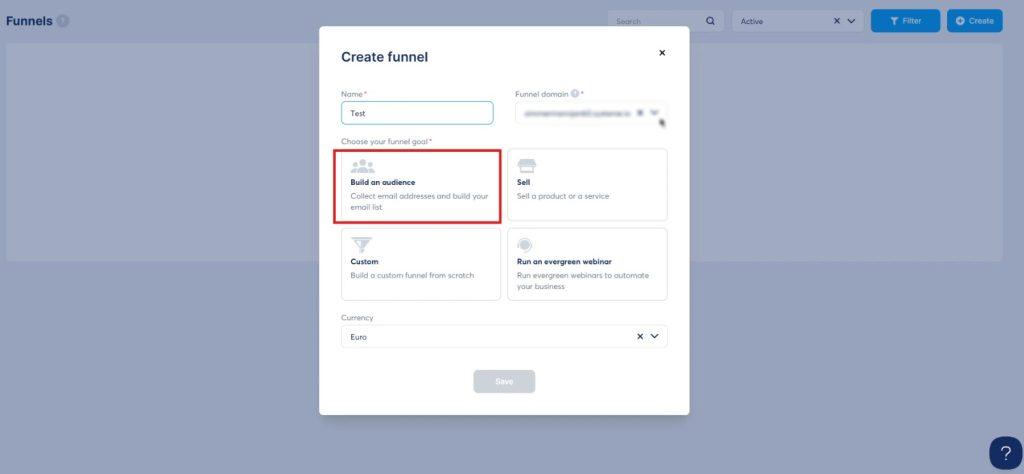
- Select a Goal: For this guide, since we’re collecting emails, choose the “Build an Audience” option.
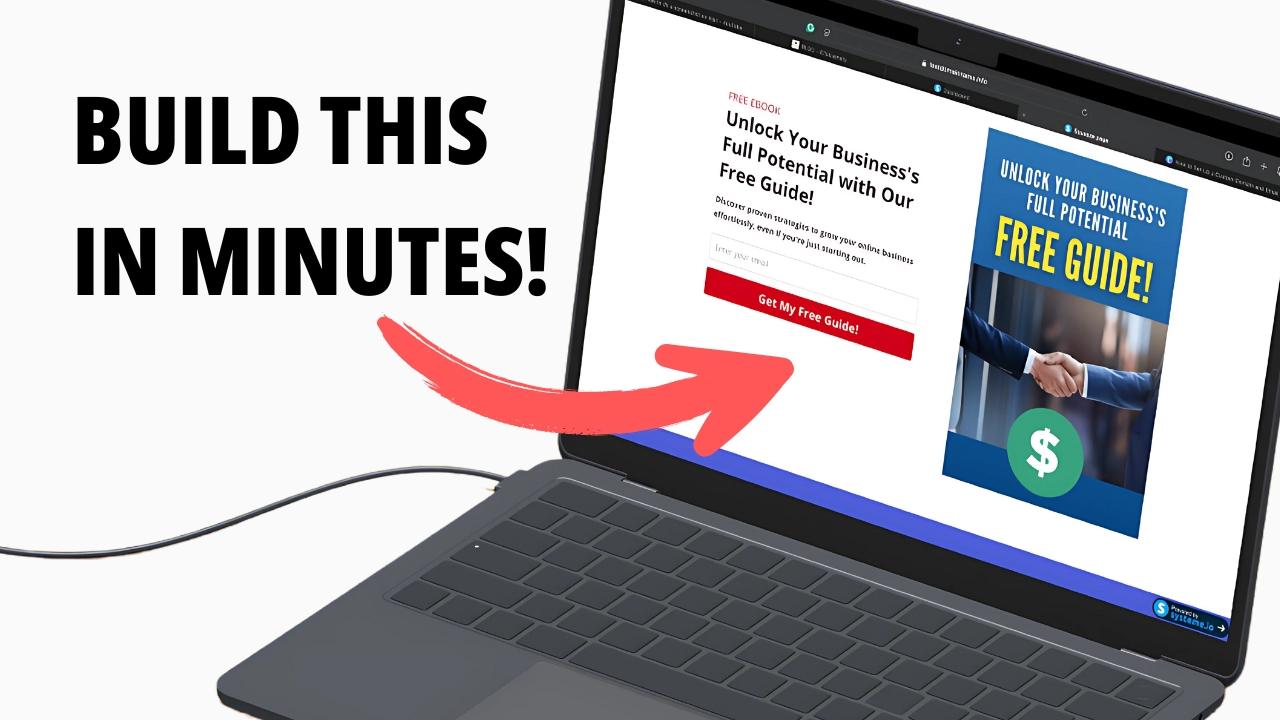
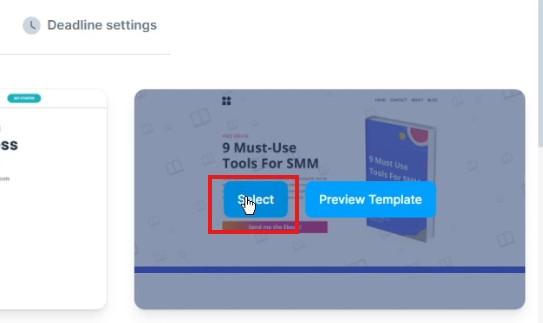
- Preview and Pick: Browse through the templates and pick one that suits your needs. (See the one I chose in the image below!)
- Customize It: Click “Edit Page” to start designing. Remove unnecessary elements like headers or extra links, and add your own text and images.
Step 3: Crafting Engaging Content
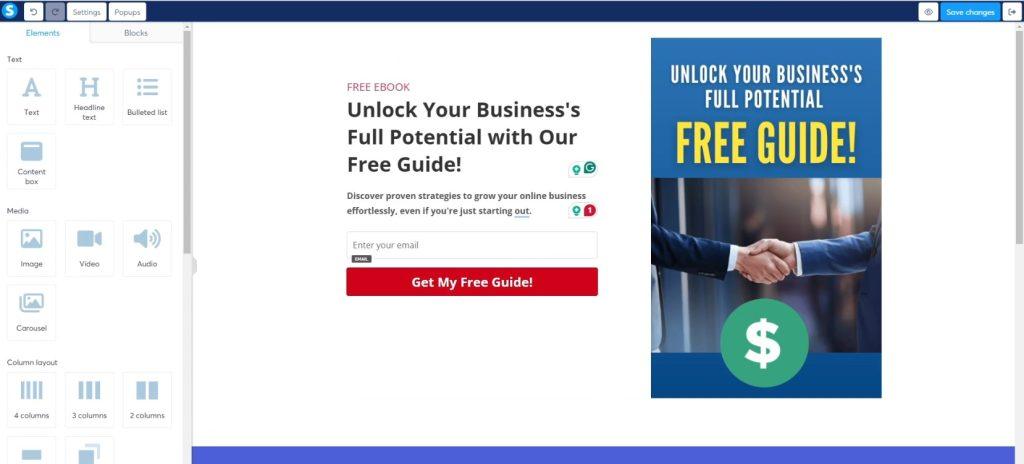
The content on your landing page is the most important part—it’s not about fancy designs or colors. Your content speaks directly to your visitors. Let’s start with the most important element: the headline.
- Headline: Write a compelling headline that grabs attention immediately. Attention spans are shrinking, so something like, “Unlock Your Business’s Full Potential with Our Free Guide” works well. Adjust font size and line spacing for readability.
- Call-to-Action (CTA) Button: Your CTA button should stand out. For example, use a bold color like red with clear text, such as “Get My Free Guide!”
- Visuals: Replace placeholder images with a picture of your free lead magnet to add credibility and appeal.
Step 4: Adding Essential Supporting Pages
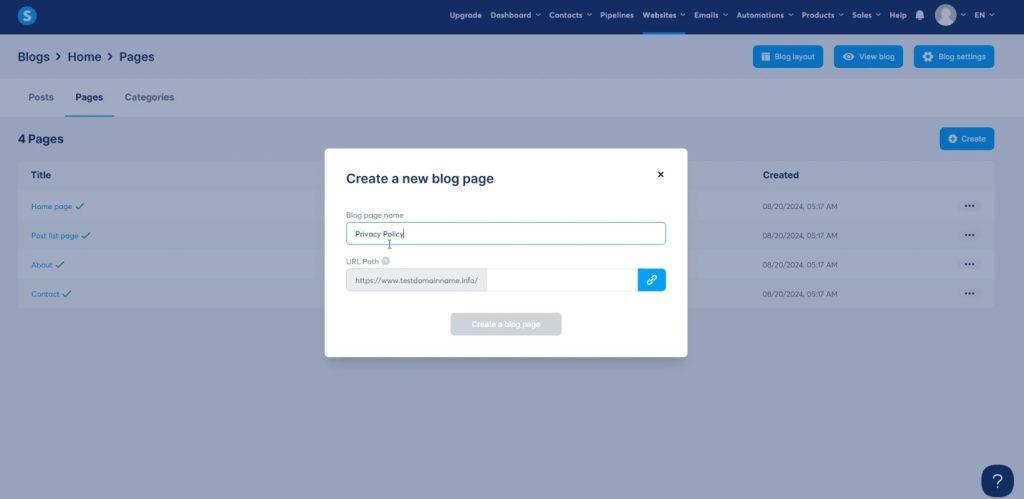
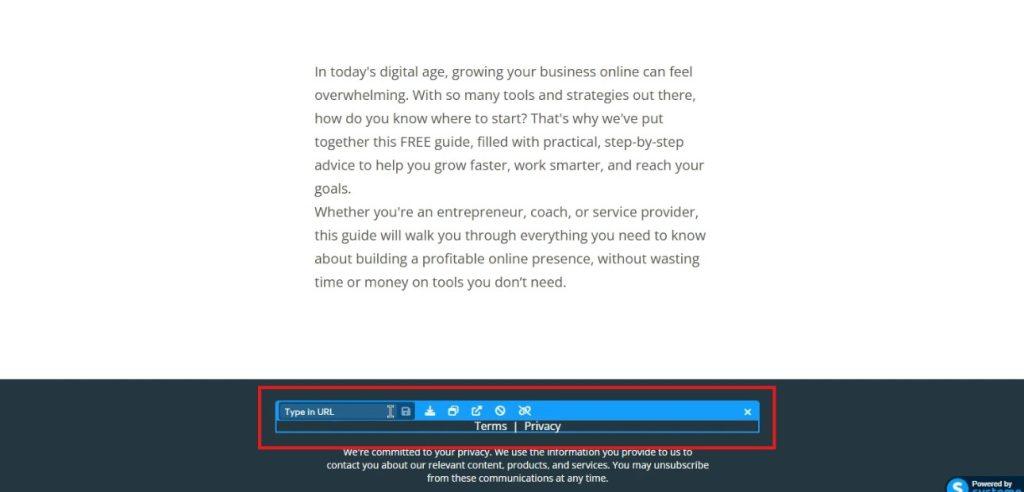
Always include Privacy Policy and Terms of Service pages, and ideally, a contact page in the footer of your landing page. These pages are required if you plan to run paid ads on platforms like Facebook or Google. Not having those pages can cause you many problems in the future.
- Create the Pages: Go to the “Blogs” section in Systeme.io and create new pages (e.g., “Privacy Policy”).
- Add Content: Use our templates or write your own text for these pages, then link them in your footer.
Step 5: Designing a Thank You Page
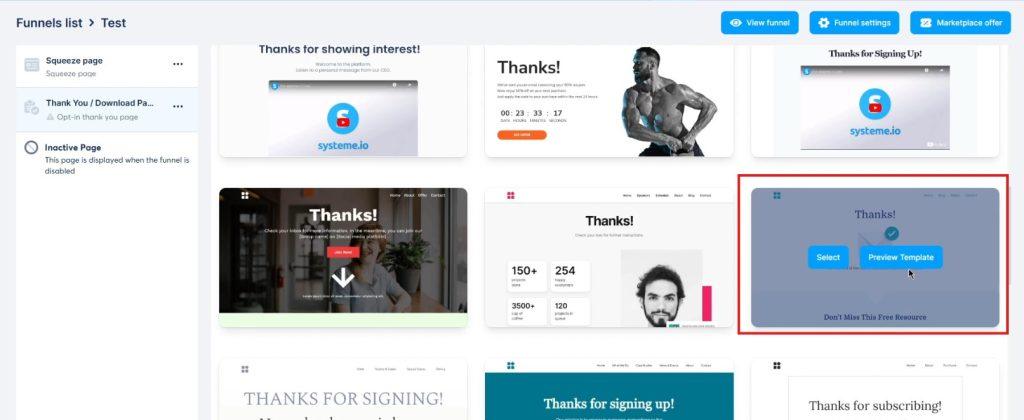
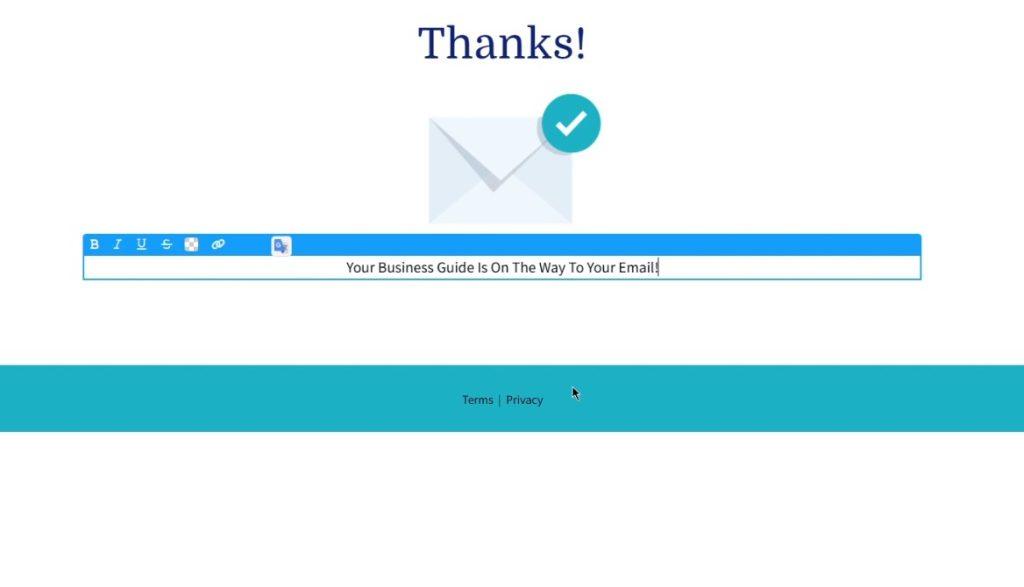
After someone subscribes, redirect them to a Thank You Page. You can use this page to upsell, link to your social media accounts, or just confirm their subscription.
- Choose a Template: Select a pre-made Thank You Page template.
- Customize the Message: Add text like, “Your free guide is on its way! Check your email to download it.”
- Simplify the Page: Remove unnecessary elements to keep the focus on the confirmation message.
Step 6: Automating Email Campaigns to Deliver Lead Magnets
Automate as much as possible to save time. It’s impractical to manually send emails to every subscriber.
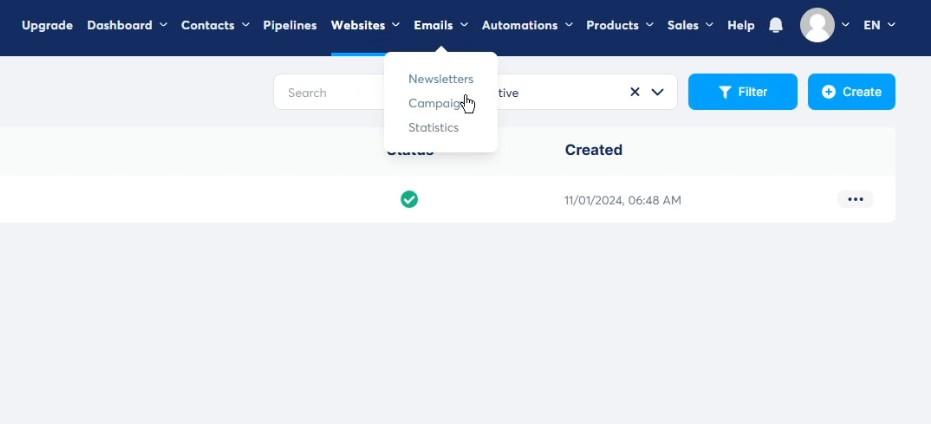
- Create a Campaign: Go to the “Emails” section and create a new campaign (e.g., “Free Guide Campaign”).
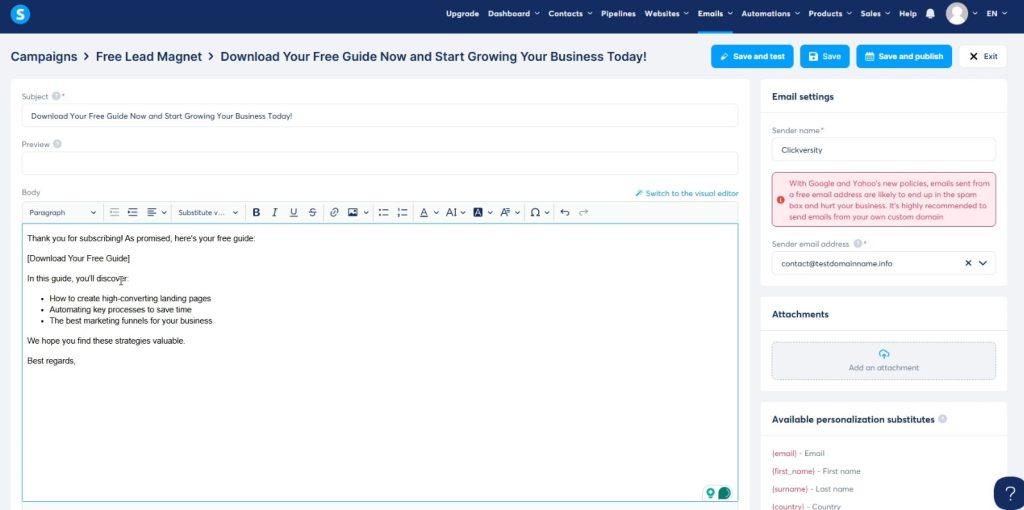
- Write Your First Email:
- Subject Line: “Download Your Free Guide Now”
- Body: Include a link to your lead magnet (e.g., hosted on Google Drive).
- Test the Email: Ensure it’s professional and functional.
Step 7: Automating Your Landing Page
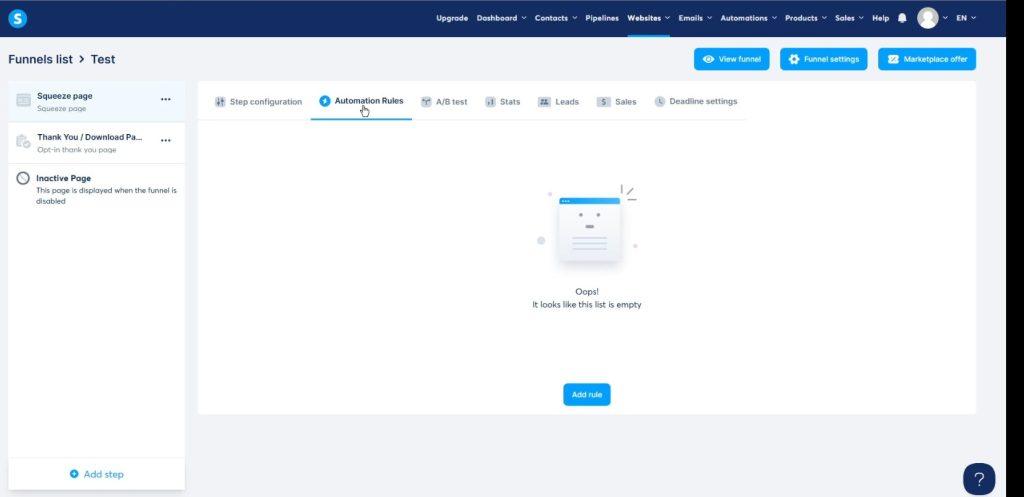
Connect your landing page form to your email campaign using Systeme.io’s automation features.
- Go to Automation Rules: On your landing page, select “Automation Rules.”
- Add a Trigger: Use “Subscription to your funnel.”
- Add an Action: Select “Subscribe to the email campaign.”
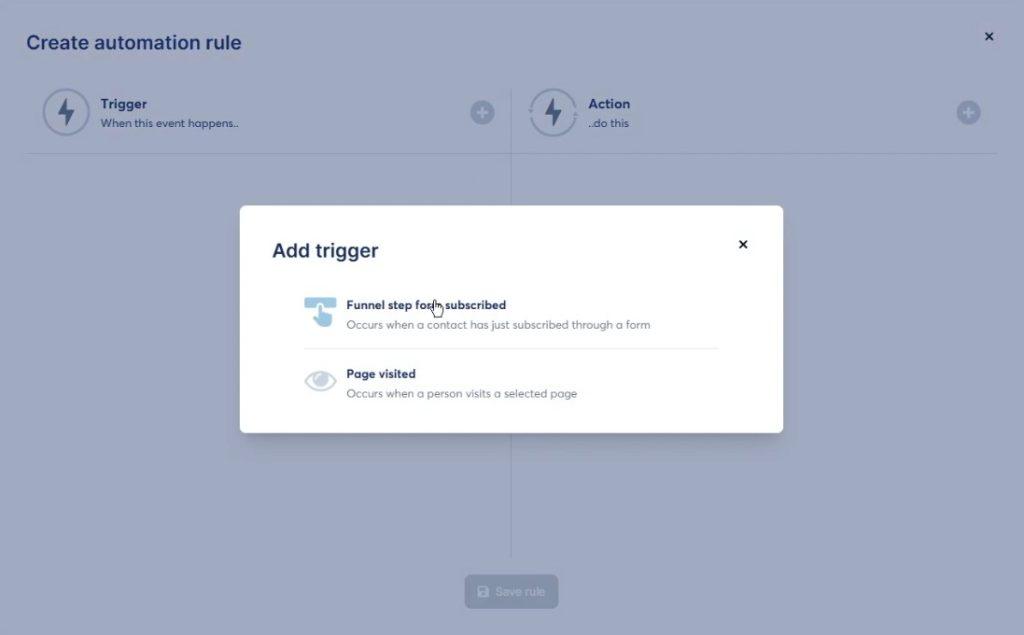
Test it out by subscribing with your email to ensure everything runs smoothly.
Best Practices for Landing Page Optimization
To maximize results:
- Optimize for Mobile: Preview your page on mobile devices and adjust fonts, images, and layout as needed.
- Keep It Simple: Avoid unnecessary clutter—focus on your main goal.
- Track Performance: Use analytics to monitor conversions and refine your page over time.
Final Thoughts
If you’ve made it to the end, congratulations! You’ve already outdone 99% of people who never finish reading or creating their landing pages.
Still unsure whether to use Systeme.io? Just give it a try—it’s completely free!
I hope this guide was helpful. Let me know if you have any questions or need further assistance!

