You made a great decision choosing Systeme.io to build your online business!
Now, it’s time to set up a custom domain and email to make your business look professional and trustworthy.
With a custom setup, your emails are far more likely to land in your subscribers’ inboxes rather than the spam or promotions tabs.
In this guide, I’ll show you the complete process—from connecting a custom domain to creating a custom email address.
Table of Contents
Why You Need a Custom Domain and Email in Systeme.io
Your domain is your business’s online identity. A custom domain is not only memorable but also proven to boost conversion rates.
Whether it’s for newsletter signups, lead generation, or sales, a custom domain helps increase your numbers significantly.
And what about your emails? Hours of work can go to waste if they end up in the spam or promotions tab!
A custom email address makes sure your messages have the best chance of reaching your audience’s inbox.
Custom domains and emails may cost a few dollars, but they’re invaluable investments for your business!
Step 1: Create Your Free Systeme.io Account
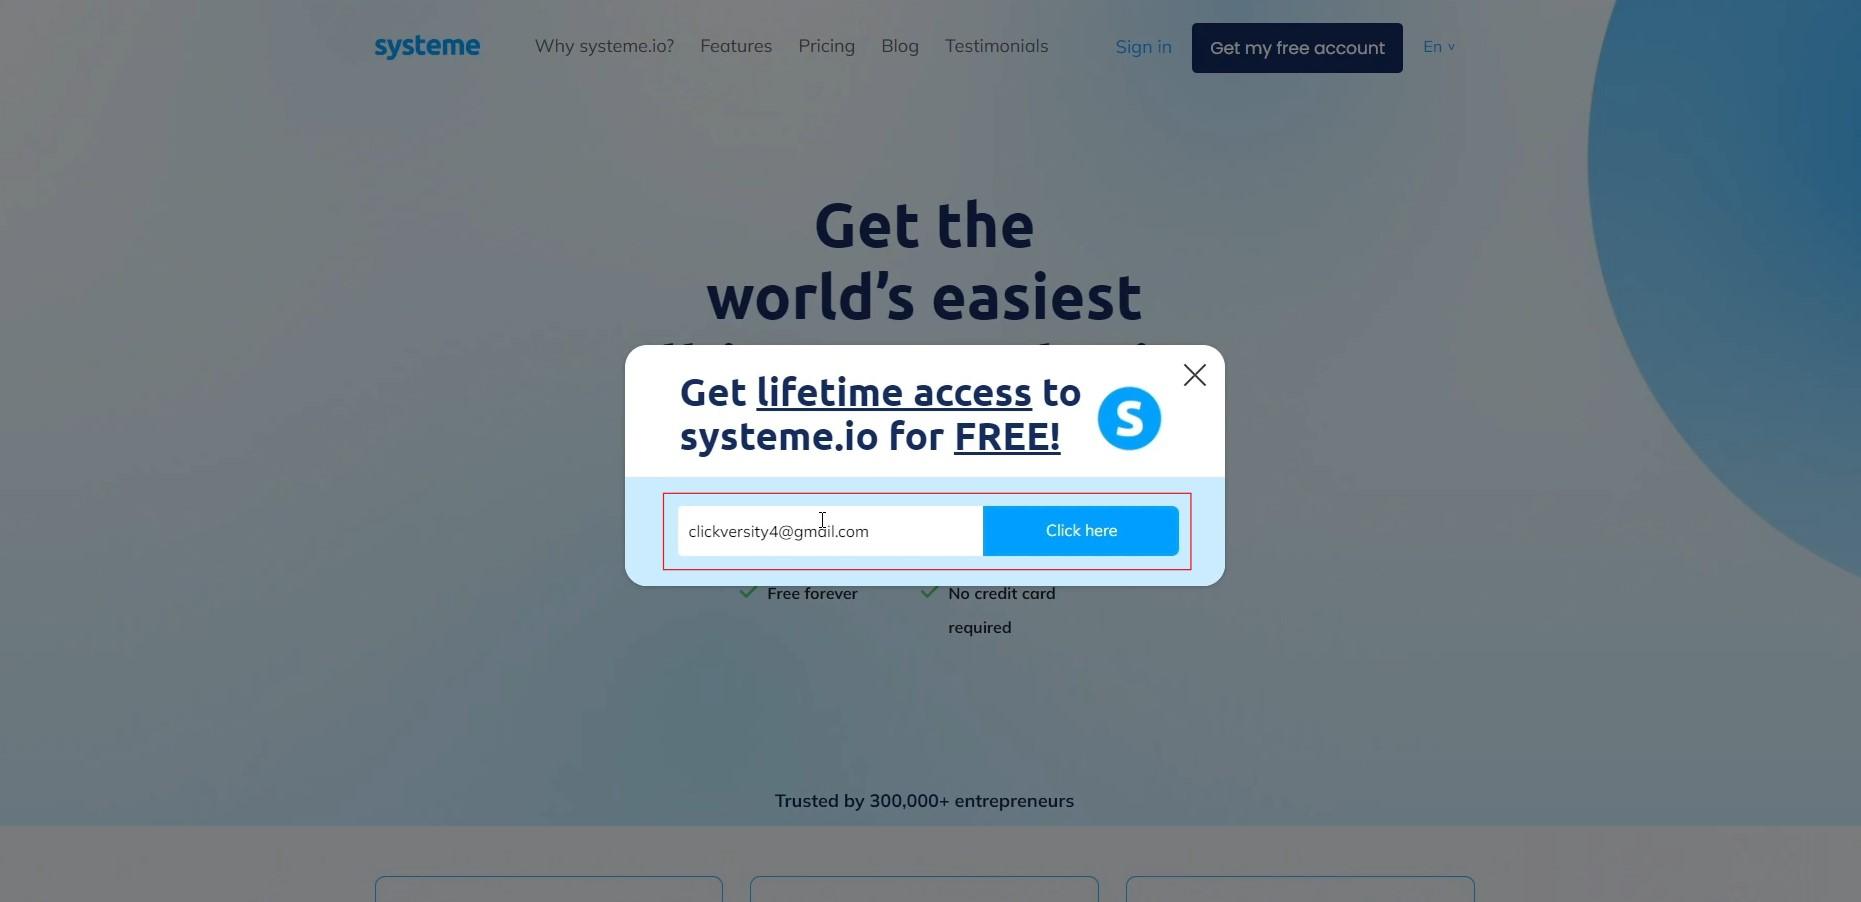
If you haven’t started yet, create a free Systeme.io account to get going.
Systeme.io offers a free forever plan—no credit card required.
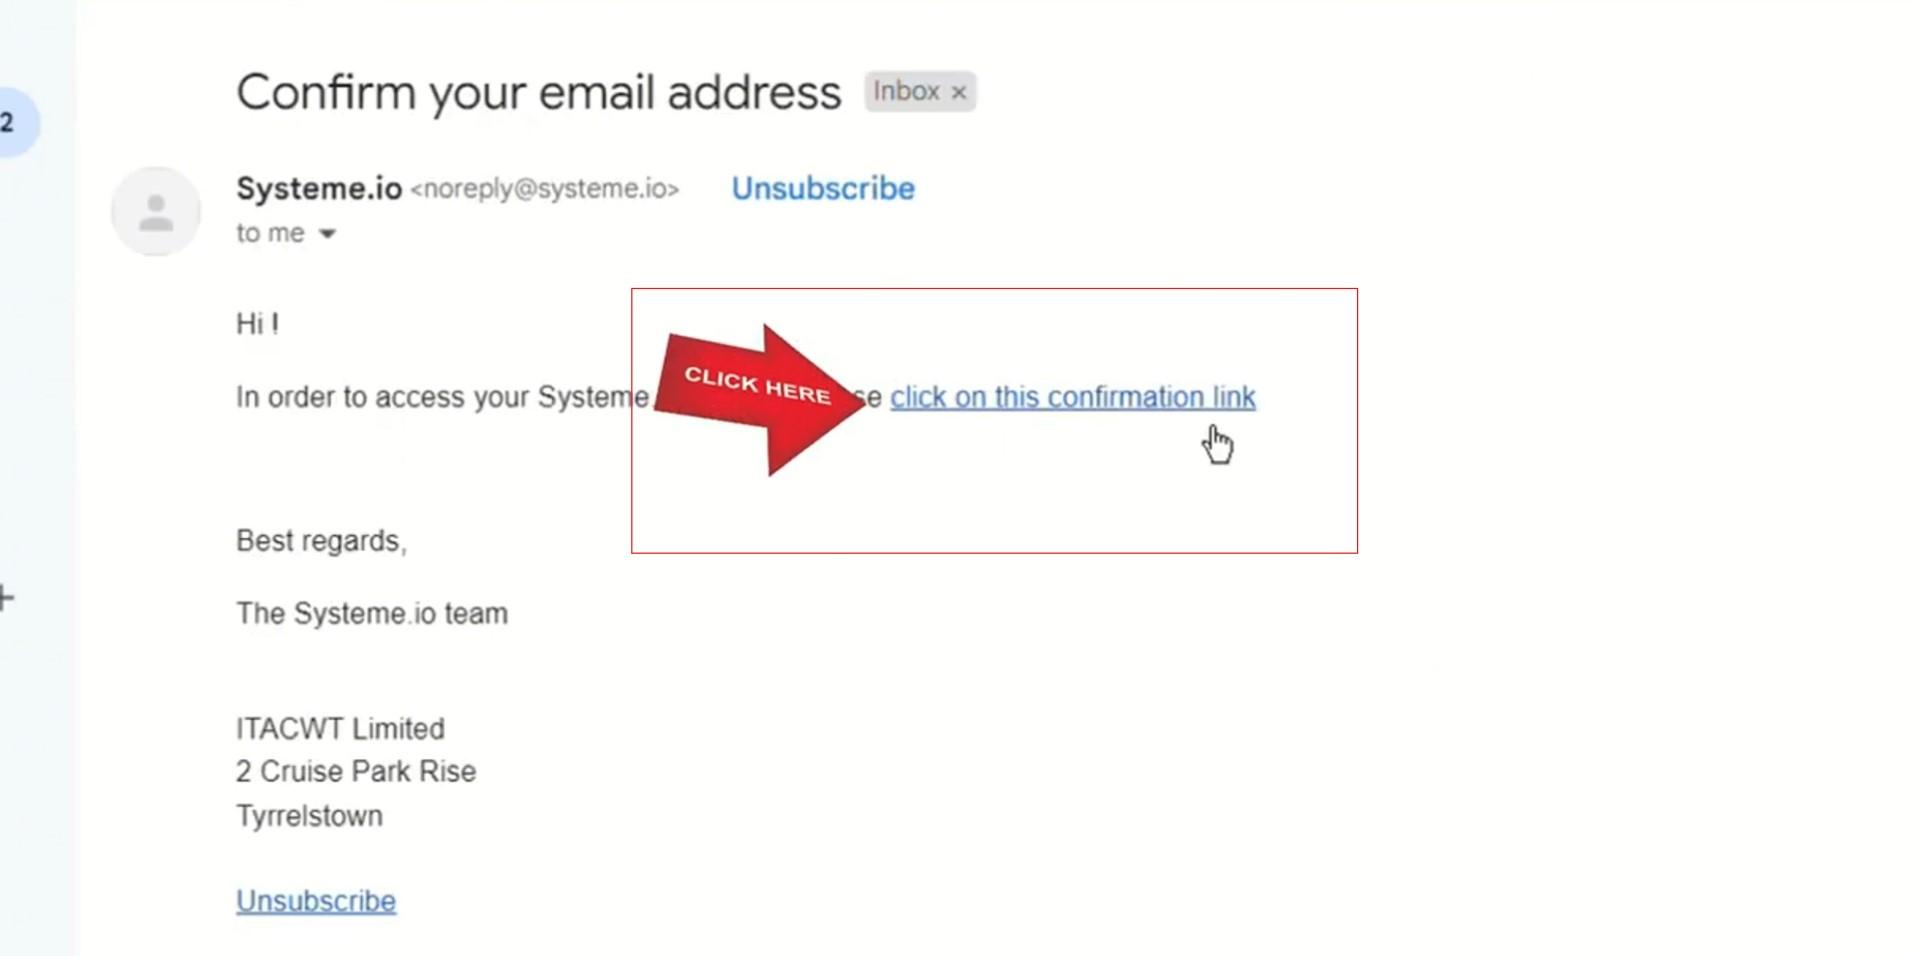
Just enter your email and confirm it with the link you receive.
After confirming, you’ll be directed to the main Systeme.io dashboard.

Step 2: Purchase a Custom Domain
Once you’re in Systeme.io, you’ll need to buy a domain.
I use Namecheap.com for all my domains—they’re reliable and have been around for years.
I recommend choosing a .COM domain for serious businesses, as it’s generally more recognizable and trustworthy.
To get started:
Sign in to your Namecheap account and type your desired domain into the search bar.
In our case “testdomainname”.
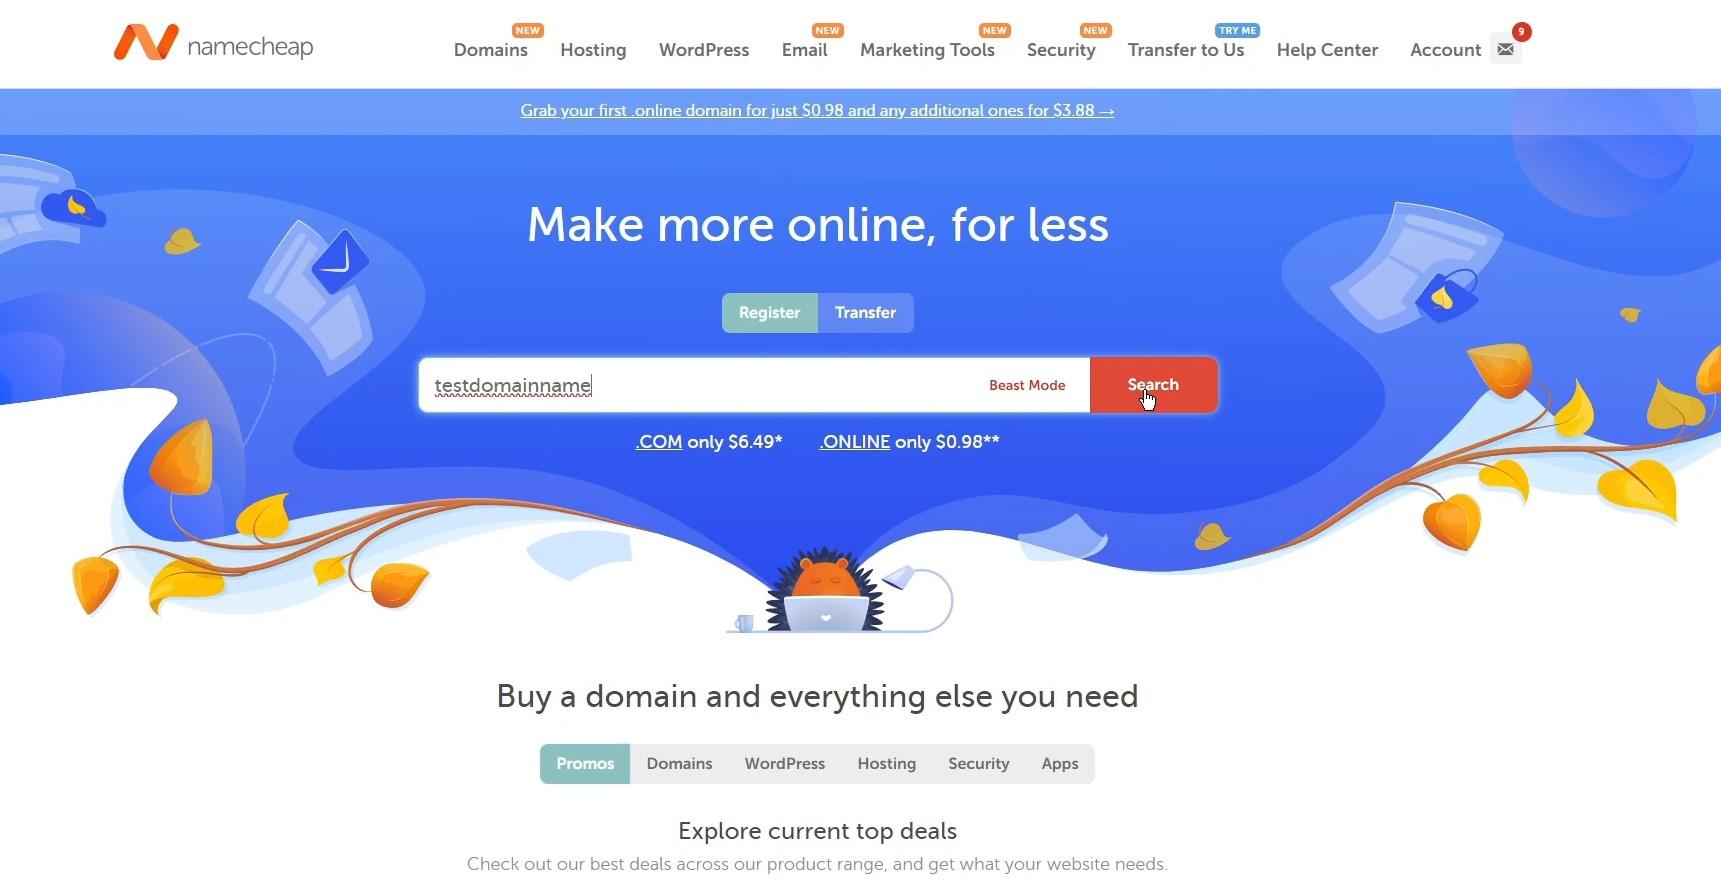
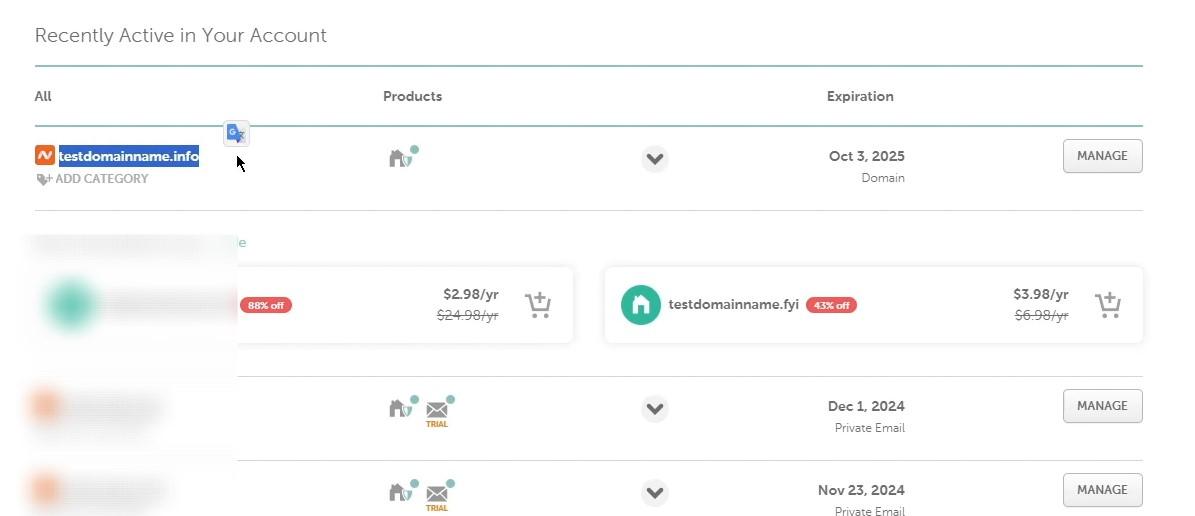
Once you find an available domain, follow the steps to add it to your cart and complete your purchase. After purchasing, go to Account > Dashboard > Domain List to find your new domain.
Step 3: Add the Custom Domain to Systeme.io
In Systeme.io:
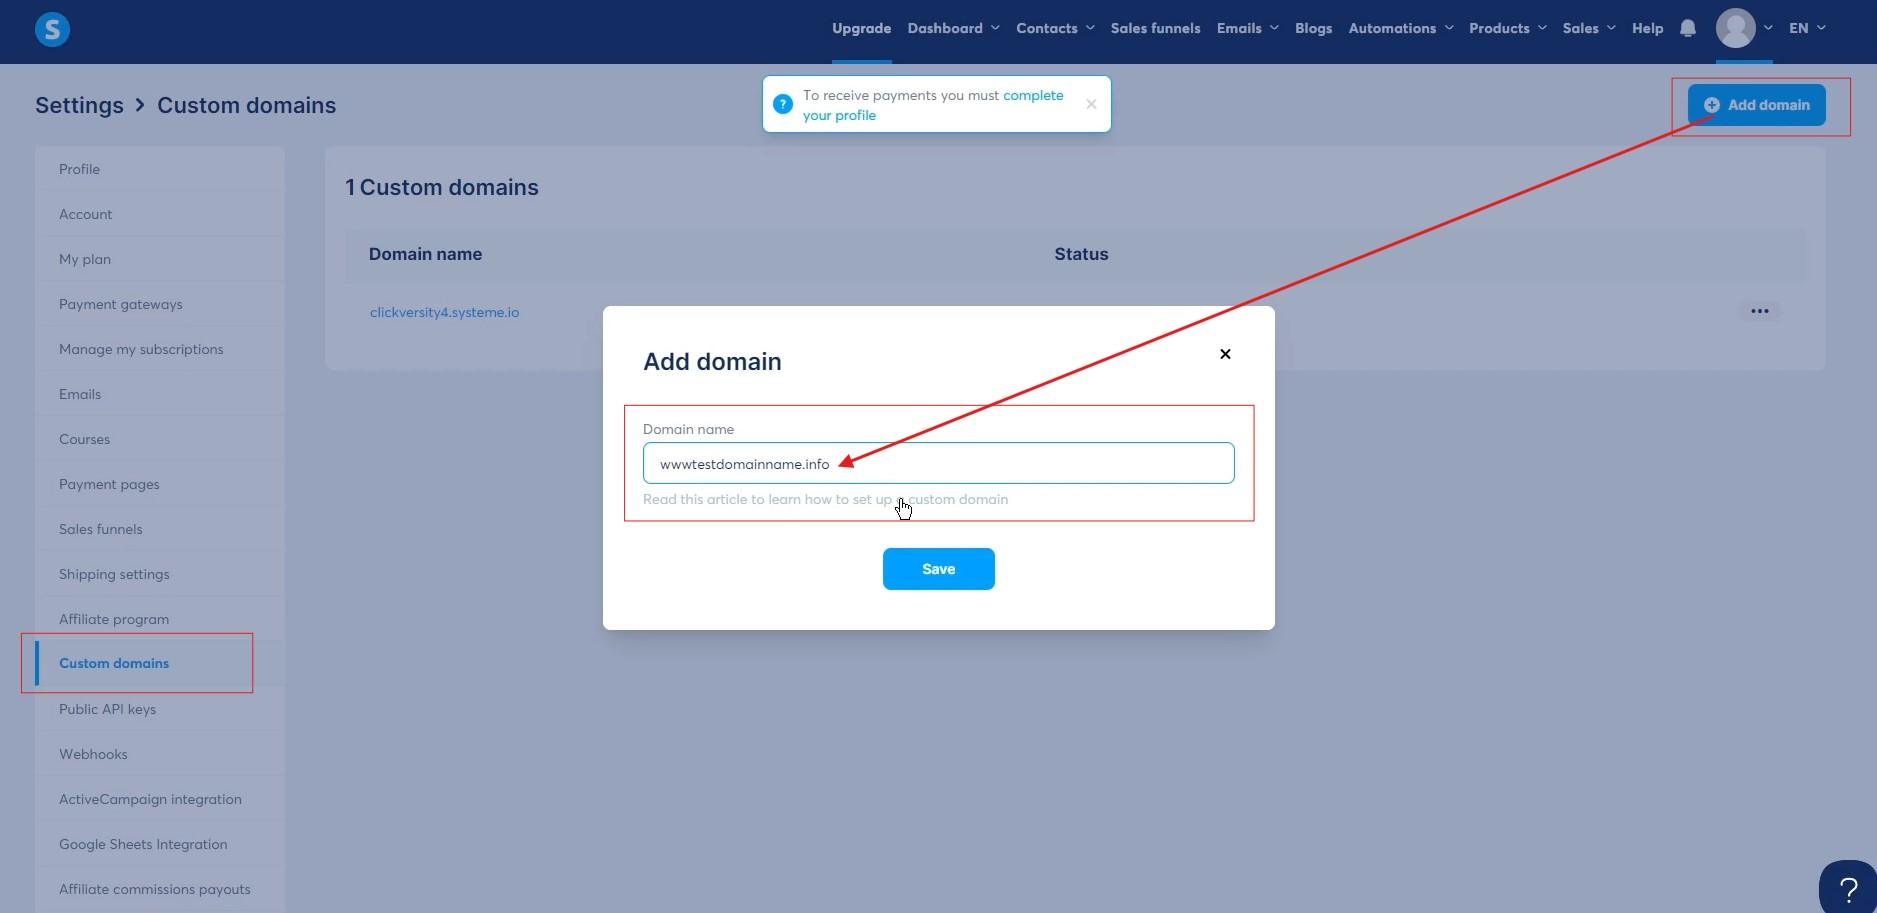
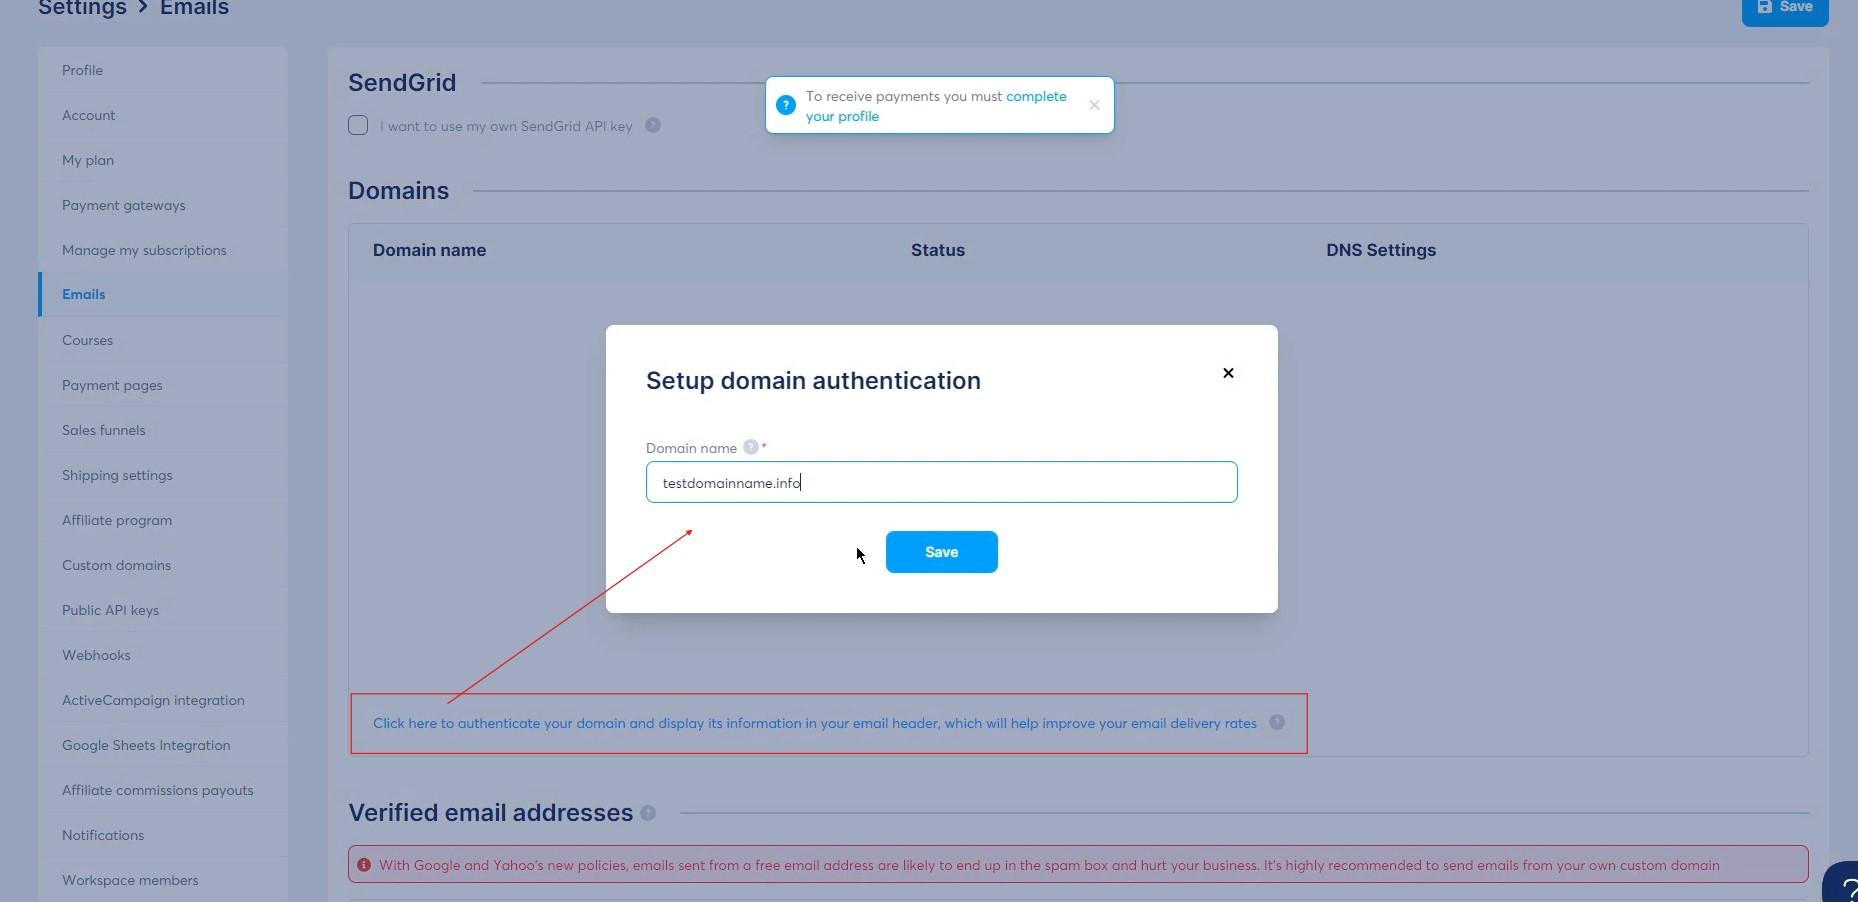
Go to your dashboard, then navigate to Settings > Custom Domains and add your domain (include “www.”).
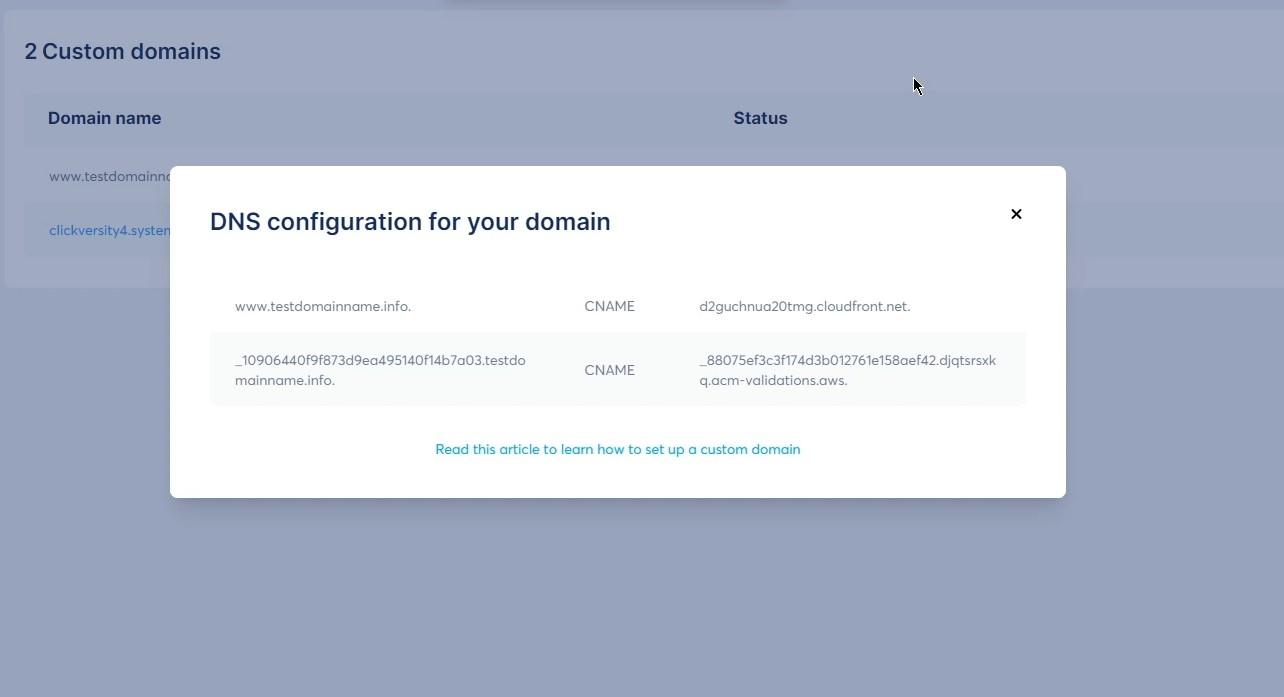
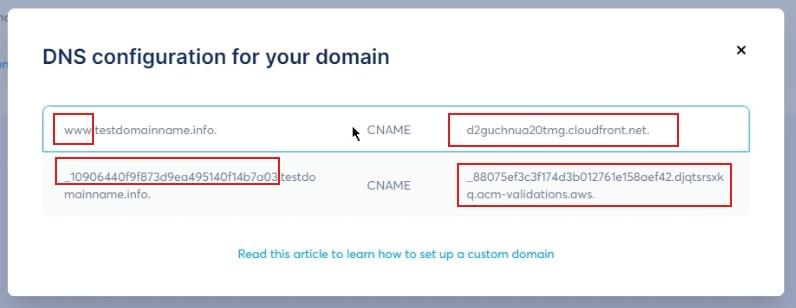
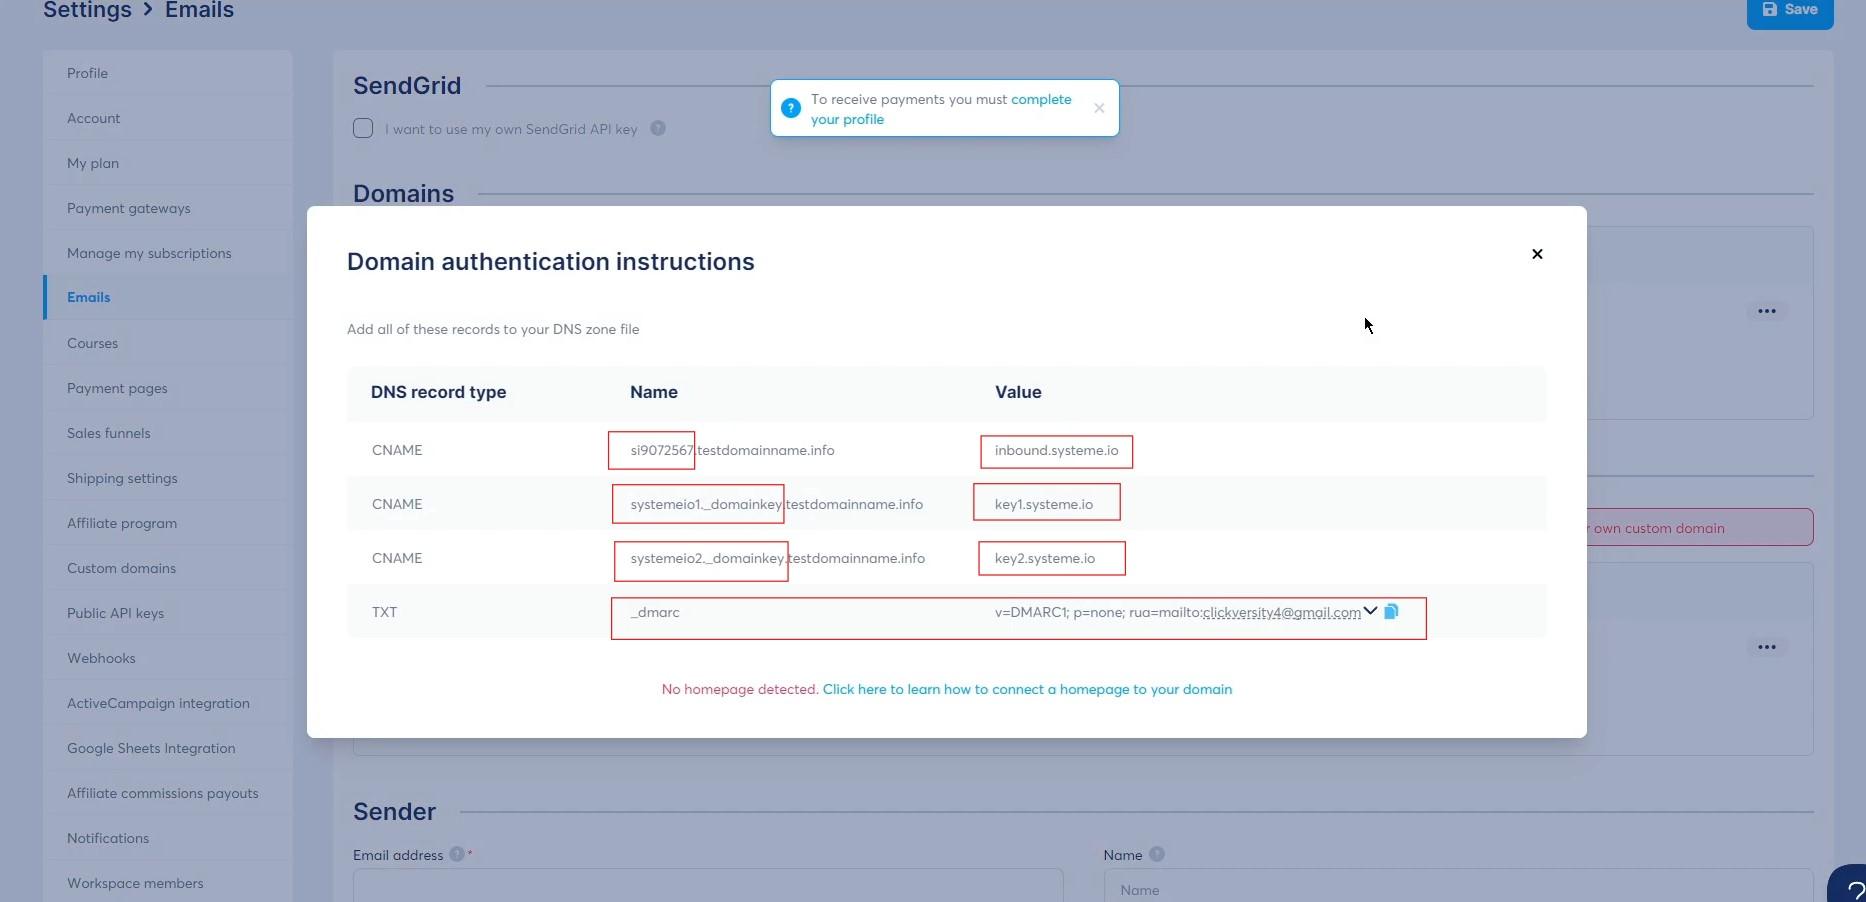
A pop-up will display two DNS records (CNAMEs) for your domain provider to connect to Systeme.io.
On Namecheap:
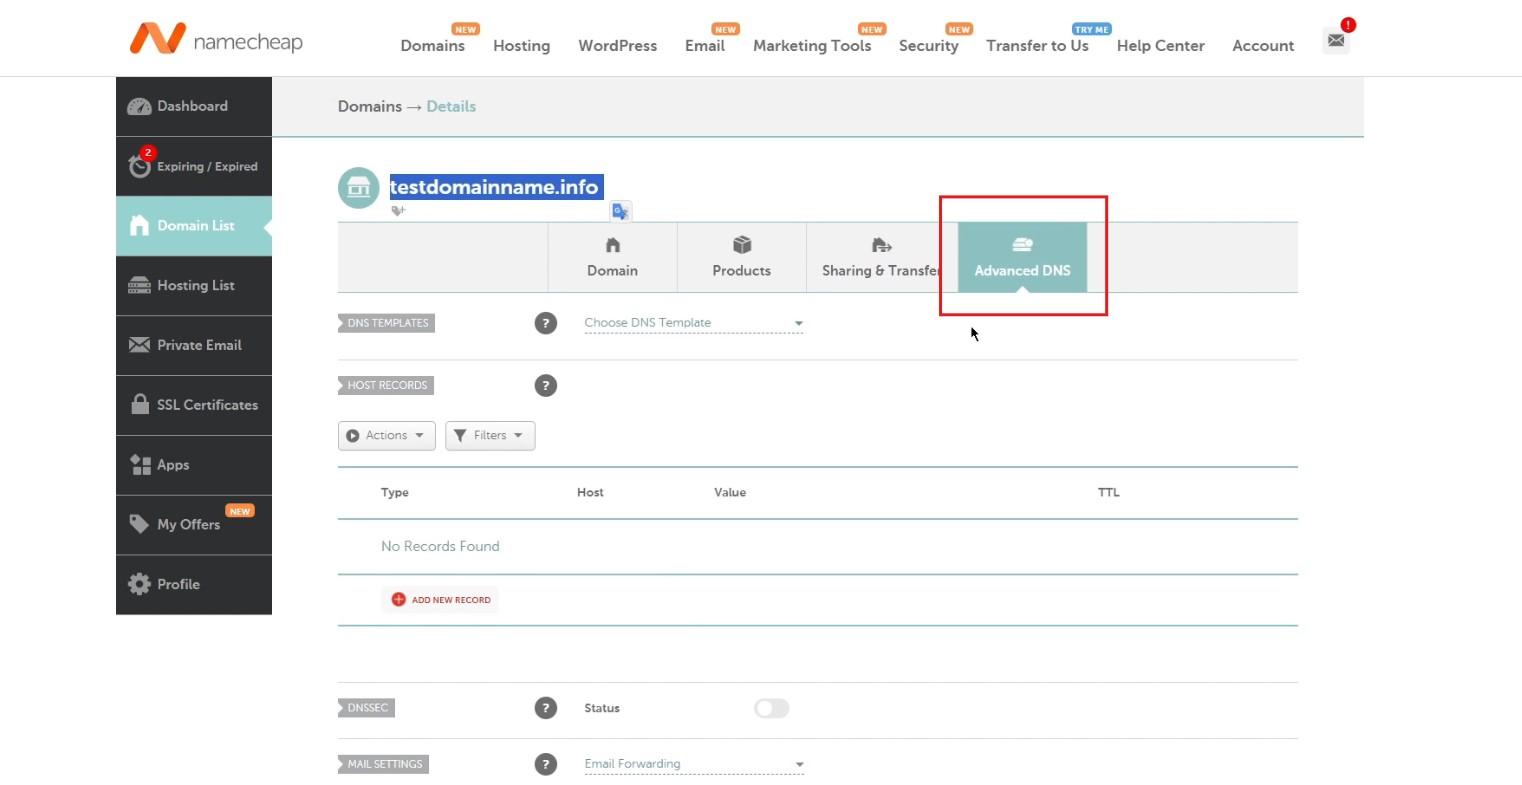
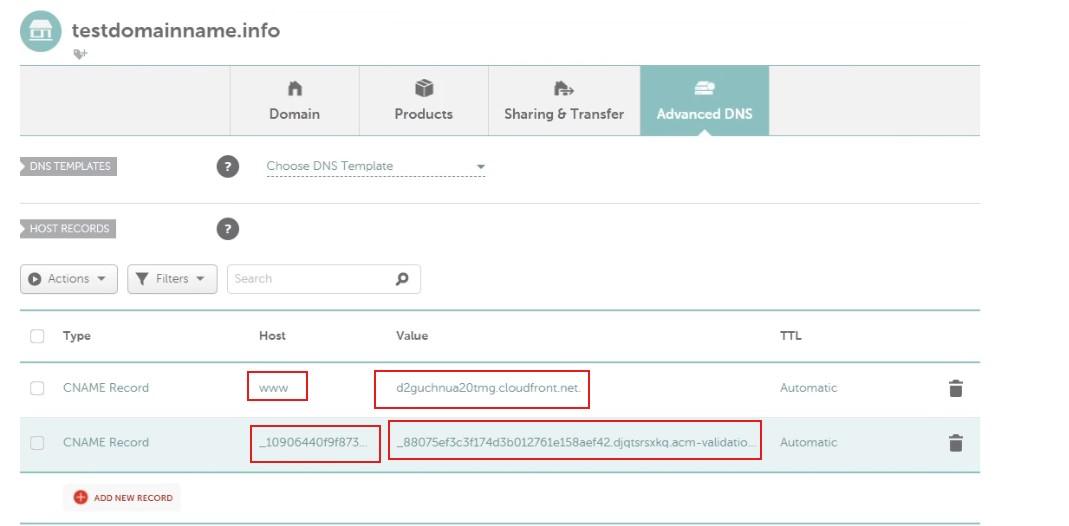
Go to your Namecheap Dashboard > Domain List. Locate your domain and click Manage.
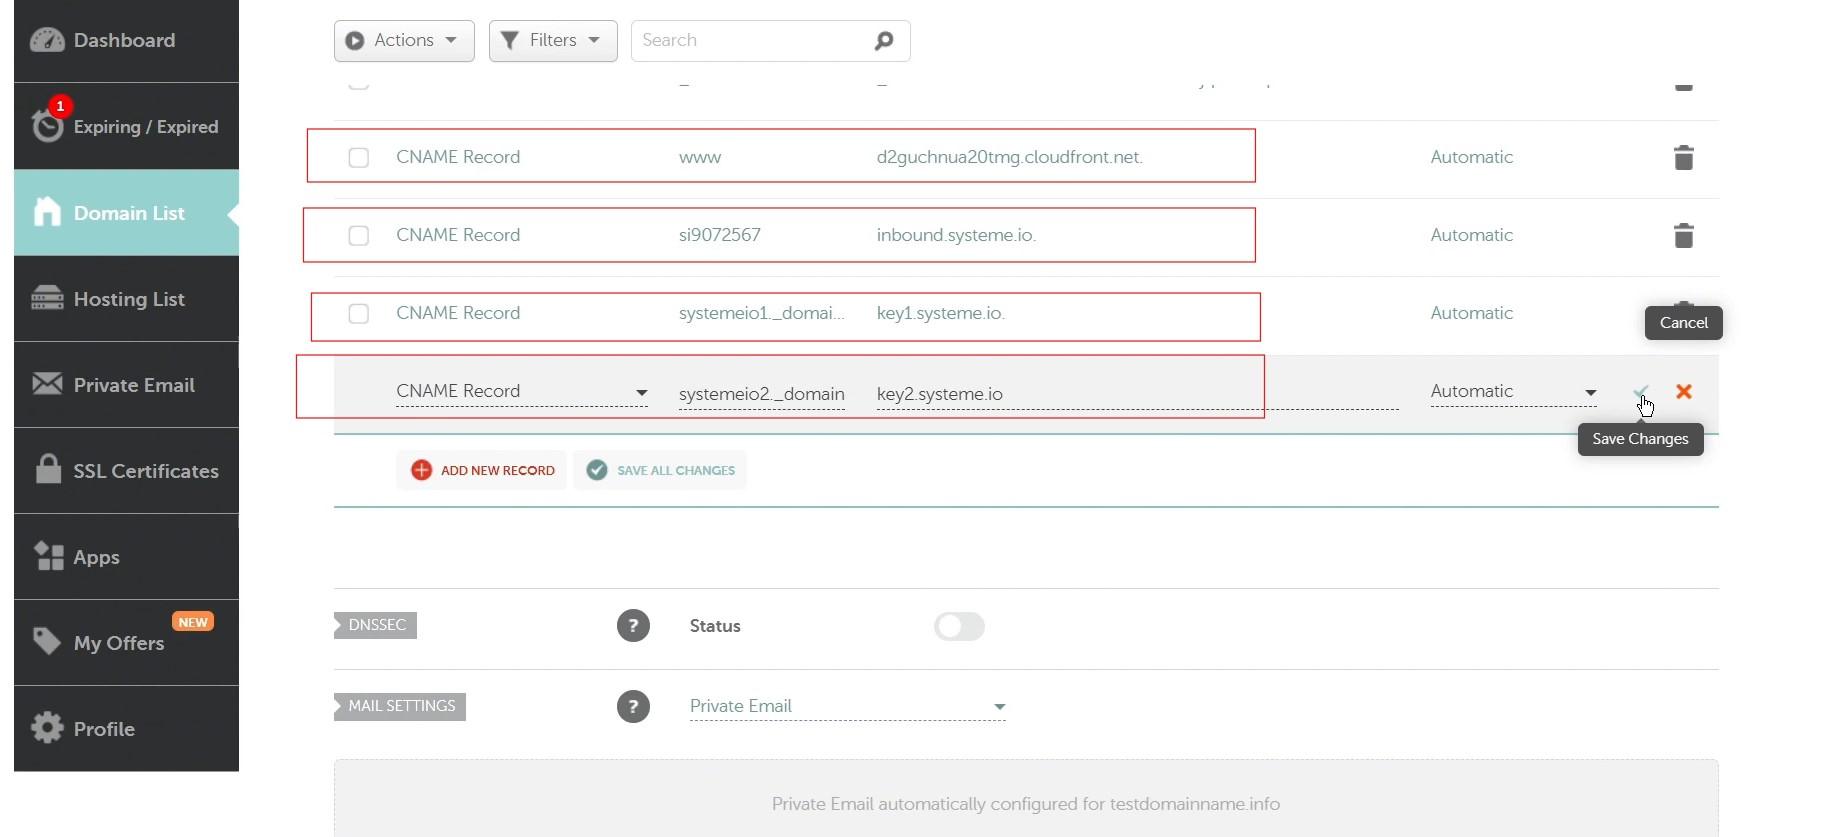
Head to Advanced DNS and delete any existing CNAMEs before adding the new ones from Systeme.io.
Paste in the two CNAME records (only copy what is marked in the image below) from Systeme.io, then save.
Here you can see how to add the
Verification may take up to 48 hours.
Step 4: Set Up Your Custom Email Address
A custom email address is essential for building trust and increasing conversions.
It’s also affordable—less than the cost of a fast-food meal!
Here’s how to set it up in Namecheap:
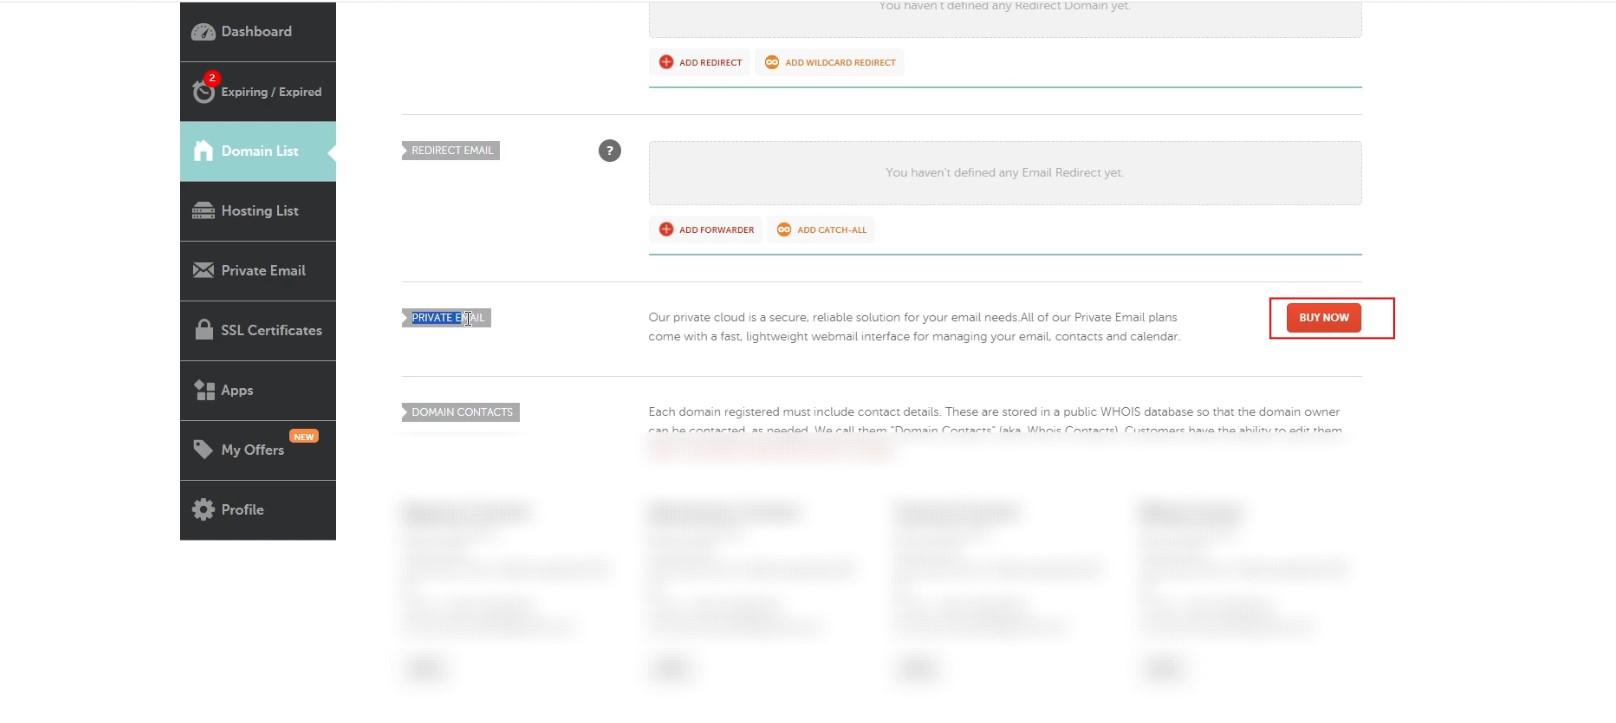
In the Namecheap dashboard, navigate to the Domain List, locate your domain, and click the Manage button.
Then, scroll to the Private Email section and select Buy Now to proceed with your purchase.
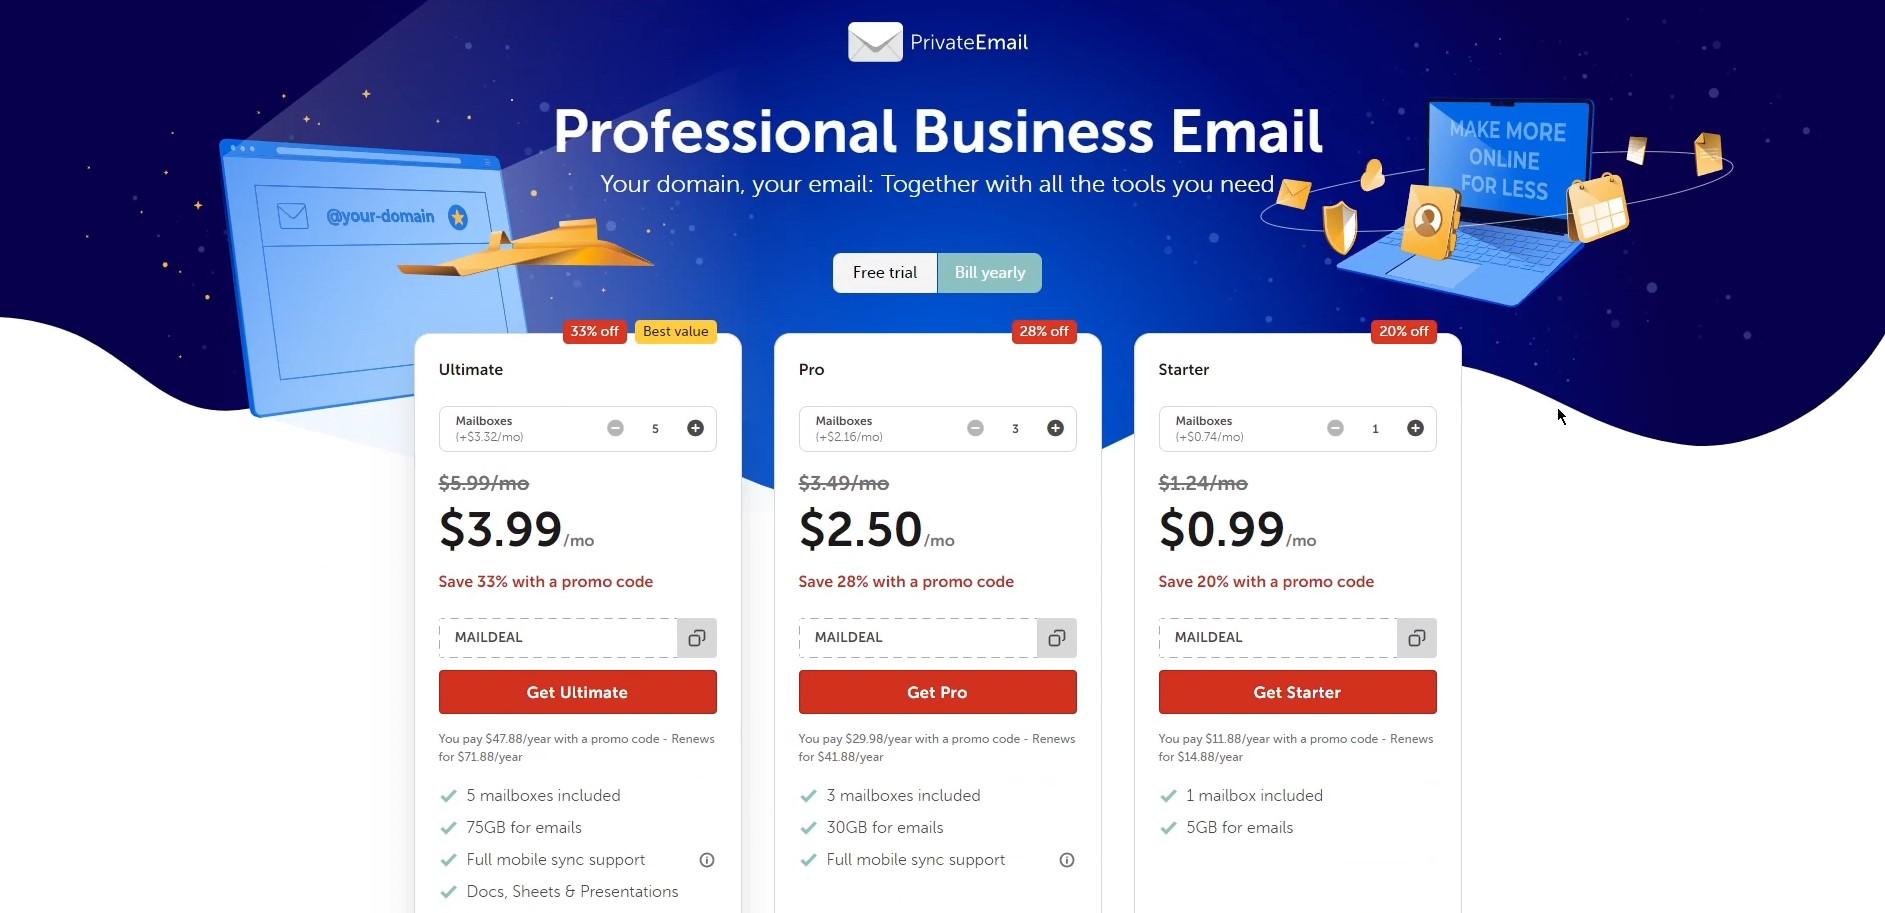
Start with Namecheap’s free 2-month trial of the starter plan.
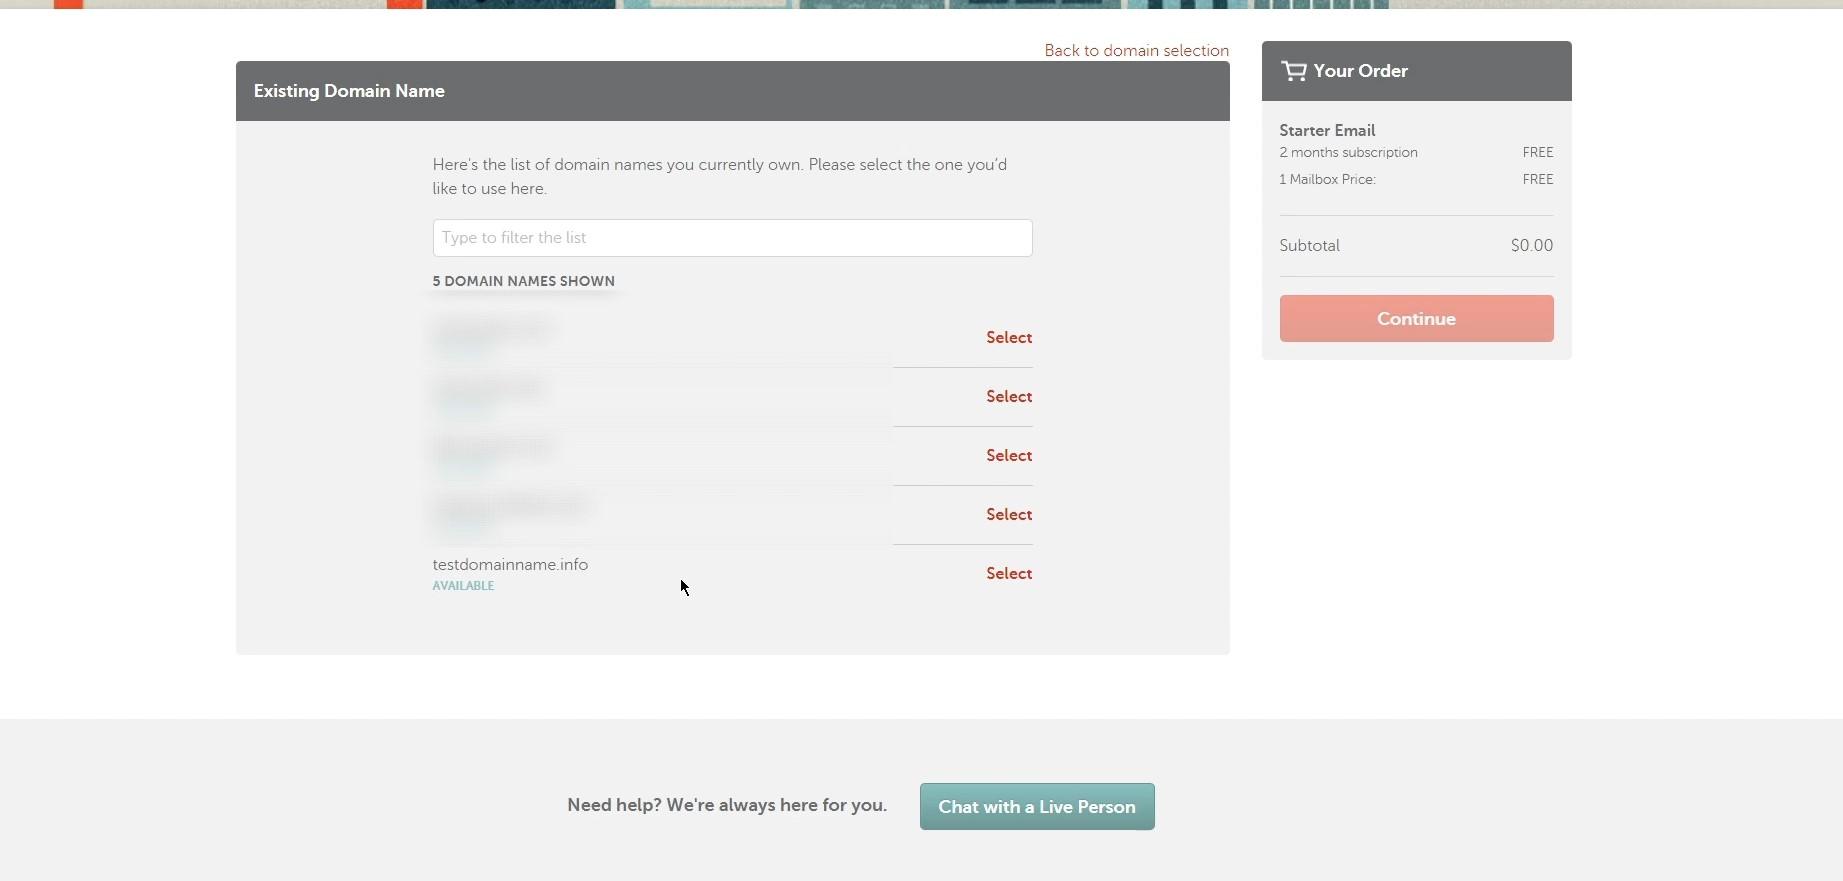
Select your domain (e.g., testdomainname.info), then continue.
Choose the number of mailboxes (one is fine to start).
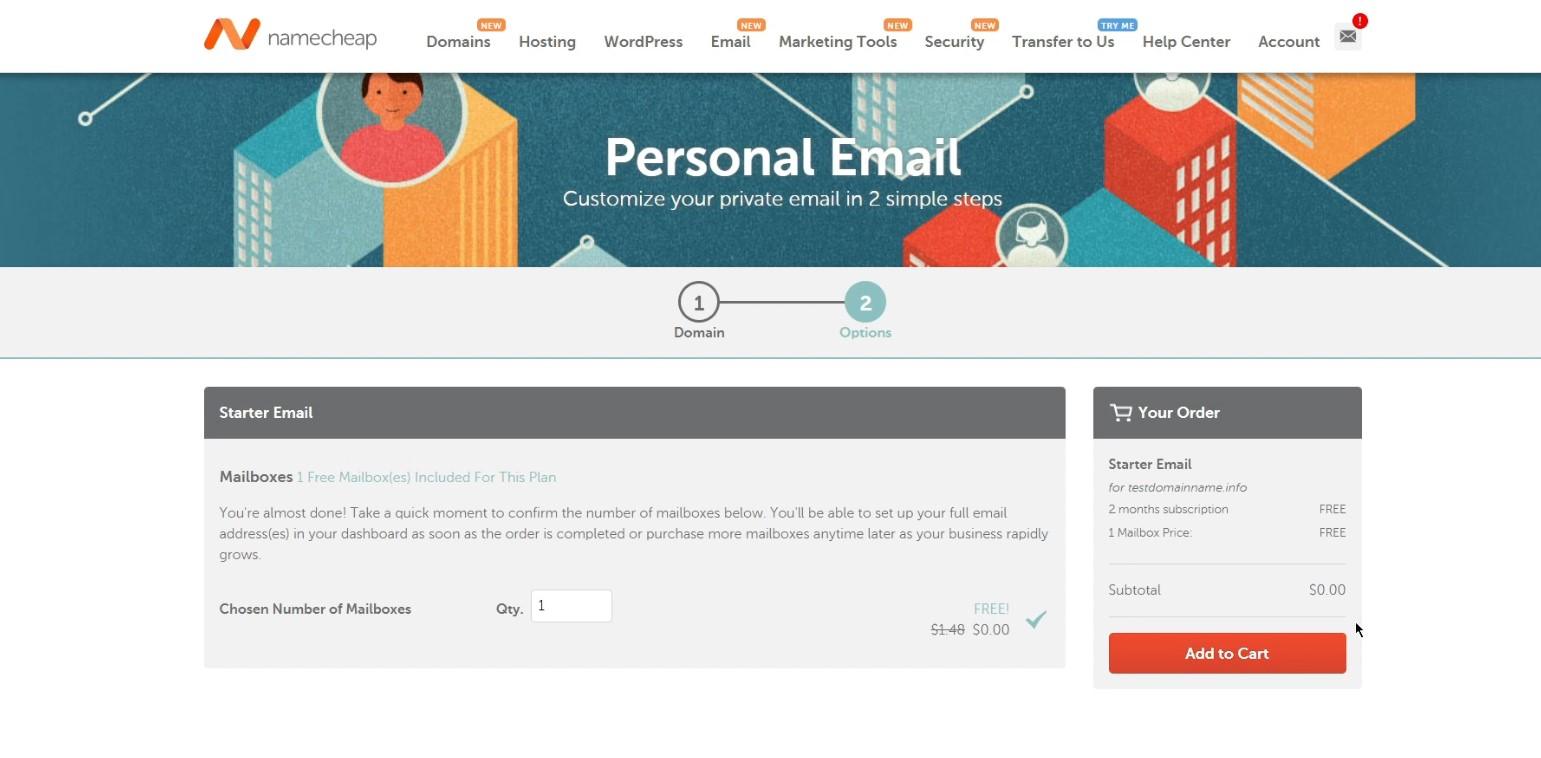
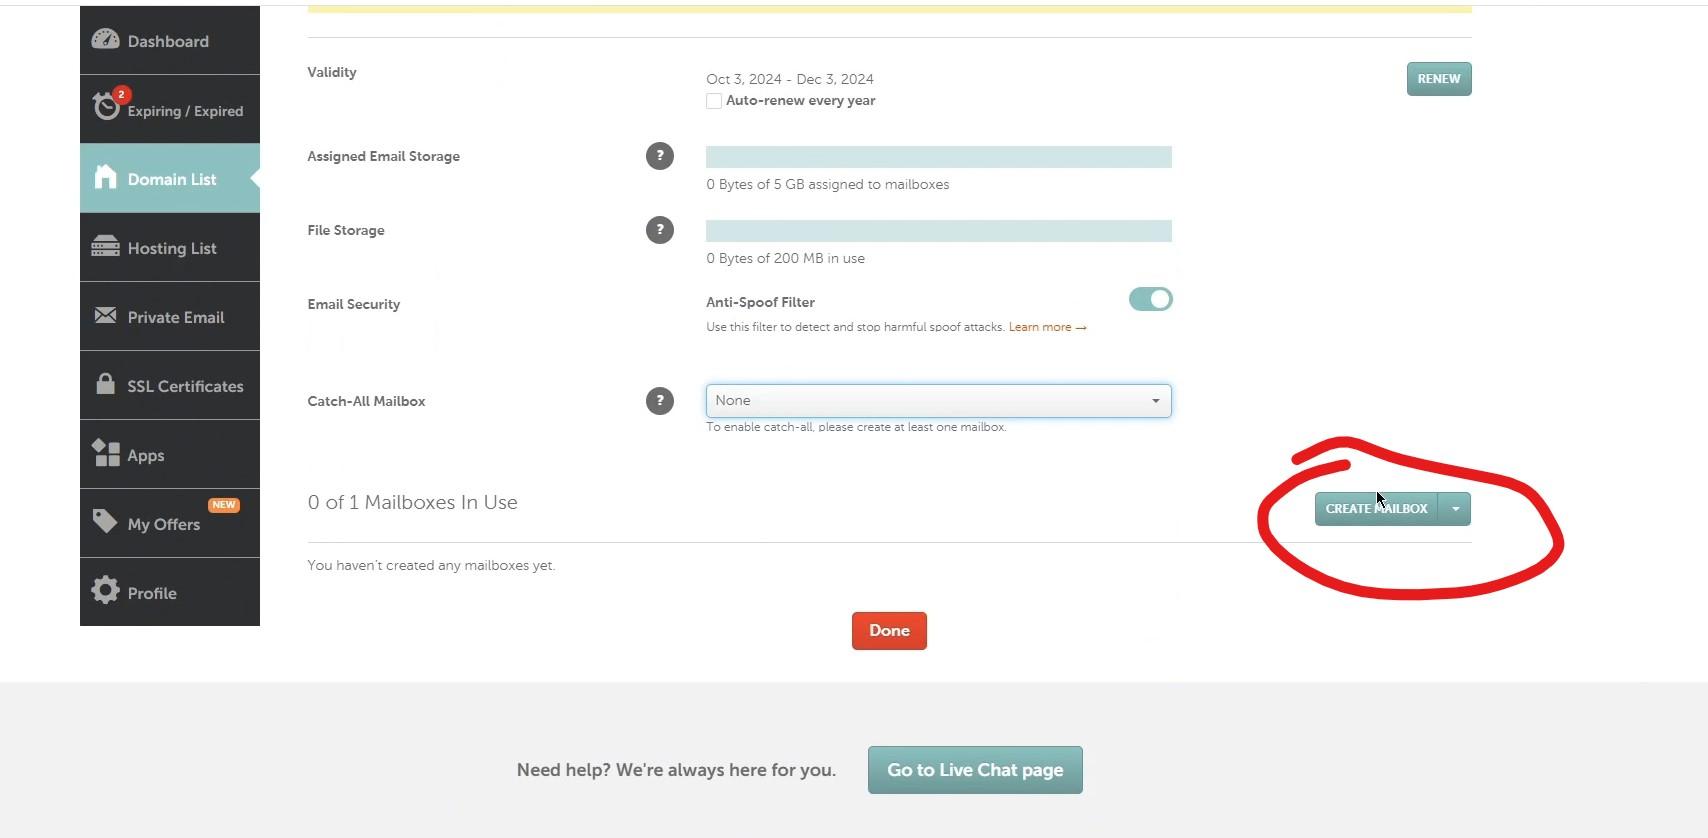
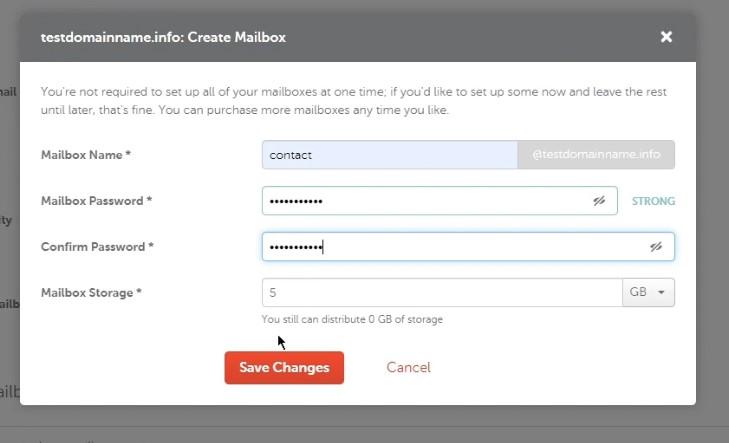
Confirm the order, then create a mailbox. For example, create contact@testdomainname.info with a secure password.
Step 5: Verify Your Custom Email in Systeme.io
To verify your custom email in Systeme.io:
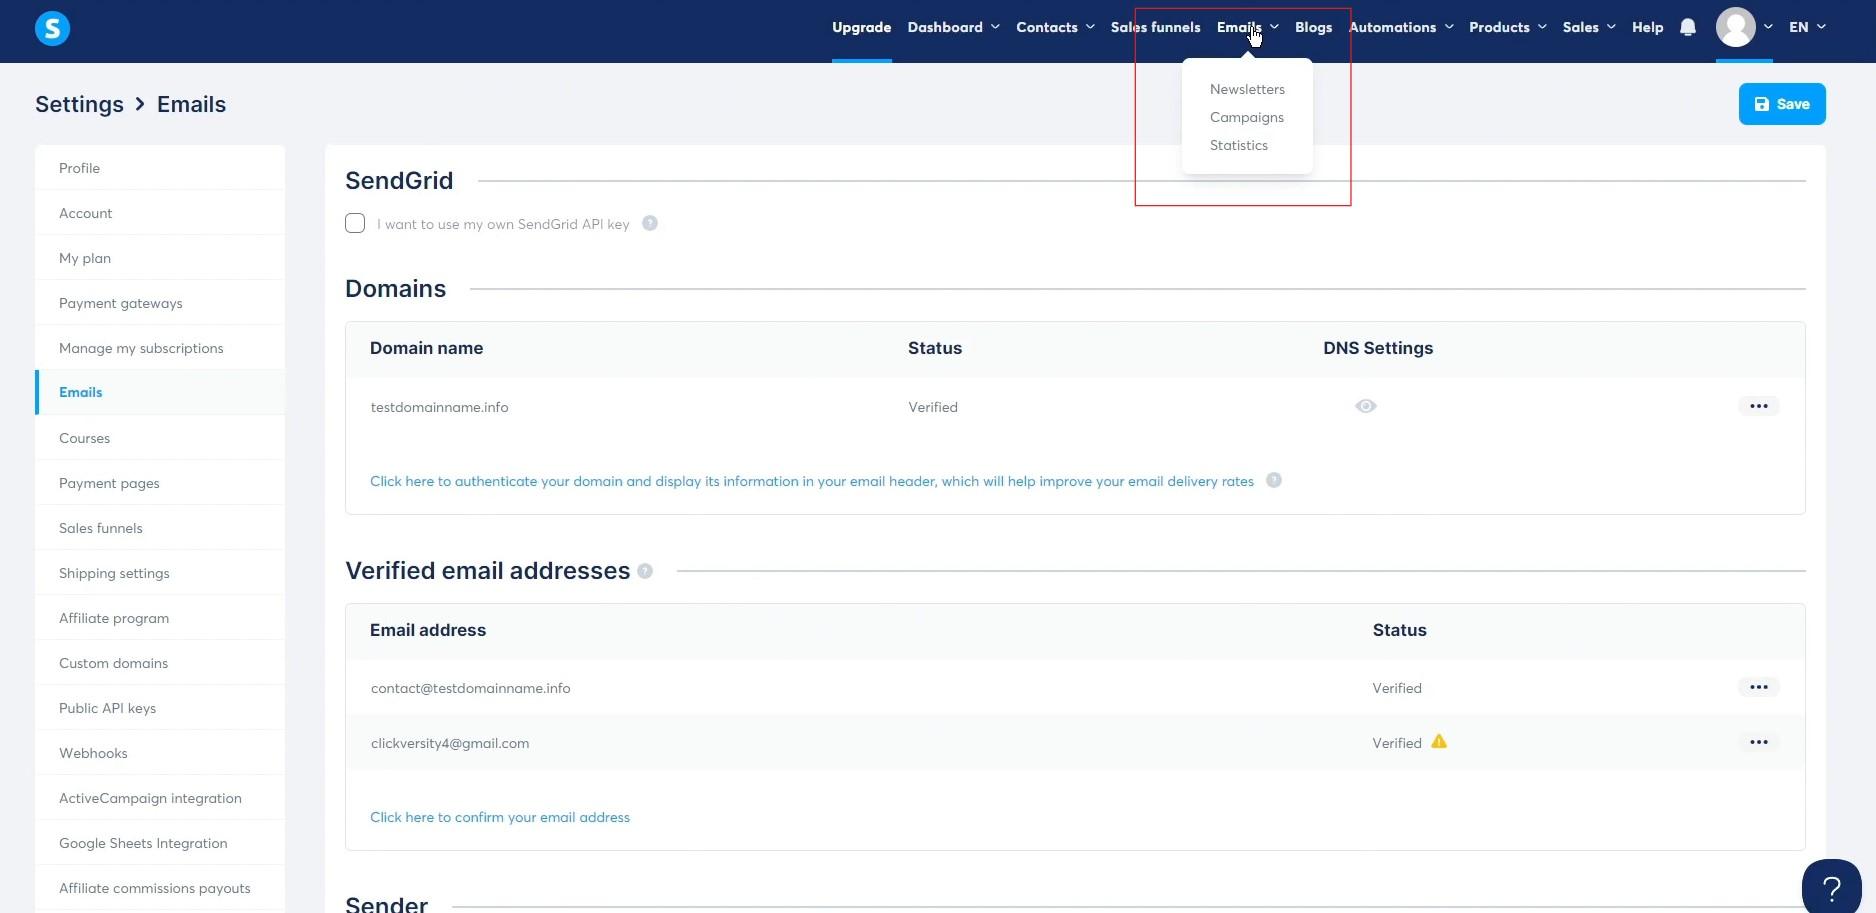
Go to Email Settings and add your custom email.
Authenticate your domain by adding the necessary DNS settings in Namecheap.
Wait up to 48 hours for verification.
Add your email as the sender in Systeme.io, choose a sender name for subscribers to see, and set a test email to confirm campaign delivery.
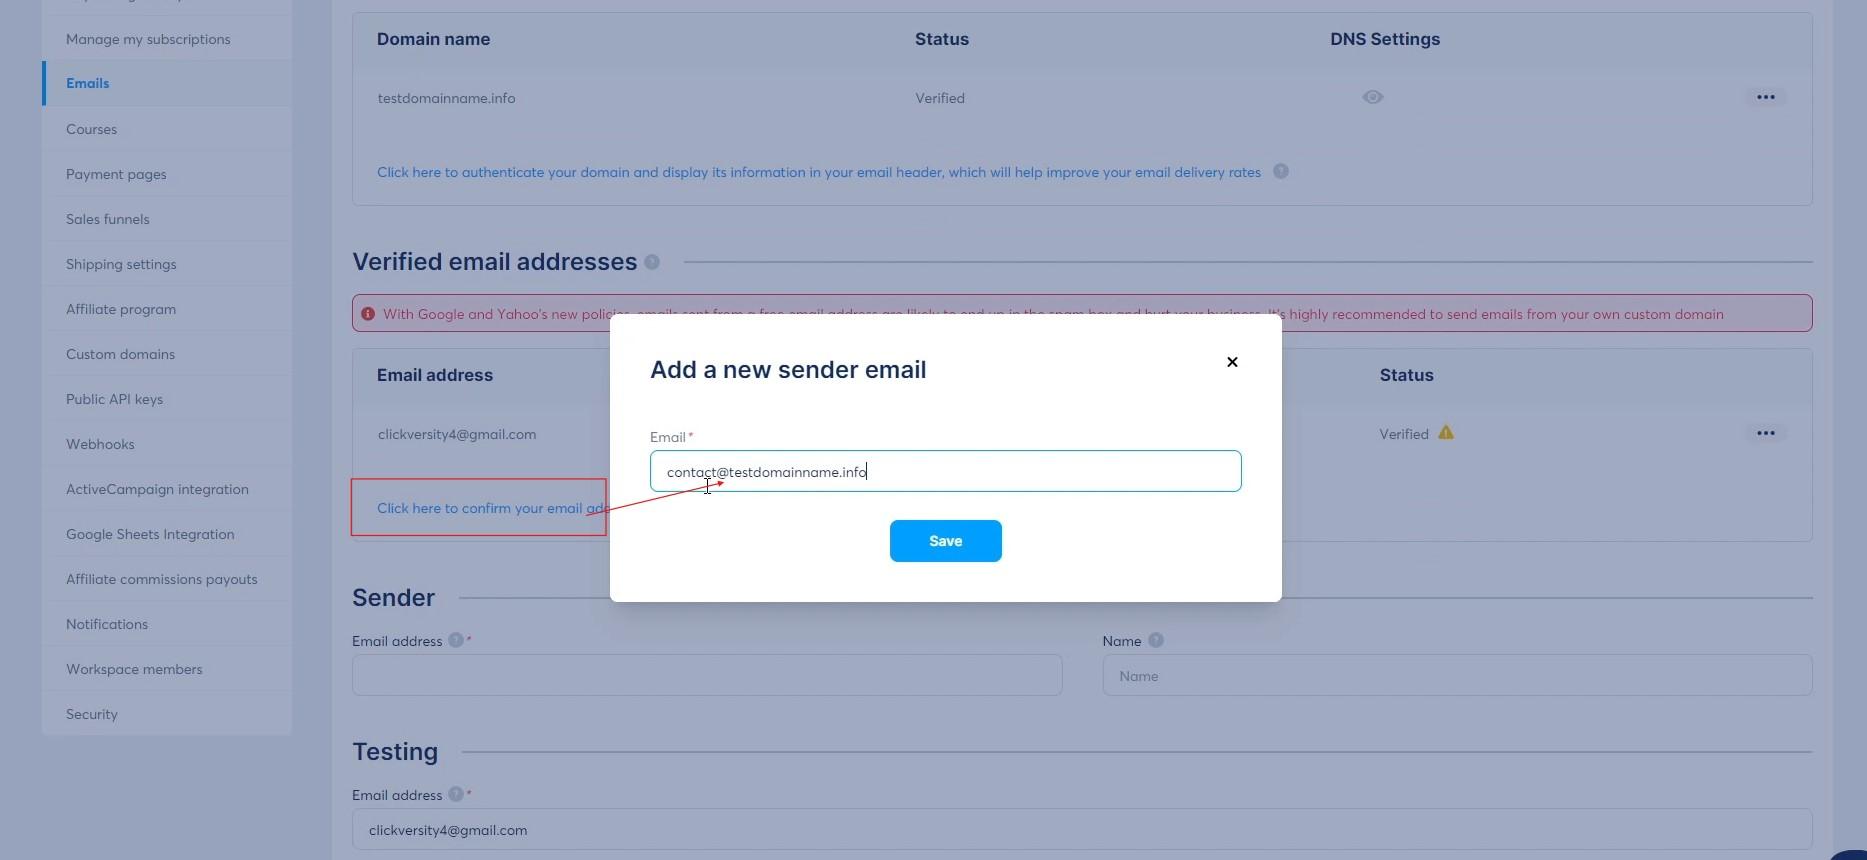

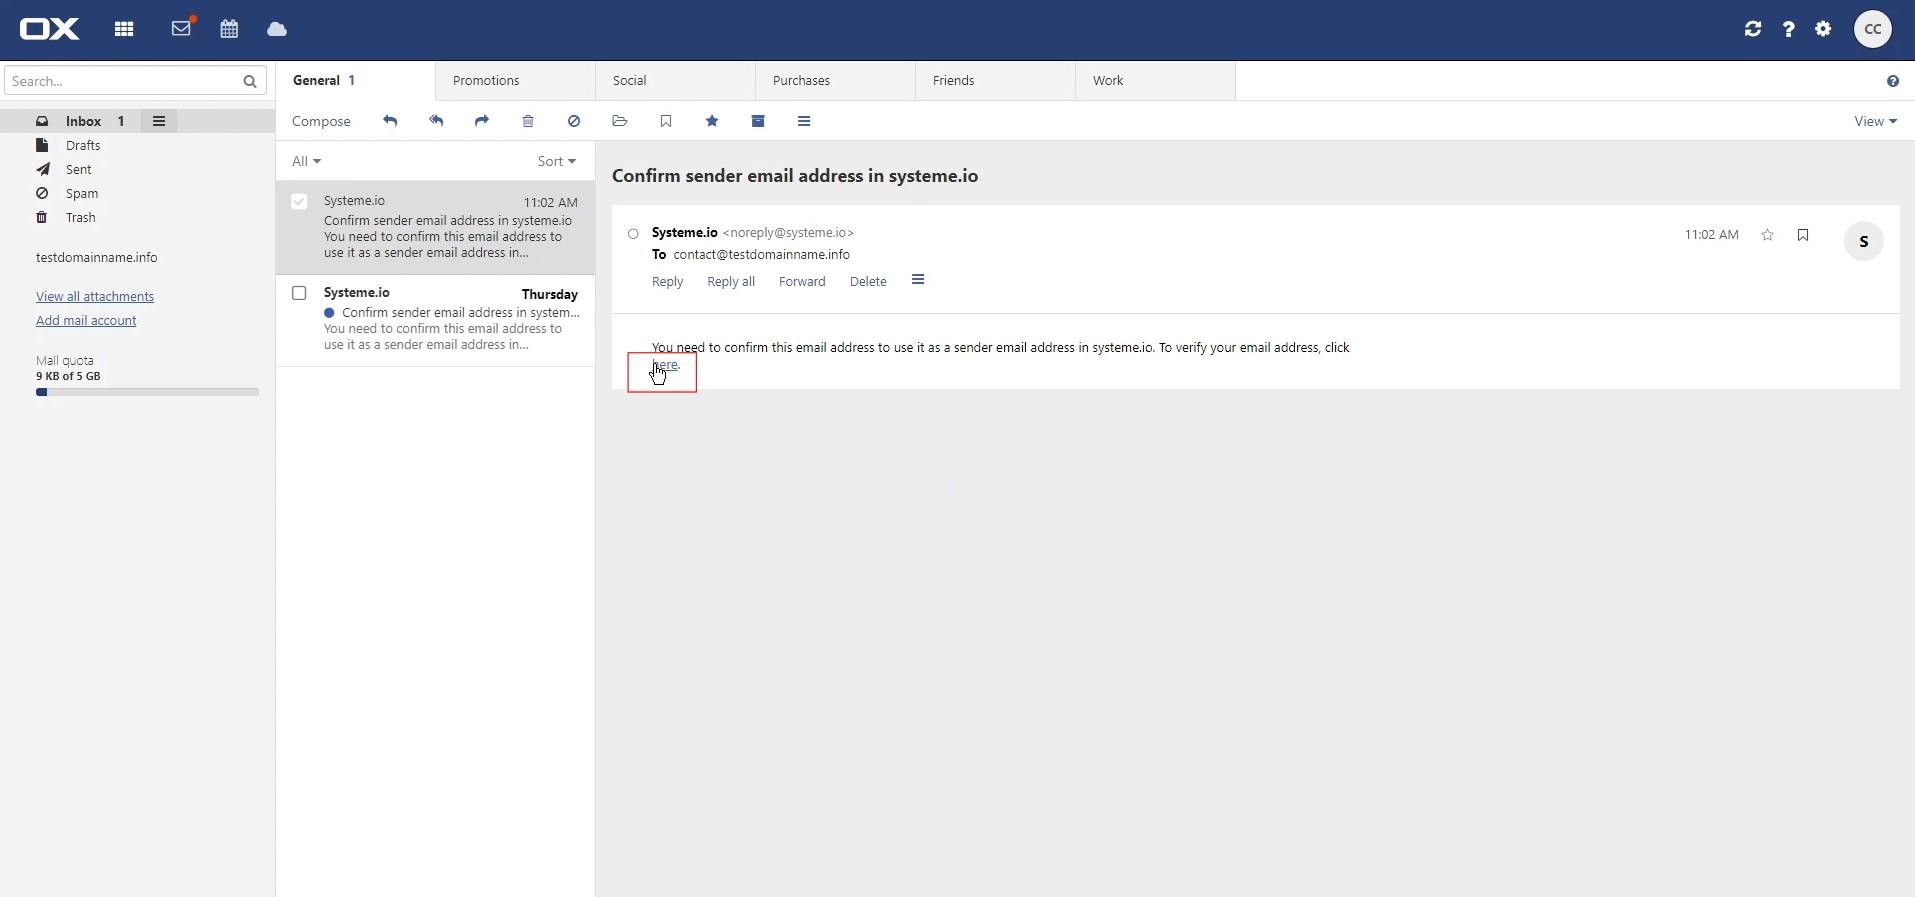
After adding your sender email, you’ll need to verify ownership of the address.
A confirmation link will be sent to your new mailbox—simply click on it to complete the verification.
In your Namecheap account, navigate to Private Email, locate your domain, and click Manage.
Scroll down and open Webmail as shown in the image below.

Login to your new email.

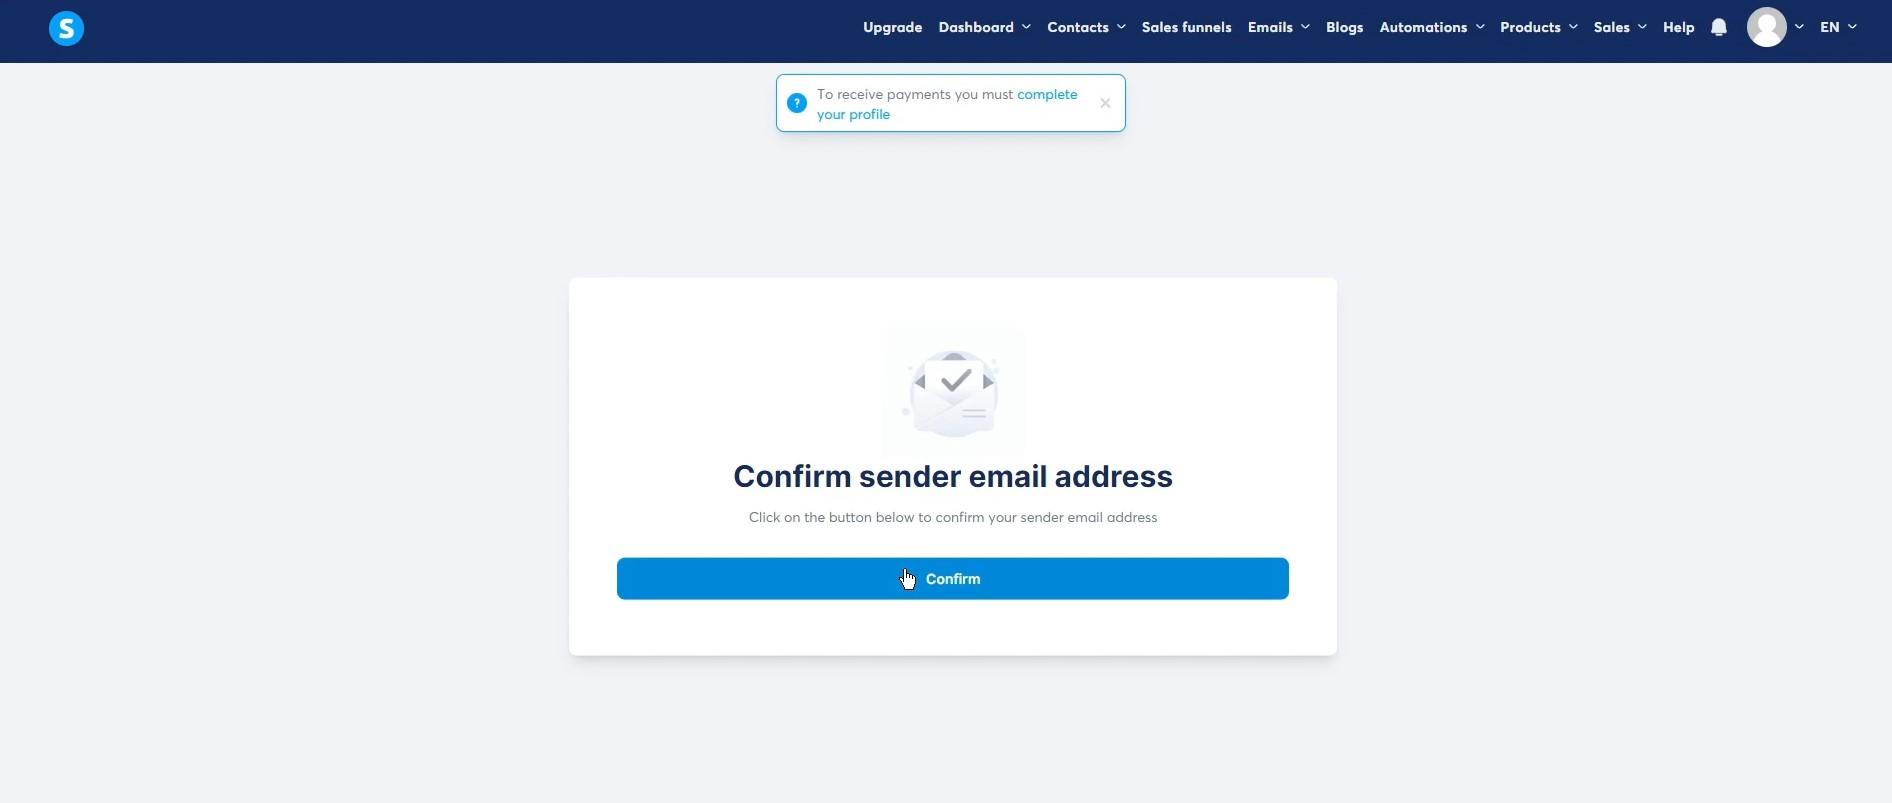
Find the confirmation email from Systeme.io and click the confirmation link.
Click CONFIRM and you are done.
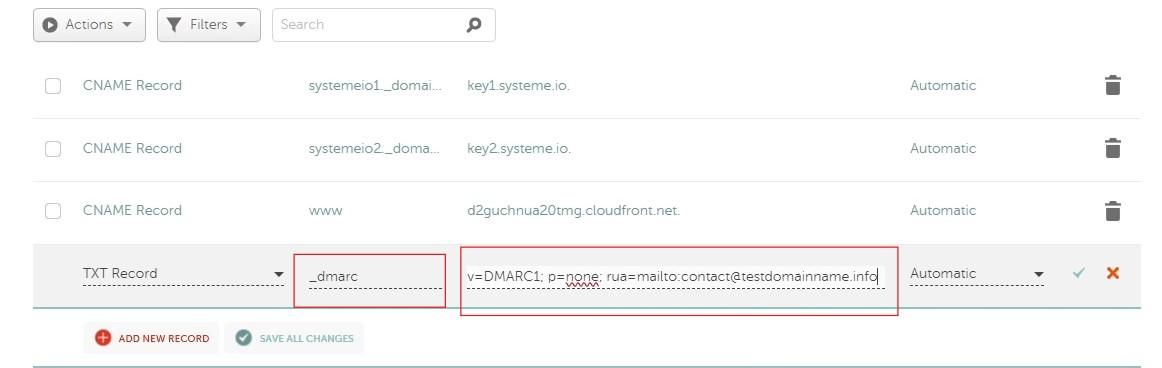
For the final step, add the last DNS record in Namecheap, this time using your custom email.
Go back to systeme.io, open the Email Settings, navigate to the DNS Records tab, and update the last parameter to reflect your custom email, as shown in the image below.

Add this TXT parameter to Namecheap.
Step 6: Test Your Custom Domain and Email
Testing ensures everything is working correctly:
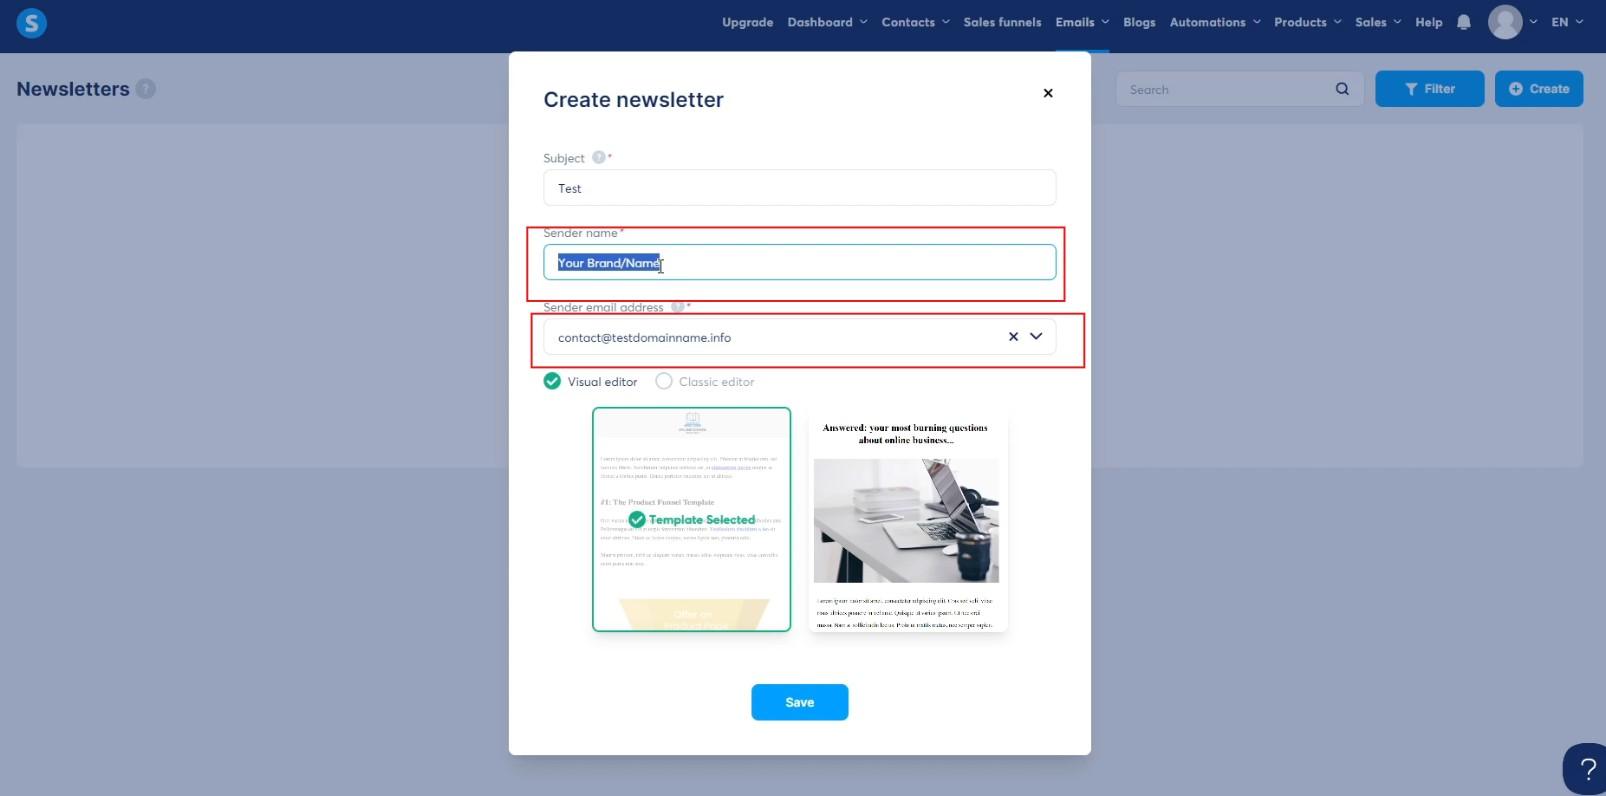
In Systeme.io, go to Emails and create a test newsletter.
Check that your sender name and custom email address are displayed correctly.
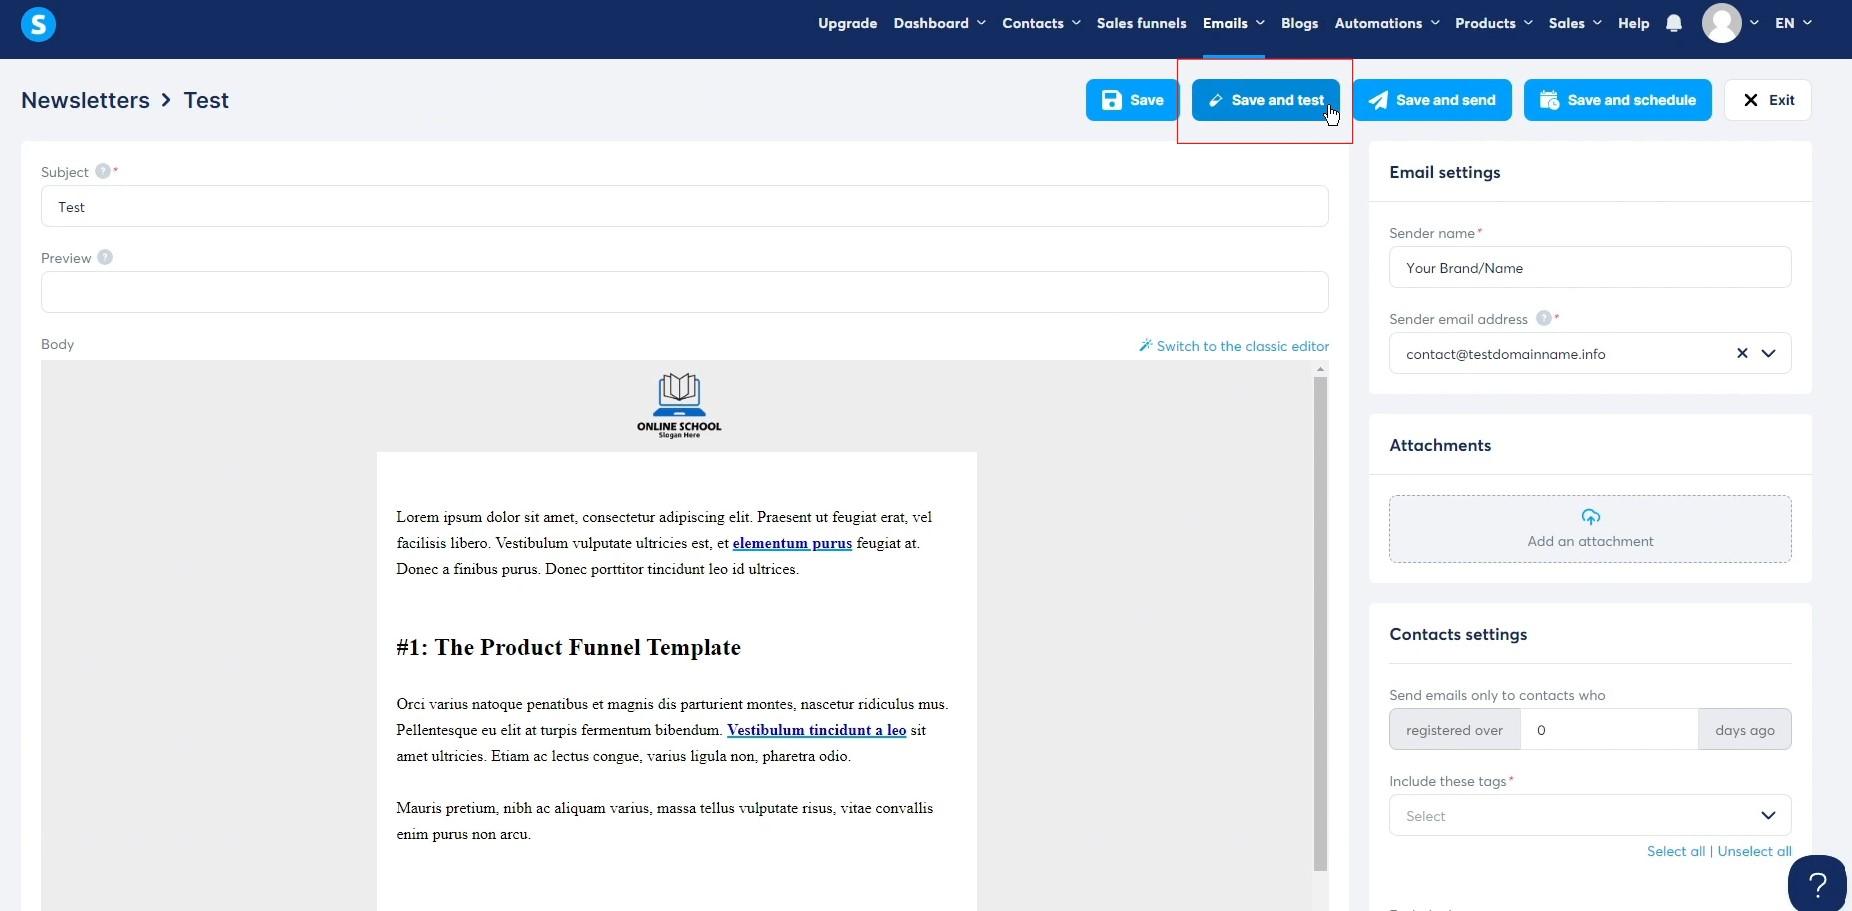
Choose a template for your test email and save it.
Send a test email to confirm deliverability.
The test email was sent to your Namecheap webmail, as we previously configured it.
Head over to your webmail to ensure everything is set up correctly.
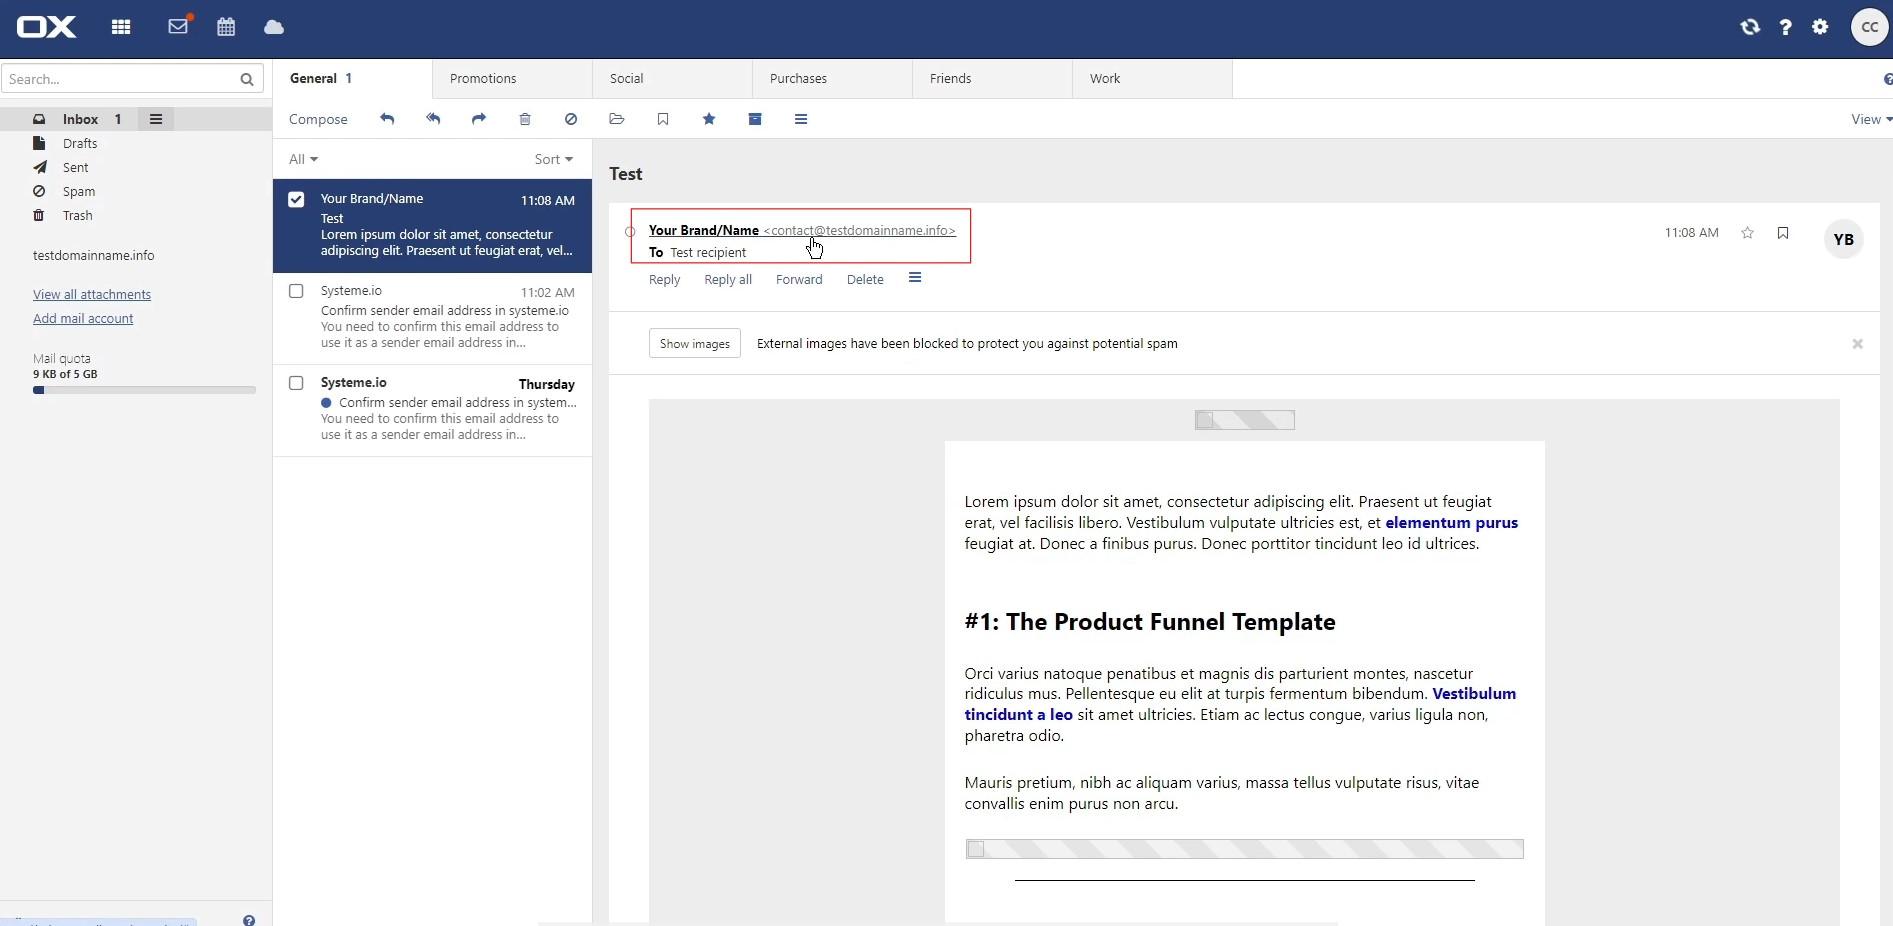
If everything looks as expected, you’re all set. Congratulations!
Conclusion:
Setting up a custom domain and email in Systeme.io is essential for establishing trust and optimizing email performance.
Following these steps, you’ll be ready with a professional website and reliable email delivery.


