Before we start, let’s make sure we have everything we need.
You’ll need either a landing page or an email list. If you don’t have a landing page yet, check out my other tutorials where I walk you through building one from scratch.
For this tutorial, I’ve created a simple landing page to collect emails.
This is essential because, without an opt-in form, you won’t be able to capture leads for your email campaign.
Let’s quickly check how that looks before setting up our emails.
Table of Contents
Step 1: Setting Up a Landing Page with an Opt-in Form
If you don’t have an email opt-in form on your page or blog yet, here’s a super quick guide on how to do it in Systeme.io:
- Navigate to the left sidebar in Systeme.io’s editor.
- Click on Form Input and drag it onto your page.
- Select Email as the input type.
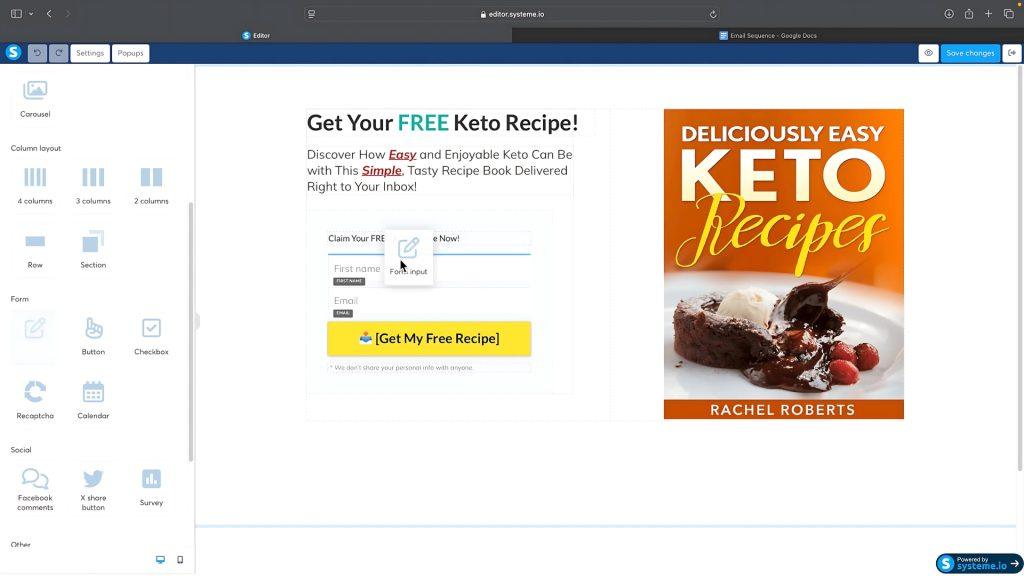
And that’s it!
You now have a simple form ready to capture leads.
Once your landing page is set up, we can move on to creating the email campaign itself.
Step 2: Creating Your First Email Campaign
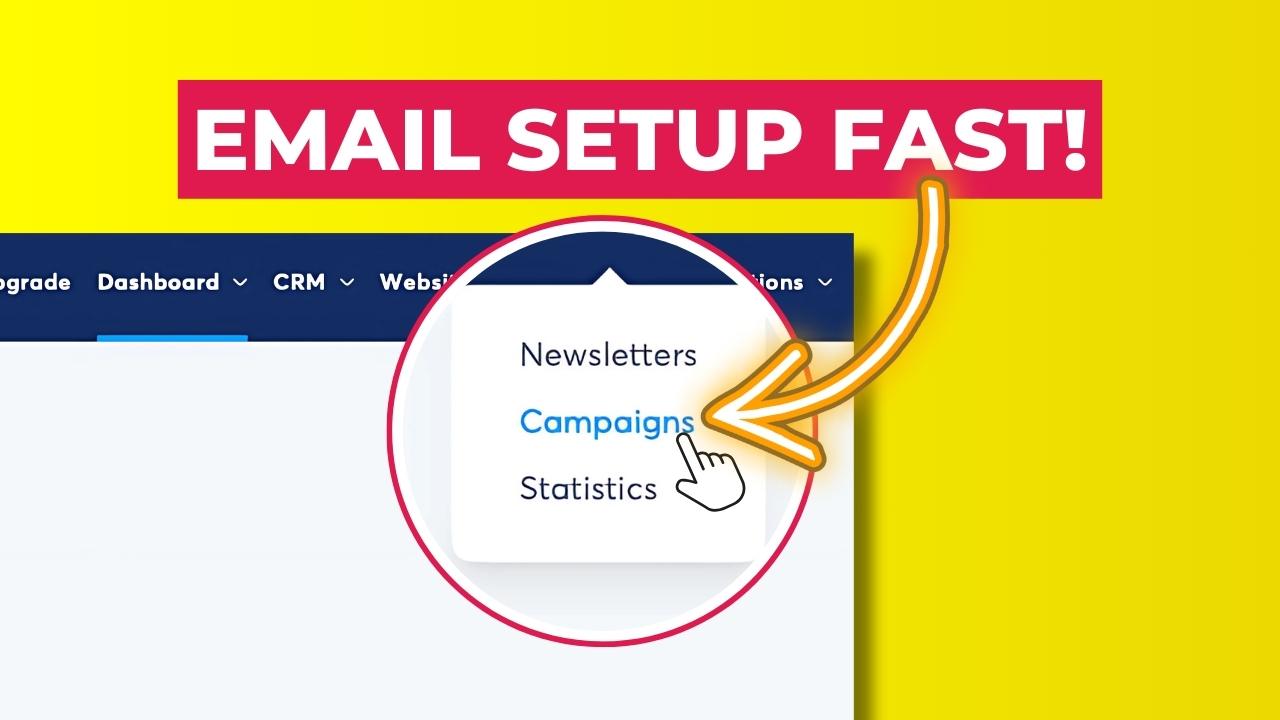
- Go to Emails > Campaigns.
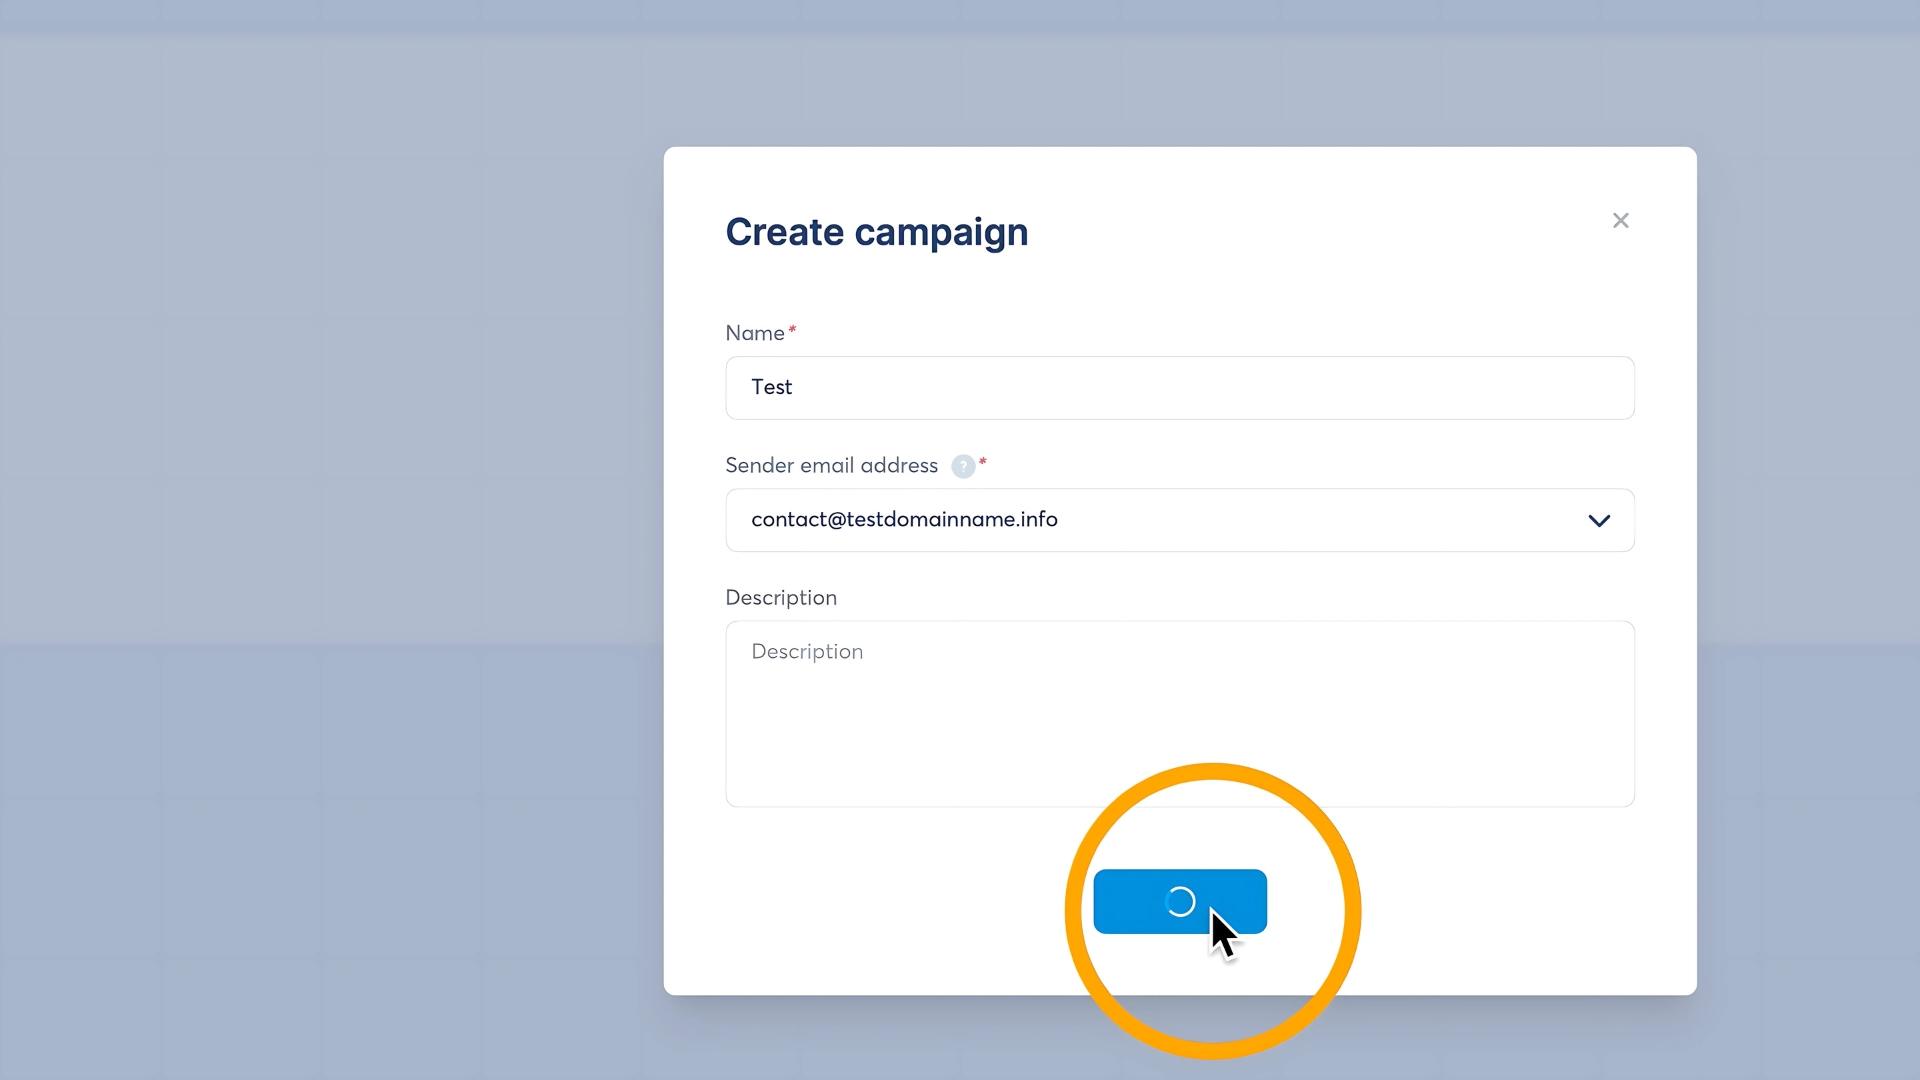
- Click on Create and give your campaign a name (I’ll call mine “Test”).
- Select a custom sender email address (make sure you have this set up—check my tutorial if you need help).
- Click Save, and your first email campaign is now created!
Now, we need to write our first email.
Step 3: Writing and Customizing Your First Email
- Click on the campaign name to open it.
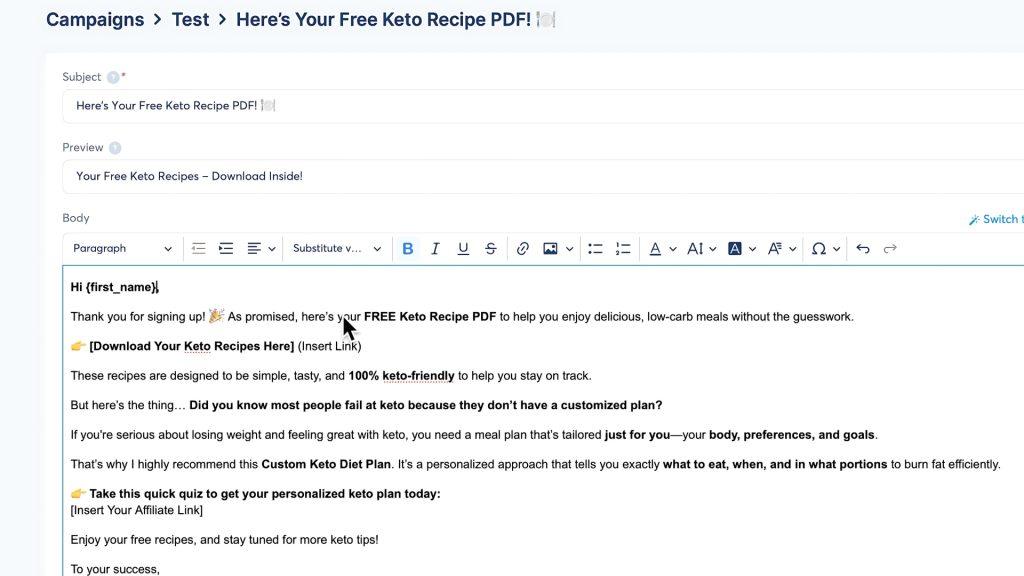
- Click Create to add a new email.
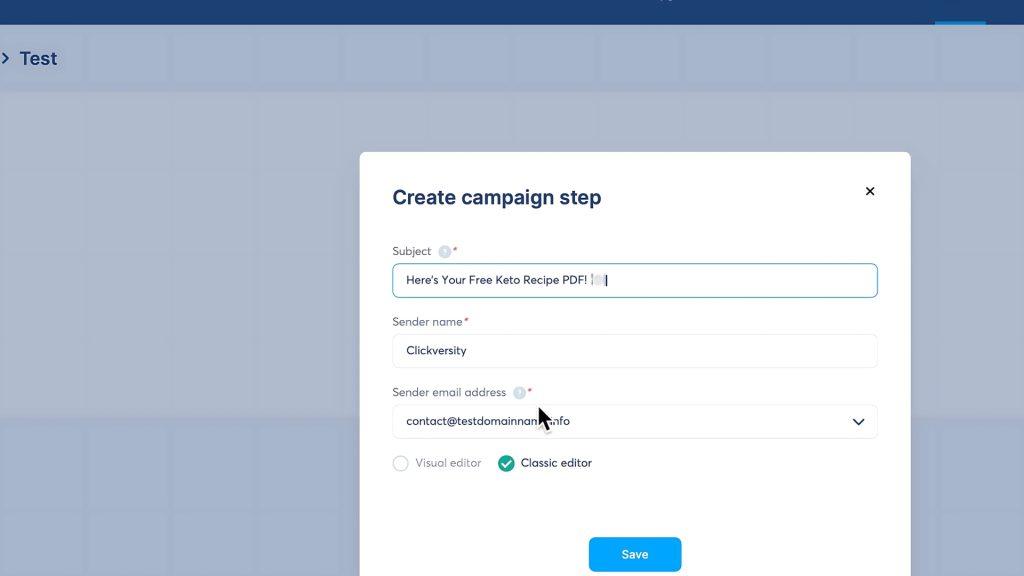
- Add the Subject Line (you can pre-write these in Google Docs and copy-paste them here).
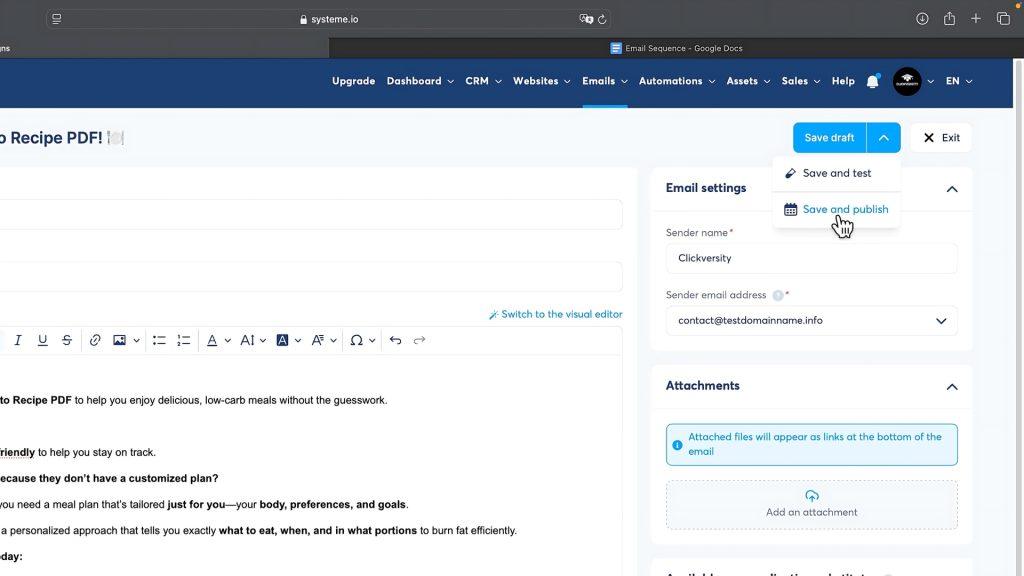
- Set the Sender Name (your name or business name) and Sender Email Address (the one you selected earlier).
- Click Save.
- Now, let’s add the preview text—this is the short description that appears next to the subject line in your inbox.
- Paste the email body content (this is where you provide value or share important information with your audience).
- Want your emails to feel more personal? Add a placeholder like {first_name} to dynamically insert the recipient’s name.
- If you’re offering a free resource like a PDF or guide, click on the link button and insert your Google Drive or file-sharing link. You can also upload an attachment directly in the email editor so it’s downloadable from the email.
Click Save and Publish when your email is ready!
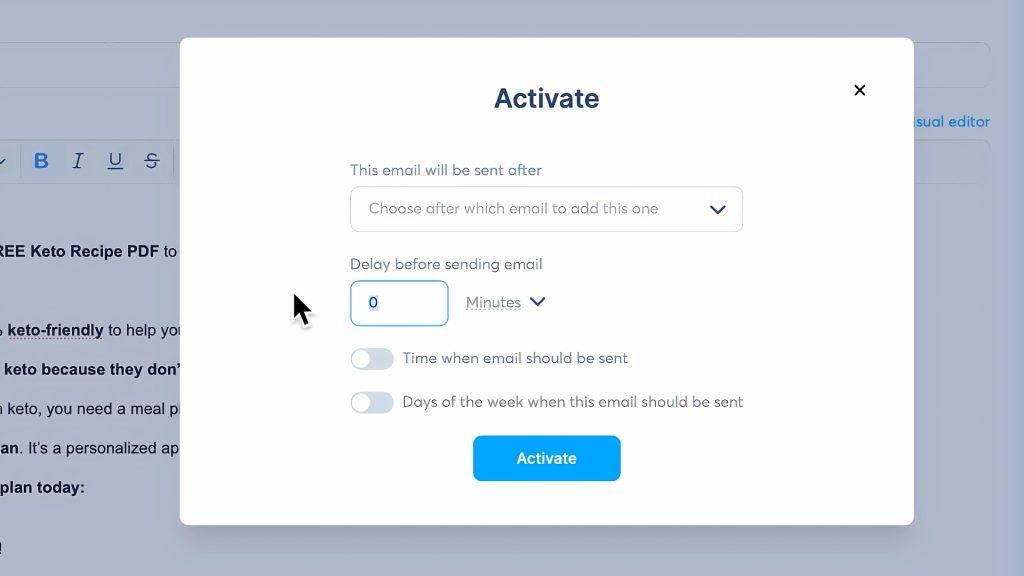
Now, a pop-up window will show up where you can set the delay.
This determines how long it should take to automatically send the email after someone opts in to your form.
You can set it to send immediately or after a few minutes, hours, or days.
Step 4: Automating Your Email Sequence
Once we have our first email, we can start building the email sequence:
- Click Create to add your second email.
- Write the subject line and email body. (Little tip: ChatGPT or Claude can be great helpers in writing email sequences!)
- Again, add any placeholders like {first_name} for personalization.
- Click Save and Publish.
- Set the delay and rule for when to send it.
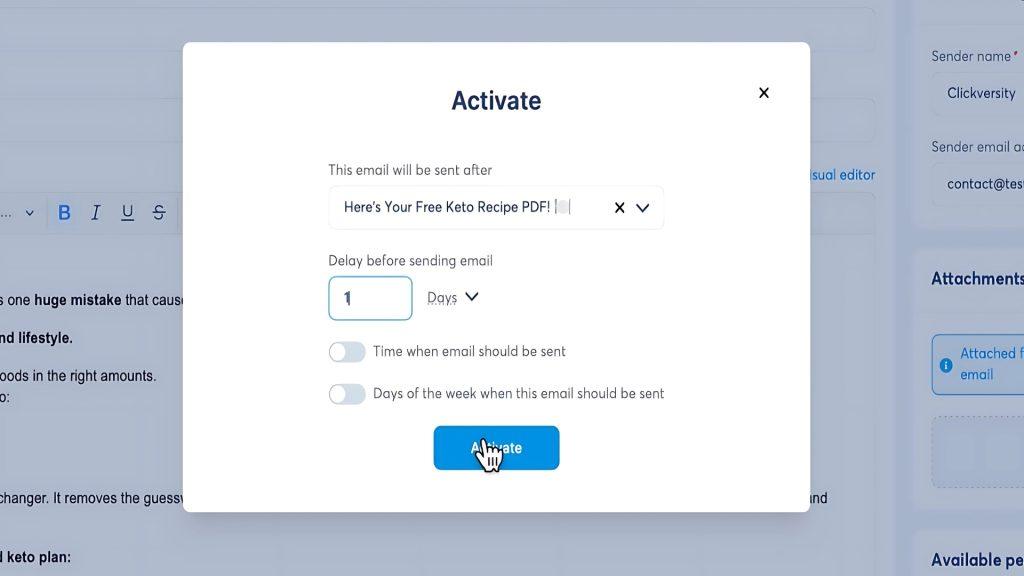
- In the pop-up window, you’ll see the option “This email will be sent after”. Select your first email—this will be the trigger for the next one.
- If you want this email sent immediately after the first, set the delay to 1 minute.
- If you want it sent the next day, set the delay to 1 day.
Repeat this process for your third email, setting a 2-day delay after the second email.
Now, we have a basic 3-email sequence where:
- Email 1 (Day 0): Delivers the free PDF or any other resource you’re offering.
- Email 2 (Day 1): Follows up with more valuable content.
- Email 3 (Day 3): Provides additional tips or a call to action.
Step 5: Adding Tags for Better Organization
It’s always a good idea to categorize your leads using tags. Here’s how:
- Go to CRM > Tags.
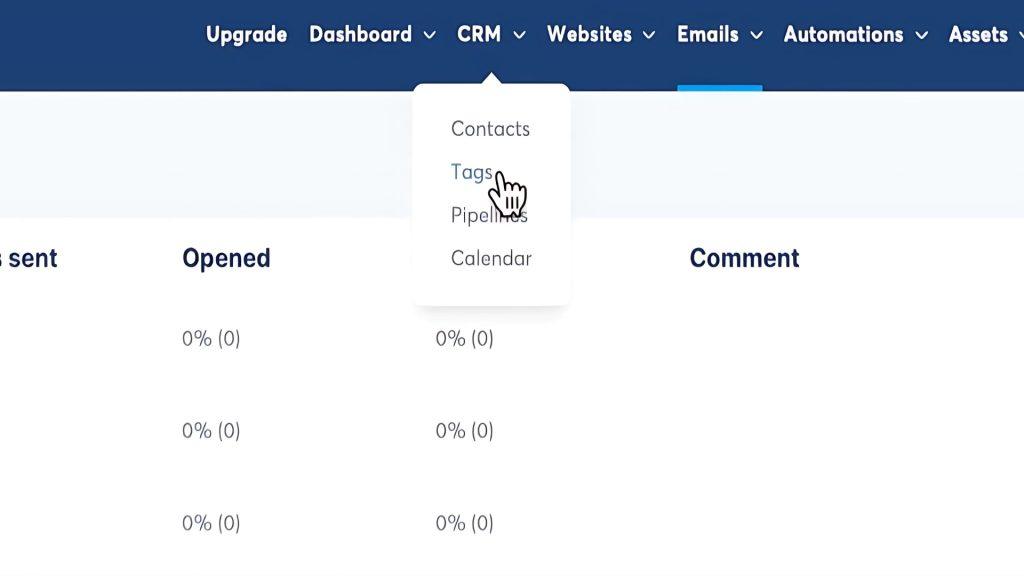
- Click Create Tag, and name it something relevant (e.g., “Free PDF”).
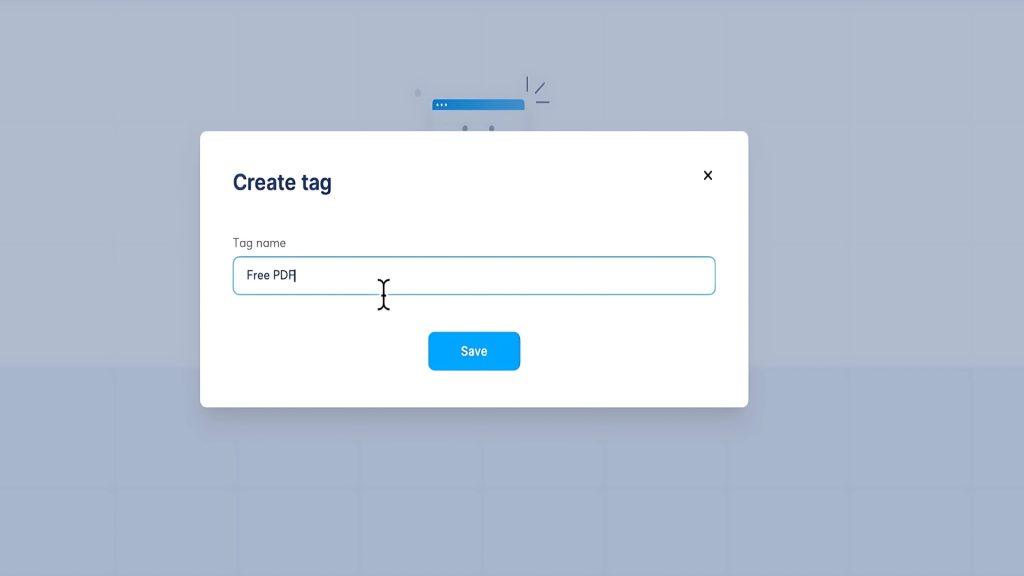
- Click Save.
Tags help you segment your audience for future campaigns or automations.
Step 6: Automating the Email Sequence with Rules
Now it’s time to automate everything!
We want to trigger the email sequence whenever someone opts into our email form.
Here’s how to do it quickly:
- Go to Websites > Sales Funnels and select your landing page.
- Click on Automation Rules.
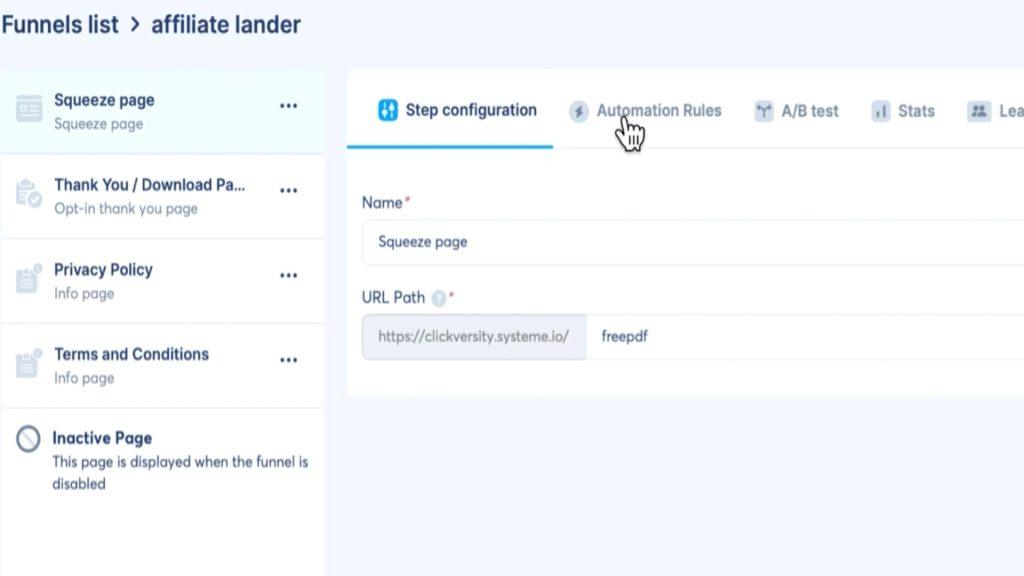
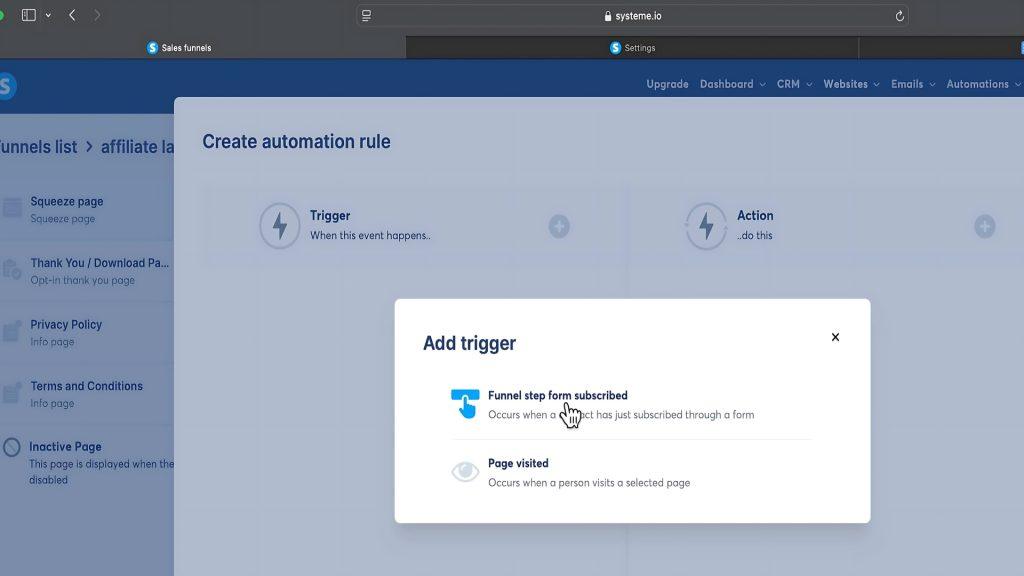
- Click Add Rule and choose Funnel Step Form Subscribed as the trigger.
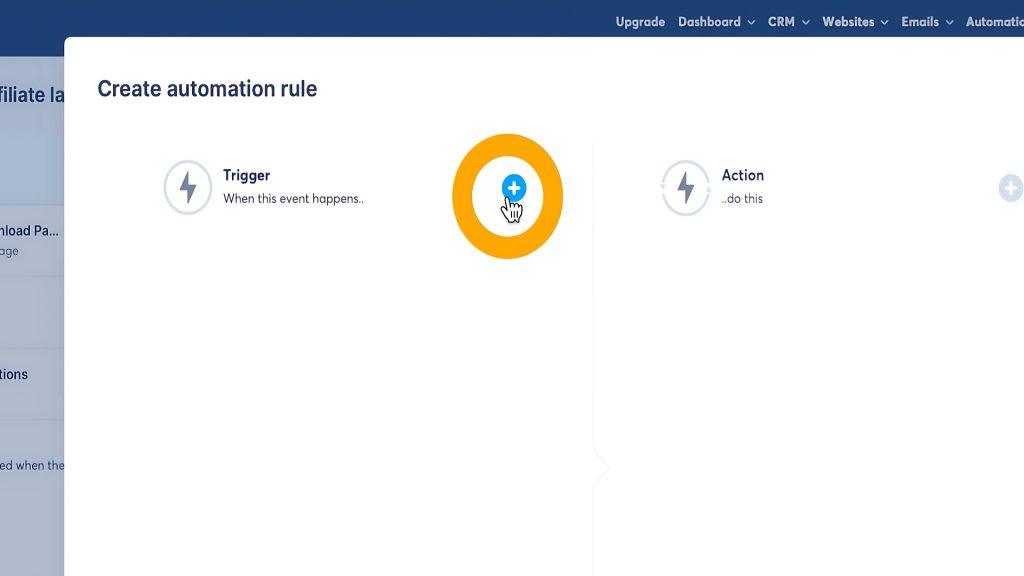
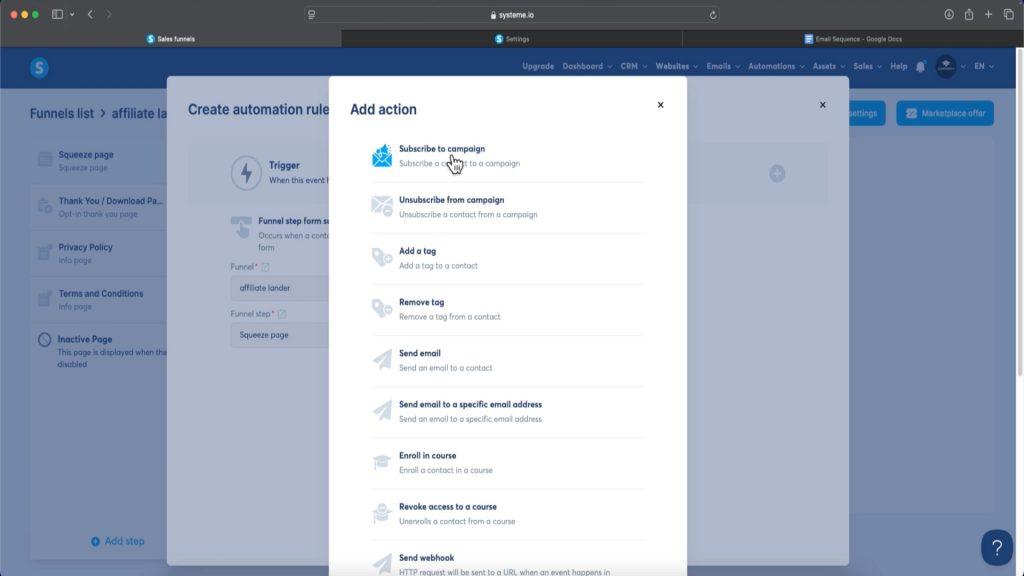
- Now, select Action > Subscribe to Campaign, then choose the campaign we created earlier.
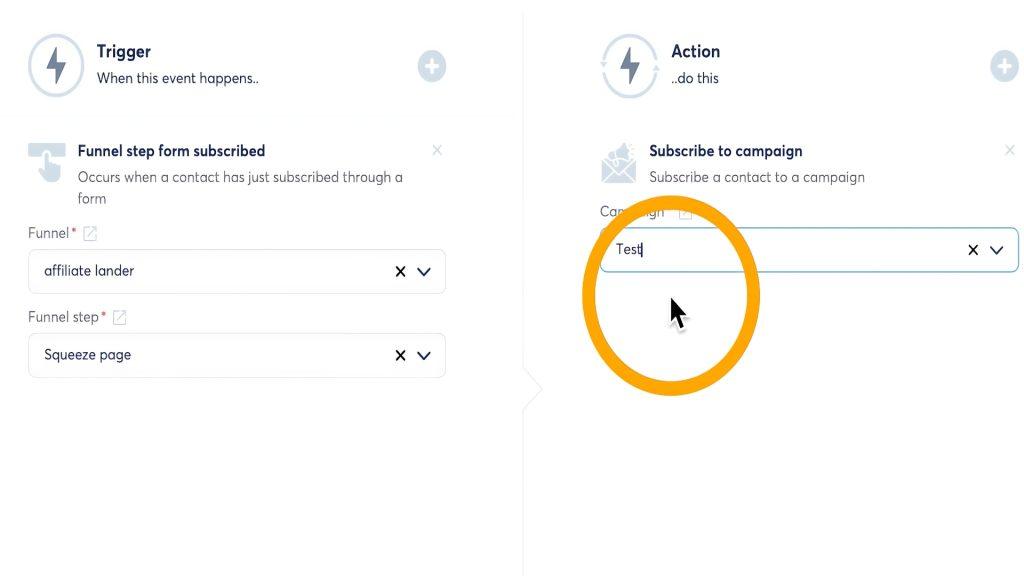
- Now select the campaign you want to use in our case it is campaign called “test” that we created before.
- Click Save Rule.
To further organize your leads:
- Add another action, selecting Add Tag.
- Choose the tag we created (“Free PDF”) and click Save Rule.
Now, whenever someone opts in, they’ll automatically receive the email sequence and be tagged accordingly.
Step 7: Testing Your Email Automation
Before calling it done, let’s test everything:
- Open your landing page and opt-in with a test email.
- Check if you get redirected to the thank you page.
- Wait for the email to arrive (it should be in your inbox or promotions tab).
- Go back to CRM > Contacts and verify that the new subscriber appears with the assigned tag.
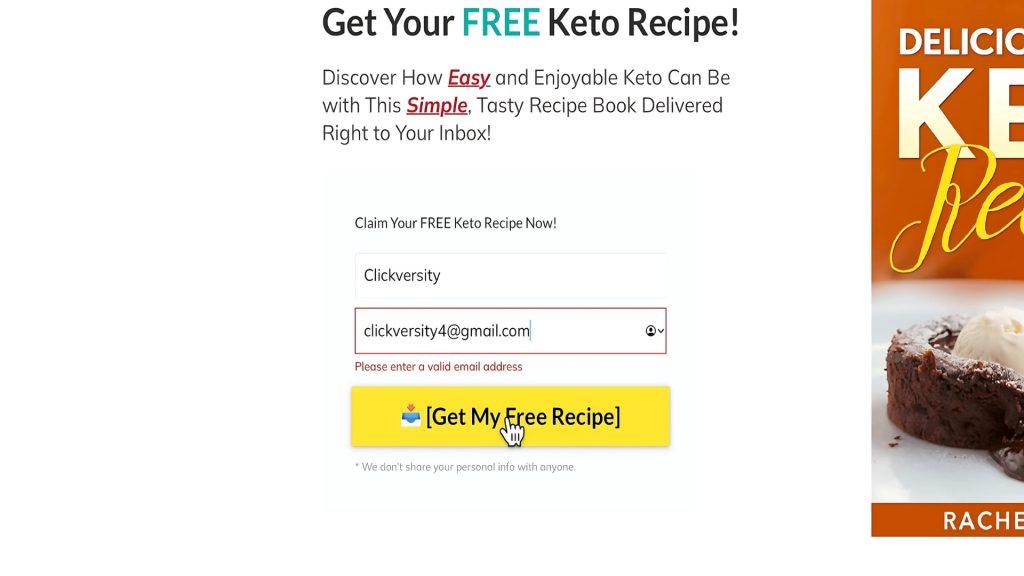
If everything checks out, your email campaign is successfully set up! 🎉
Conclusion
And that’s it! 🎯
We’ve covered how to:
✅ Set up a landing page with an opt-in form.
✅ Create an email campaign and write emails.
✅ Automate the email sequence.
✅ Use tags for organization.
✅ Test everything before launching.
If you found this guide helpful, subscribe to our YouTube channel for more tutorials!

