
When you’re just getting started, using free domains like yourname.systeme.io is totally okay.
But once you want to get serious about building funnels, businesses, and brands, it’s time to move to your own custom, professional domain name.
A custom domain isn’t just about looking professional — it’s a sign that you’re serious about your brand.
Having your own domain can actually boost trust and even improve conversions on your website or funnel.
And it’s super cheap, so there’s really no reason not to use a custom domain.
If you’re using Systeme.io and want to look more legit online, now’s the time to add your own domain.
In this guide, I’ll show you how to add a custom domain to Systeme.io using Namecheap — one of the most affordable and beginner-friendly domain providers out there.
Don’t worry, it’s super easy and pretty straightforward.
We’ll be done in 15 minutes or less.
Table of Contents
Why Use a Custom Domain on Systeme.io?
Why should you use a custom domain in the first place?
Because…
- Looks more professional – No more .systeme.io in your URL
- Boosts brand trust – A branded domain builds credibility
- Improves SEO and email deliverability – Custom domains help you look real to search engines and inboxes
- Flexible branding – You can build full websites or funnels with your own domain
Really — no more talking.
Just switch to a custom domain and do it today!
Step 1 – Purchase a Domain on Namecheap
If you already have a domain, feel free to skip this step.
I use Namecheap for all my domains, but feel free to use any domain provider you like — the process will be the same or very similar.
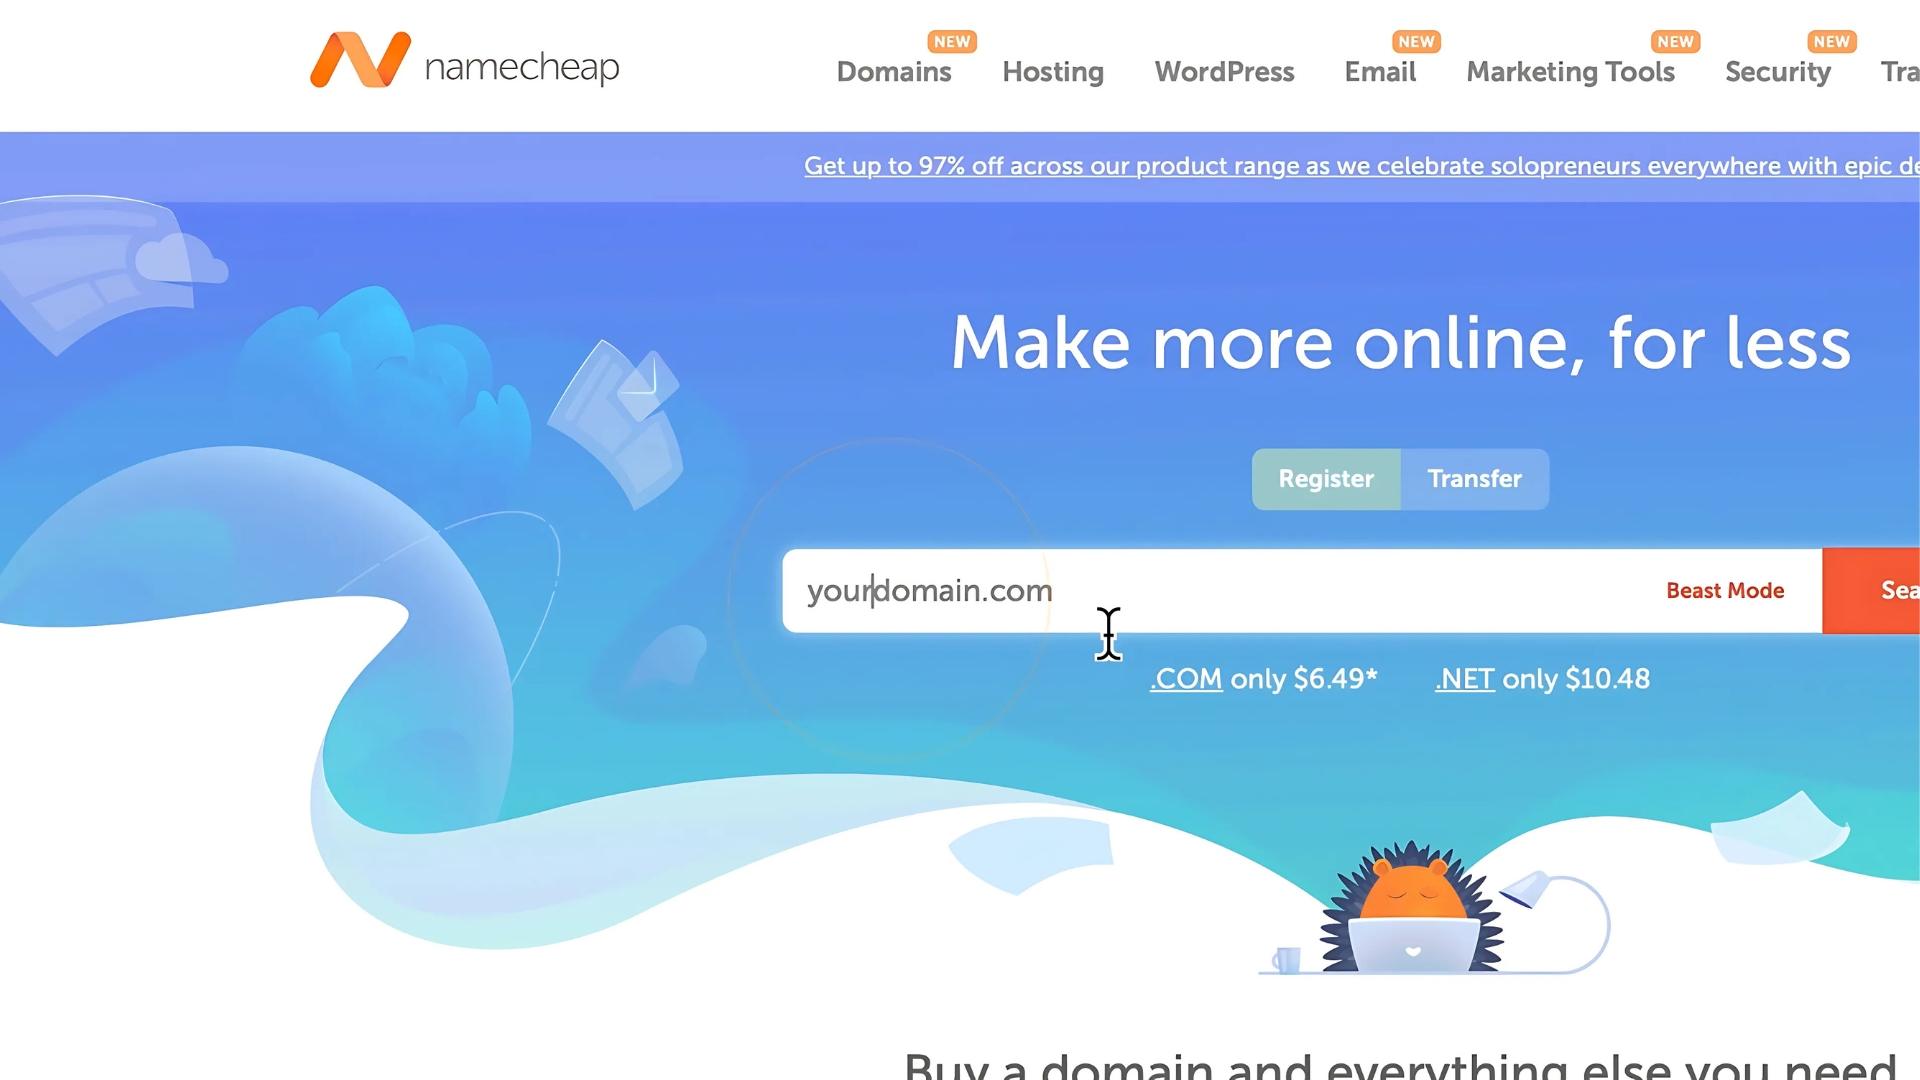
- Head over to Namecheap
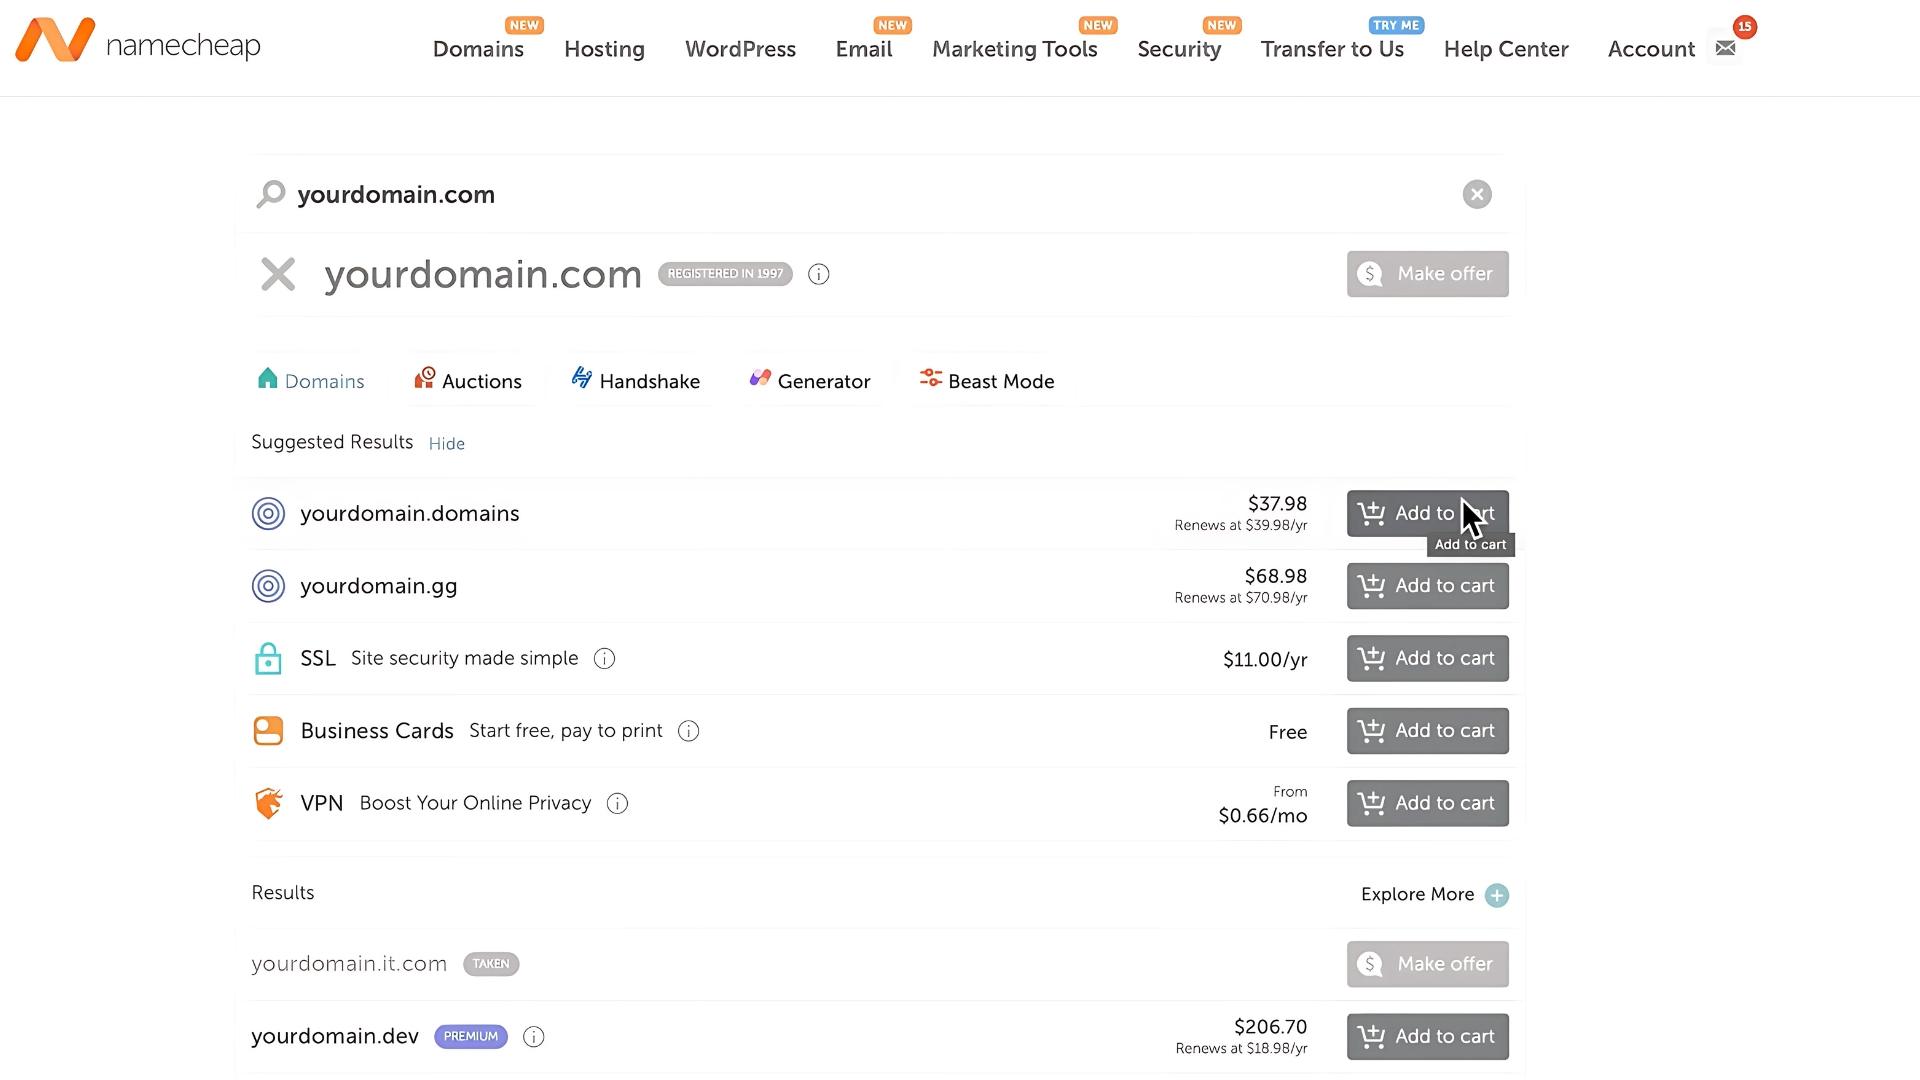
- Use the domain search bar and search for a domain you’d like to own (like yourbrand.com)
- Once you find an available one, click Add to Cart and go through the checkout
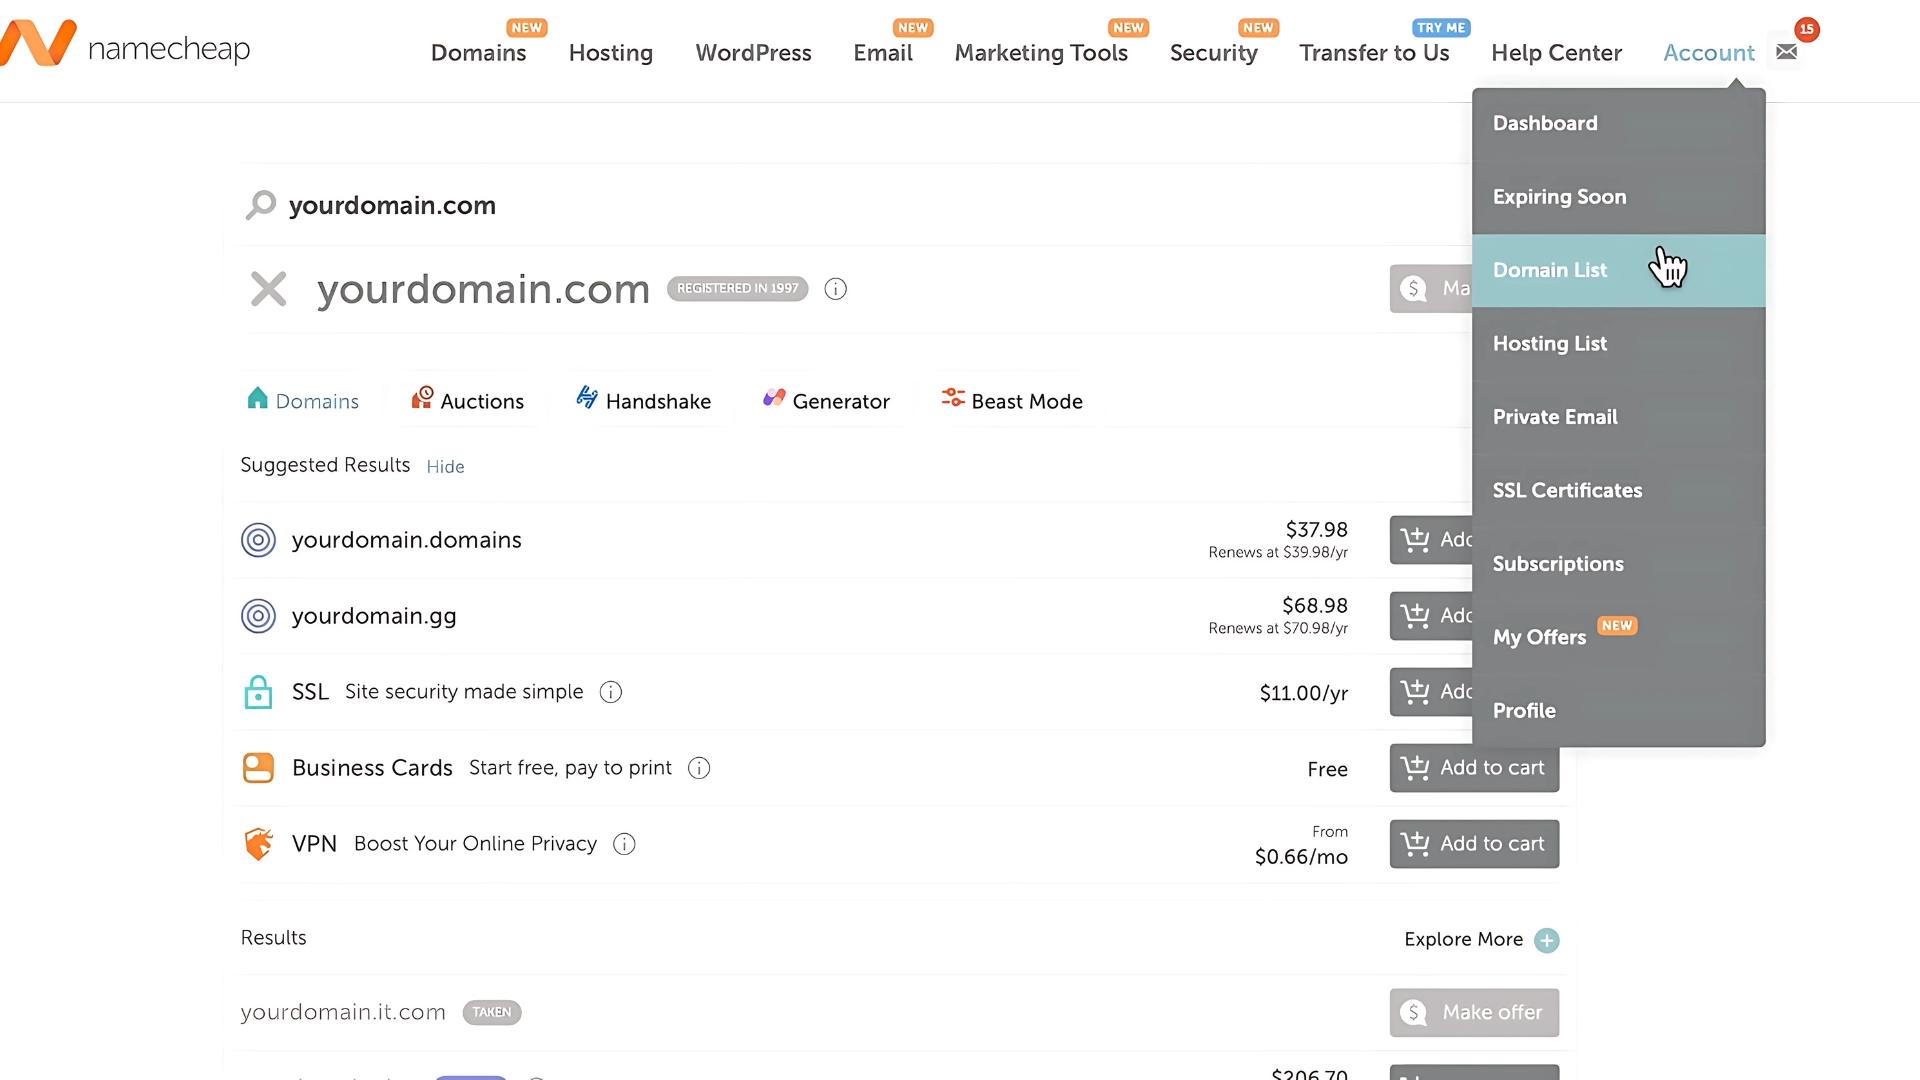
- After purchasing, go to your Domain List in your Namecheap dashboard
That’s it!
You now own a domain.
Must feel amazing!
You have your own domain — no one else on this planet can own this domain.
It’s yours!
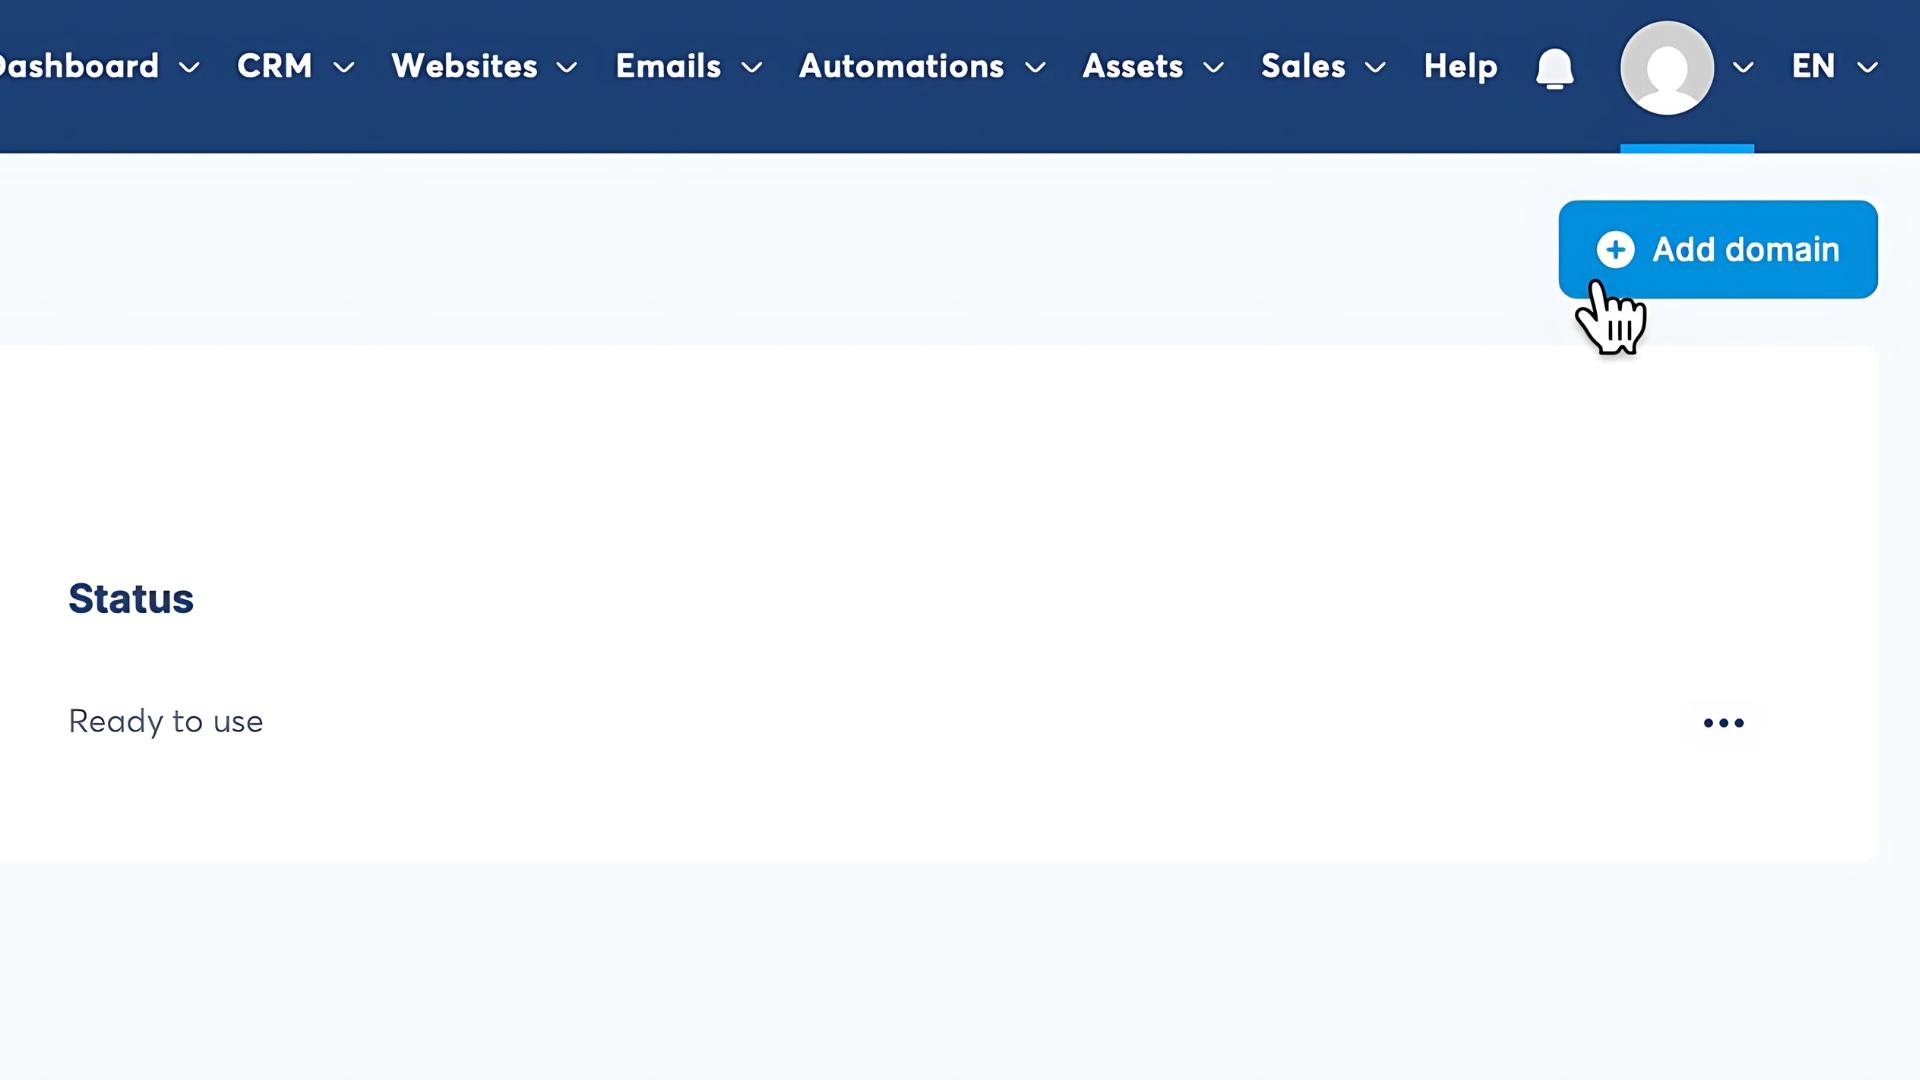
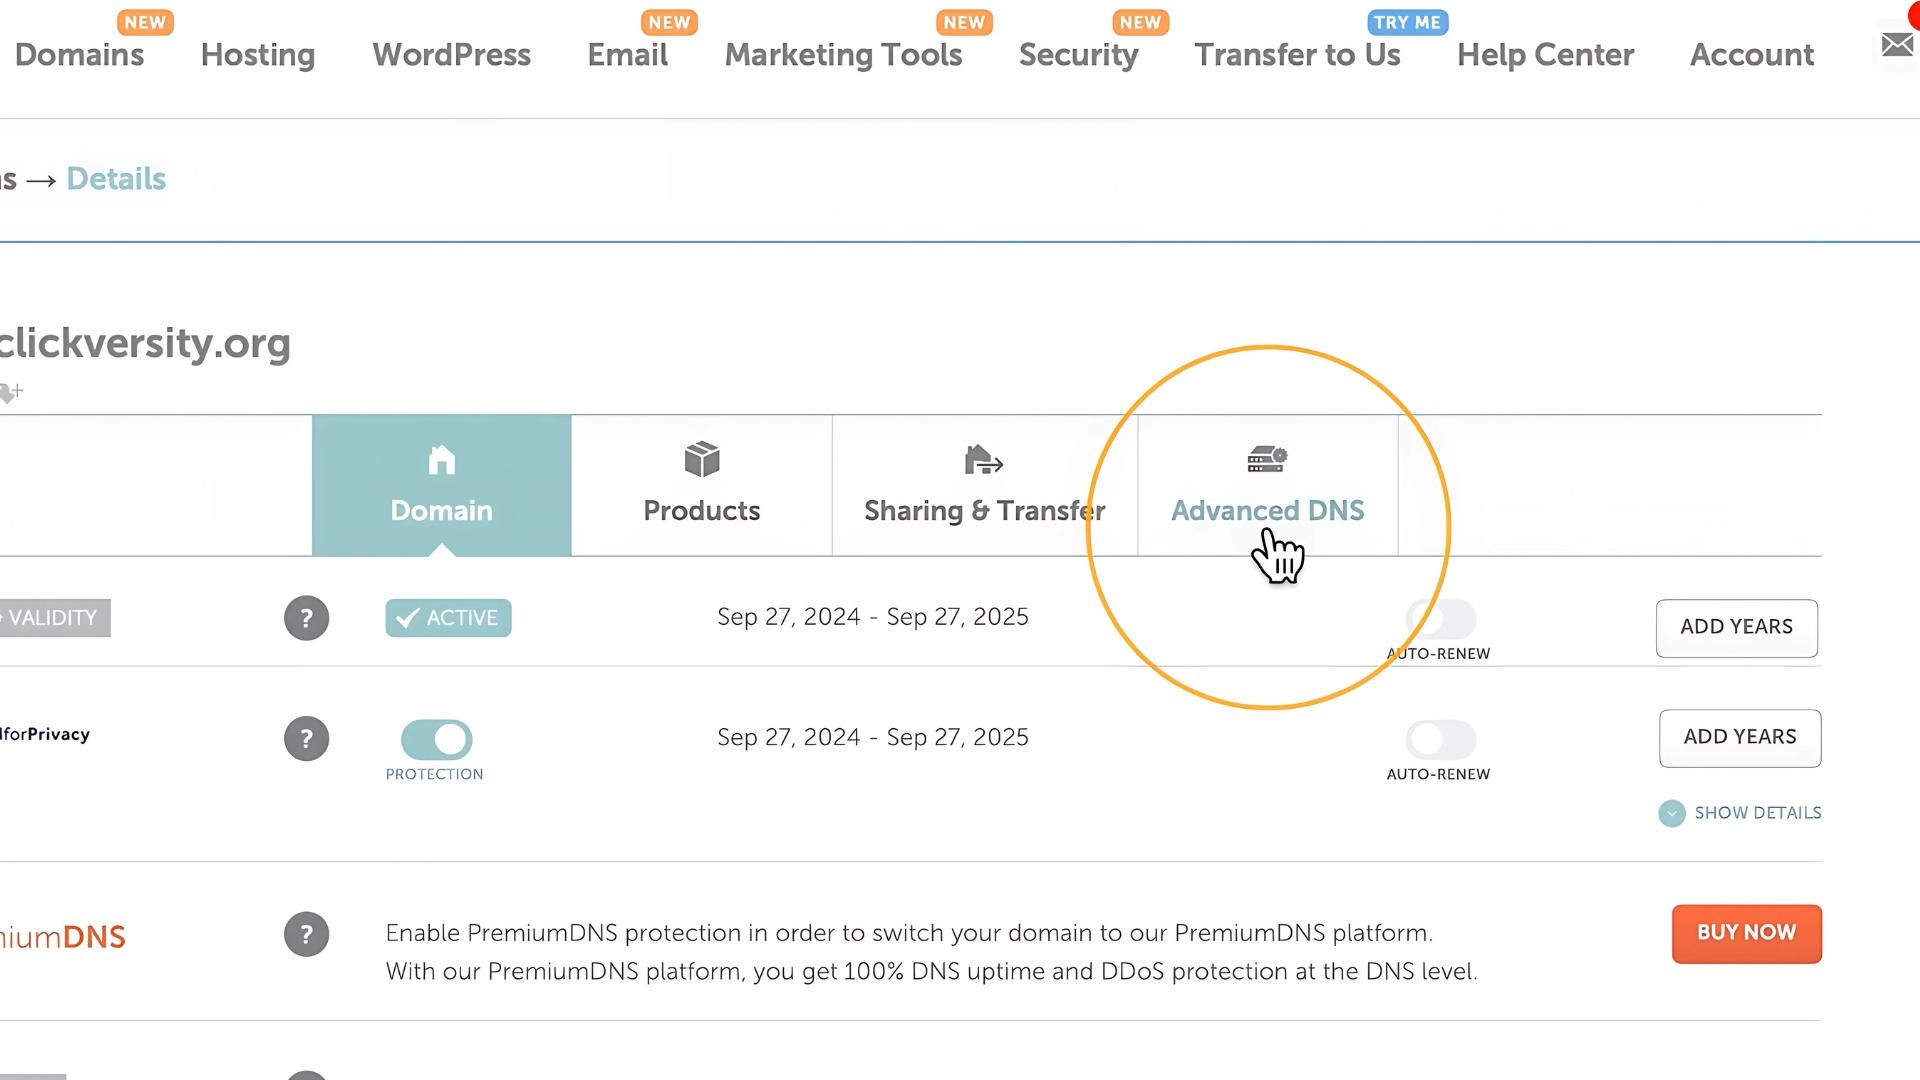
Step 2 – Add Your Domain to Systeme.io
Now let’s link your domain to your Systeme.io account.
- Log in to Systeme.io
- Click your profile icon (top-right corner) and go to Settings
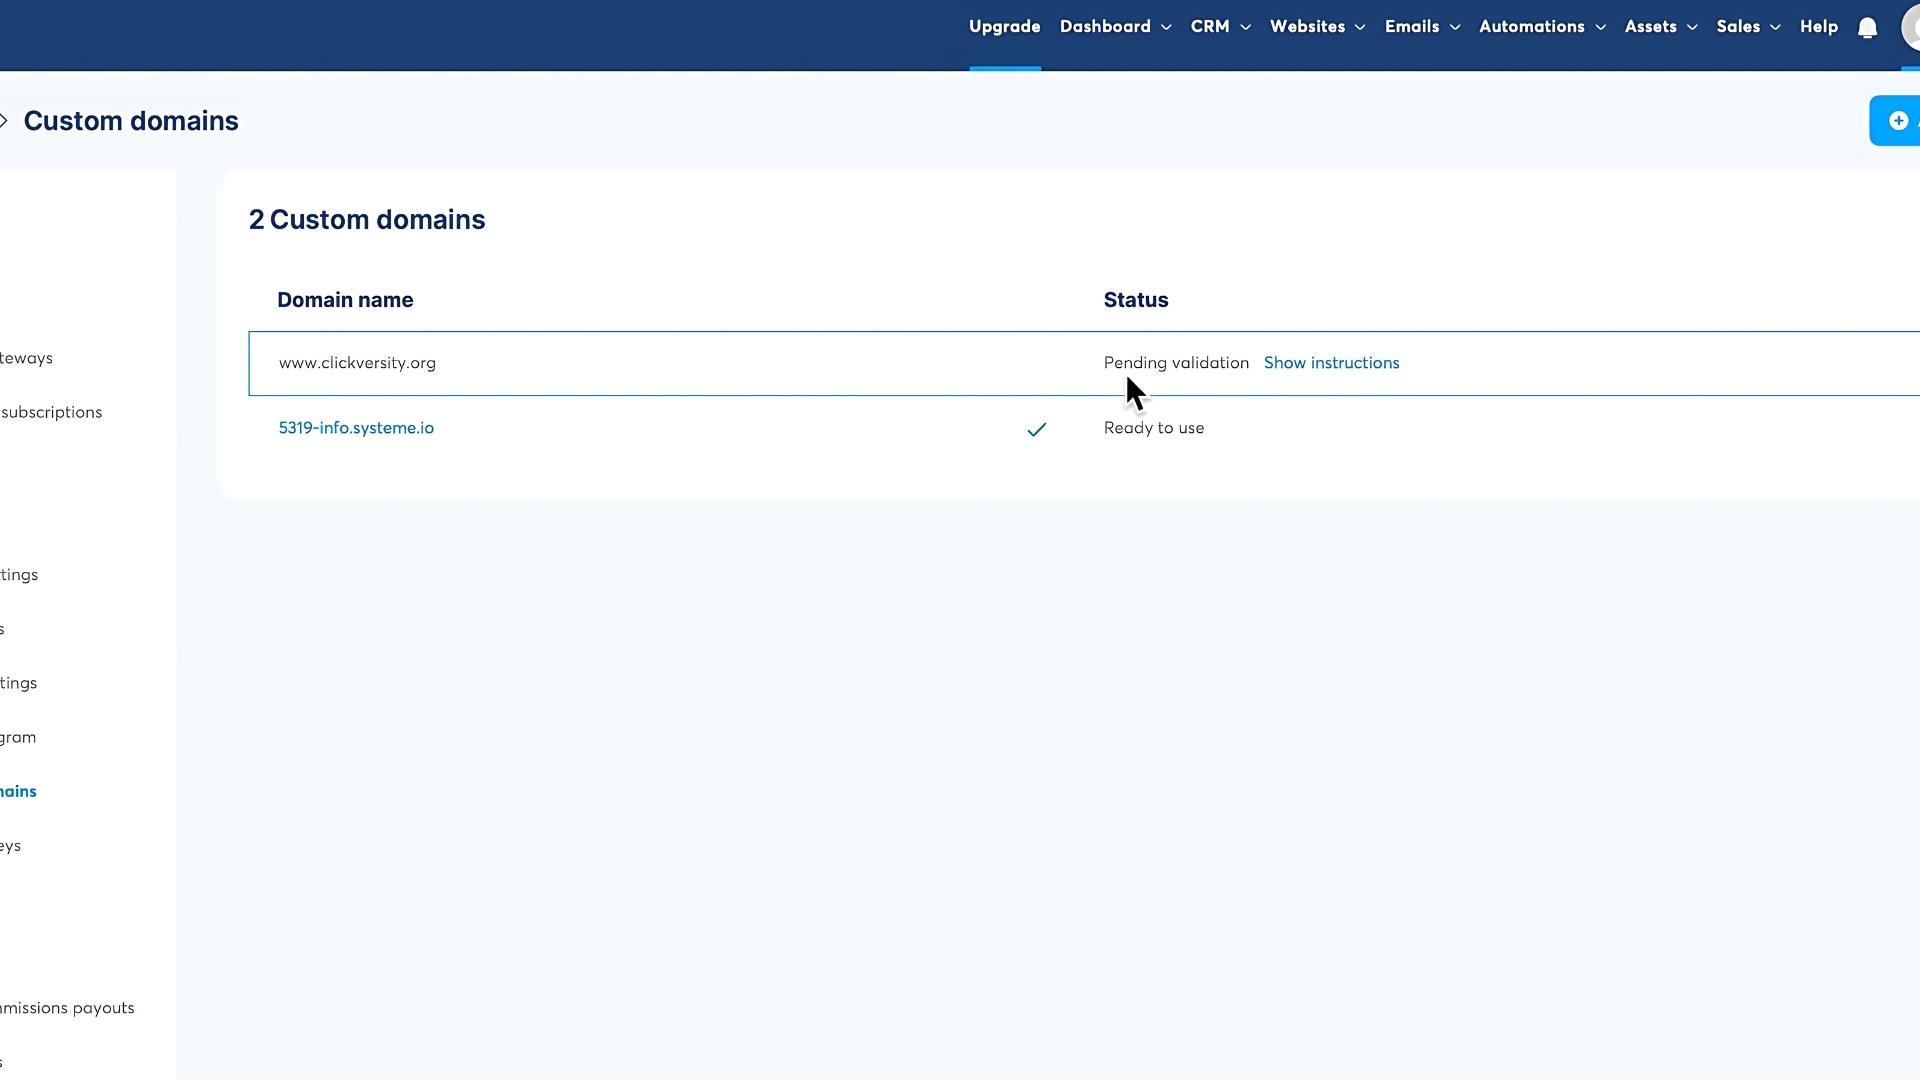
- From the left-hand menu, choose Custom Domains
- Click Add Domain
- Enter your domain (example: www.yourbrand.com) and click Save
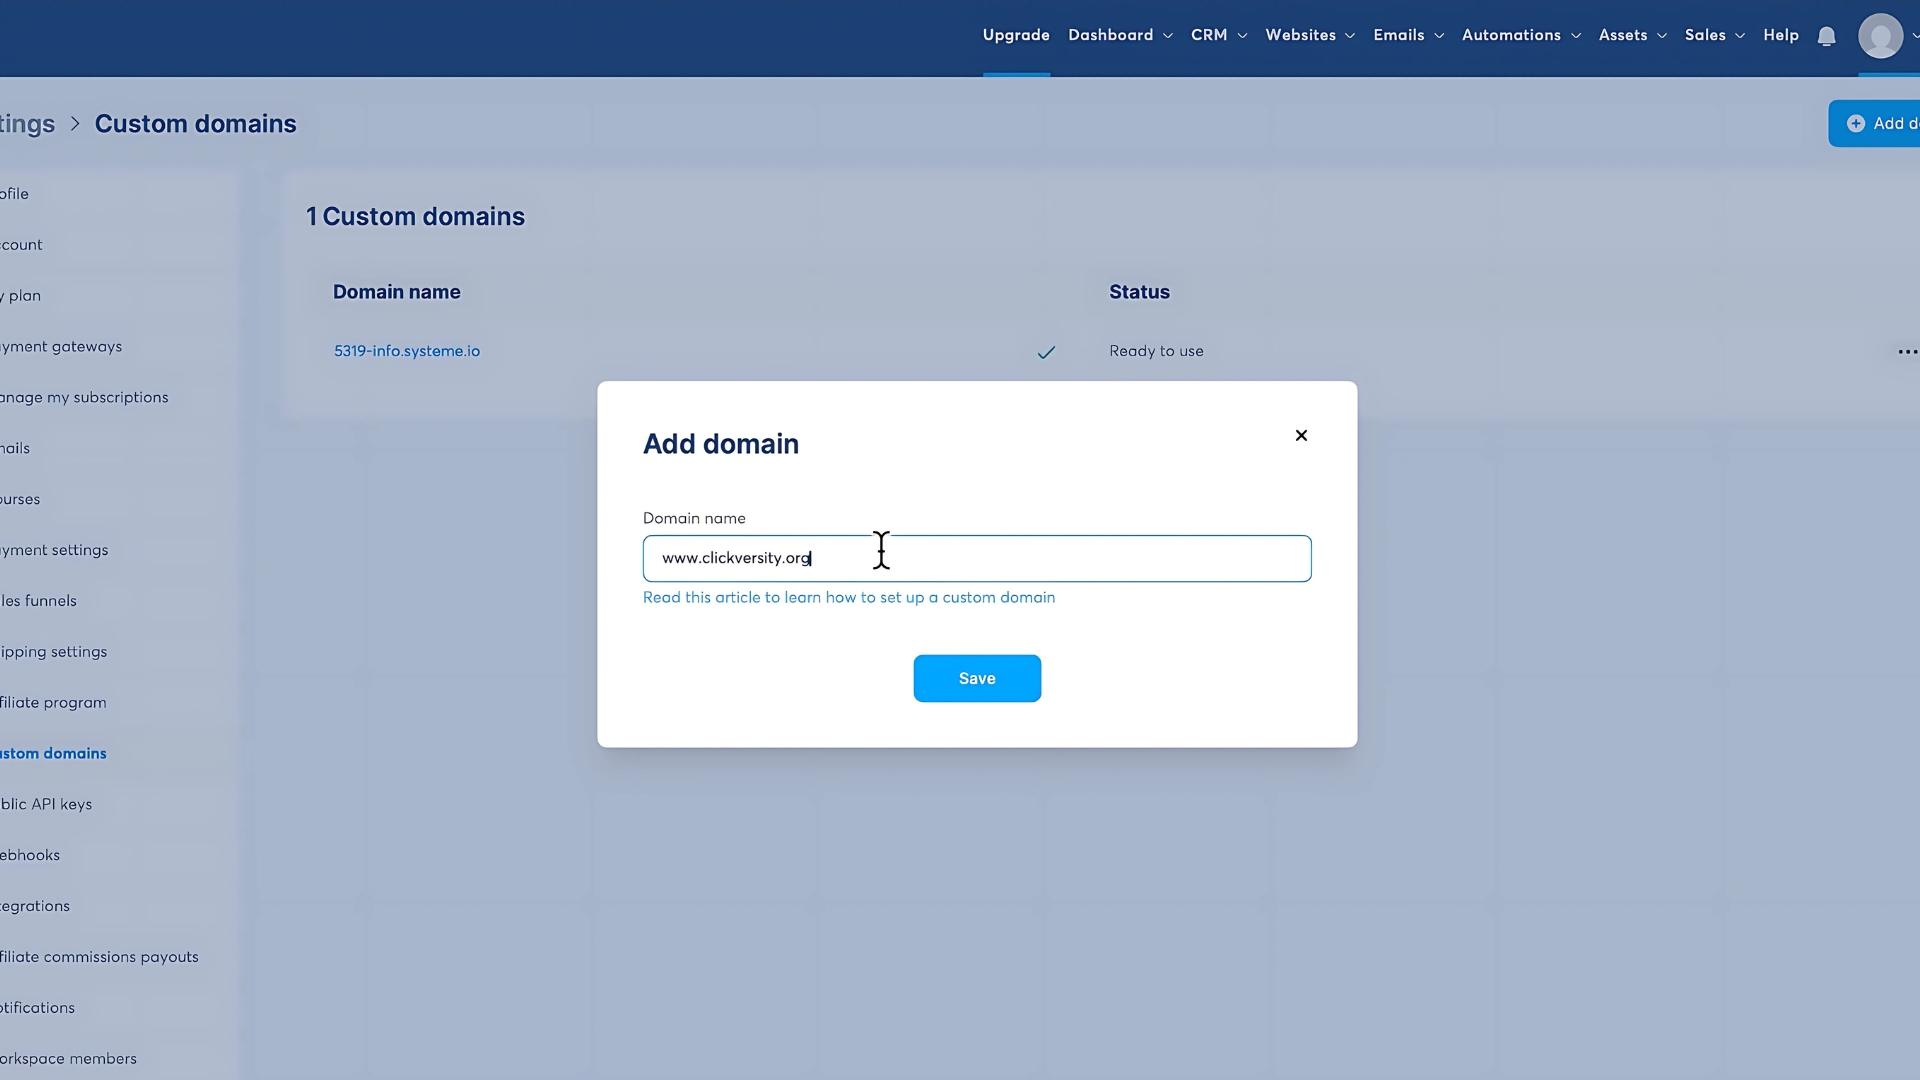
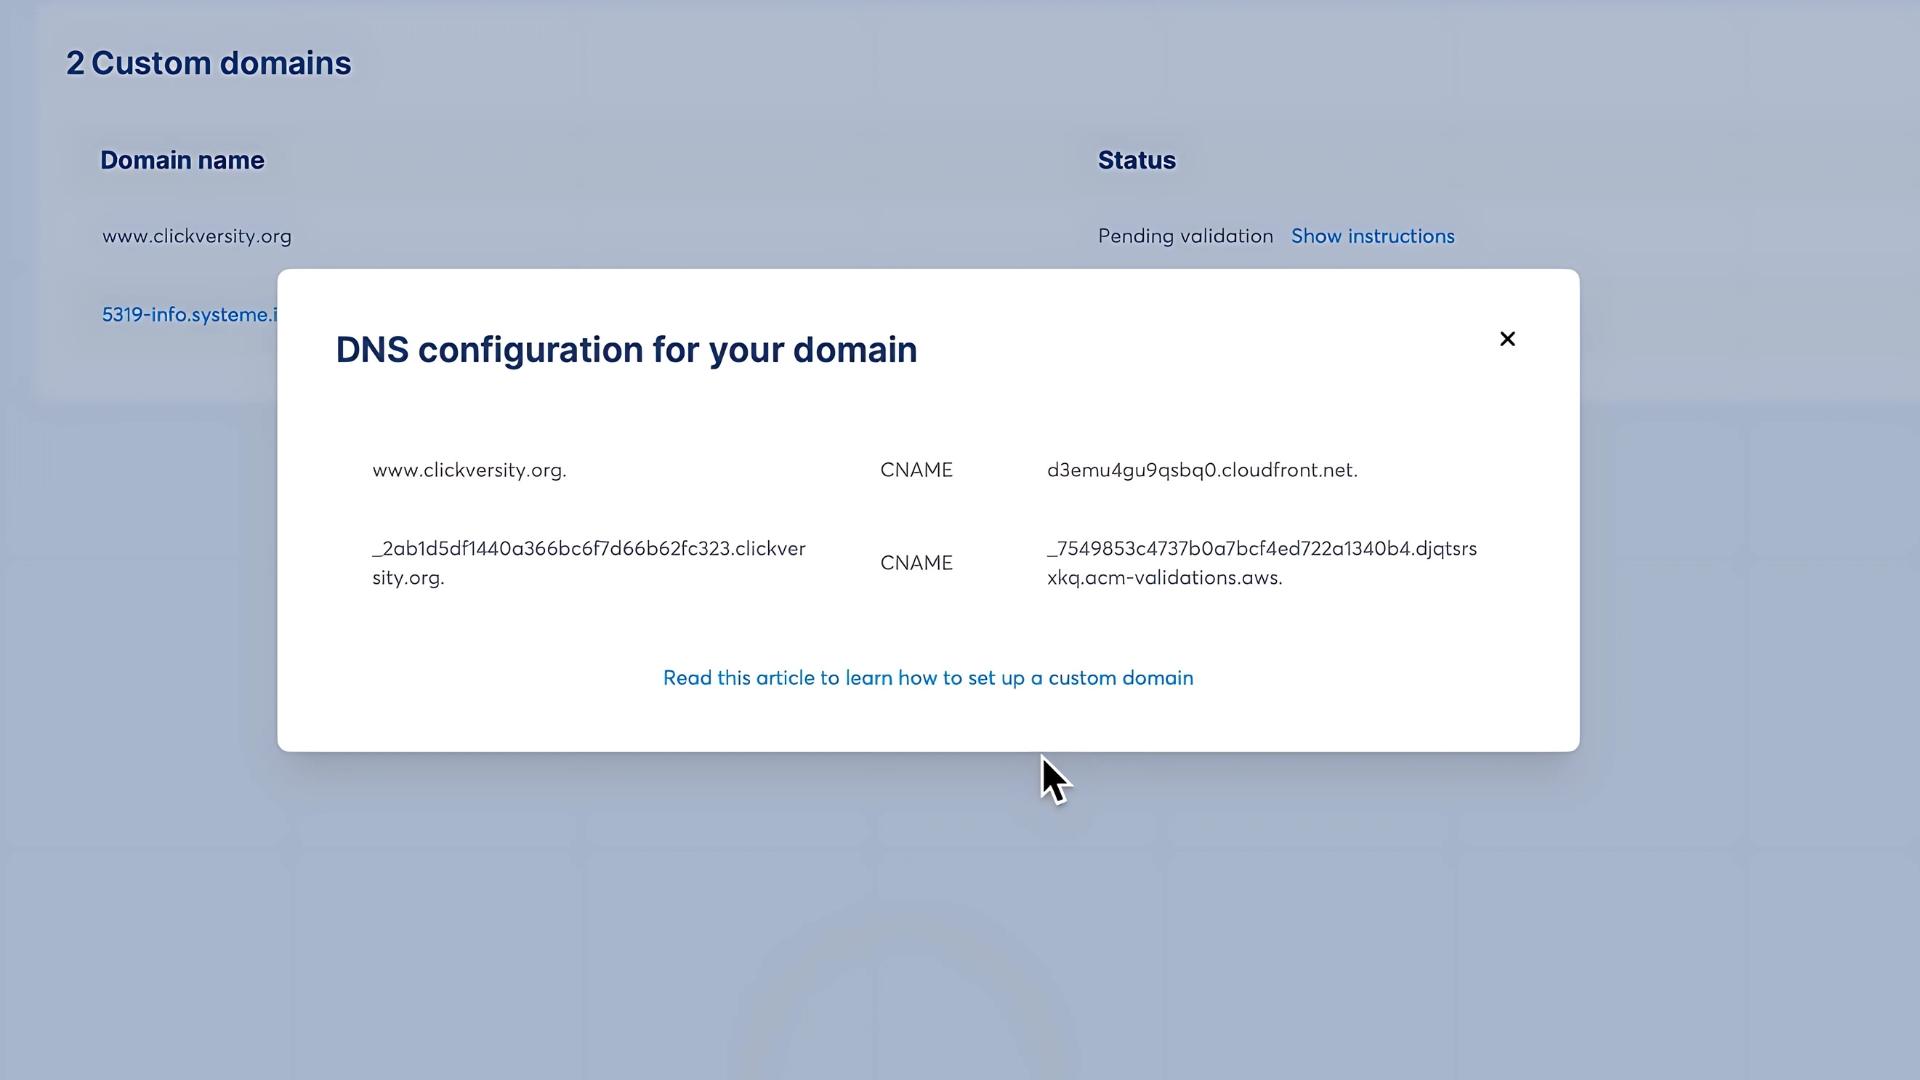
Once you do this, Systeme.io will display CNAME records that you’ll need to add to your Namecheap account.
Step 3 – Configure DNS Settings in Namecheap
Here’s how to add the CNAME records from Systeme.io into Namecheap:
- Go back to Namecheap
- From your Domain List, click Manage next to your domain
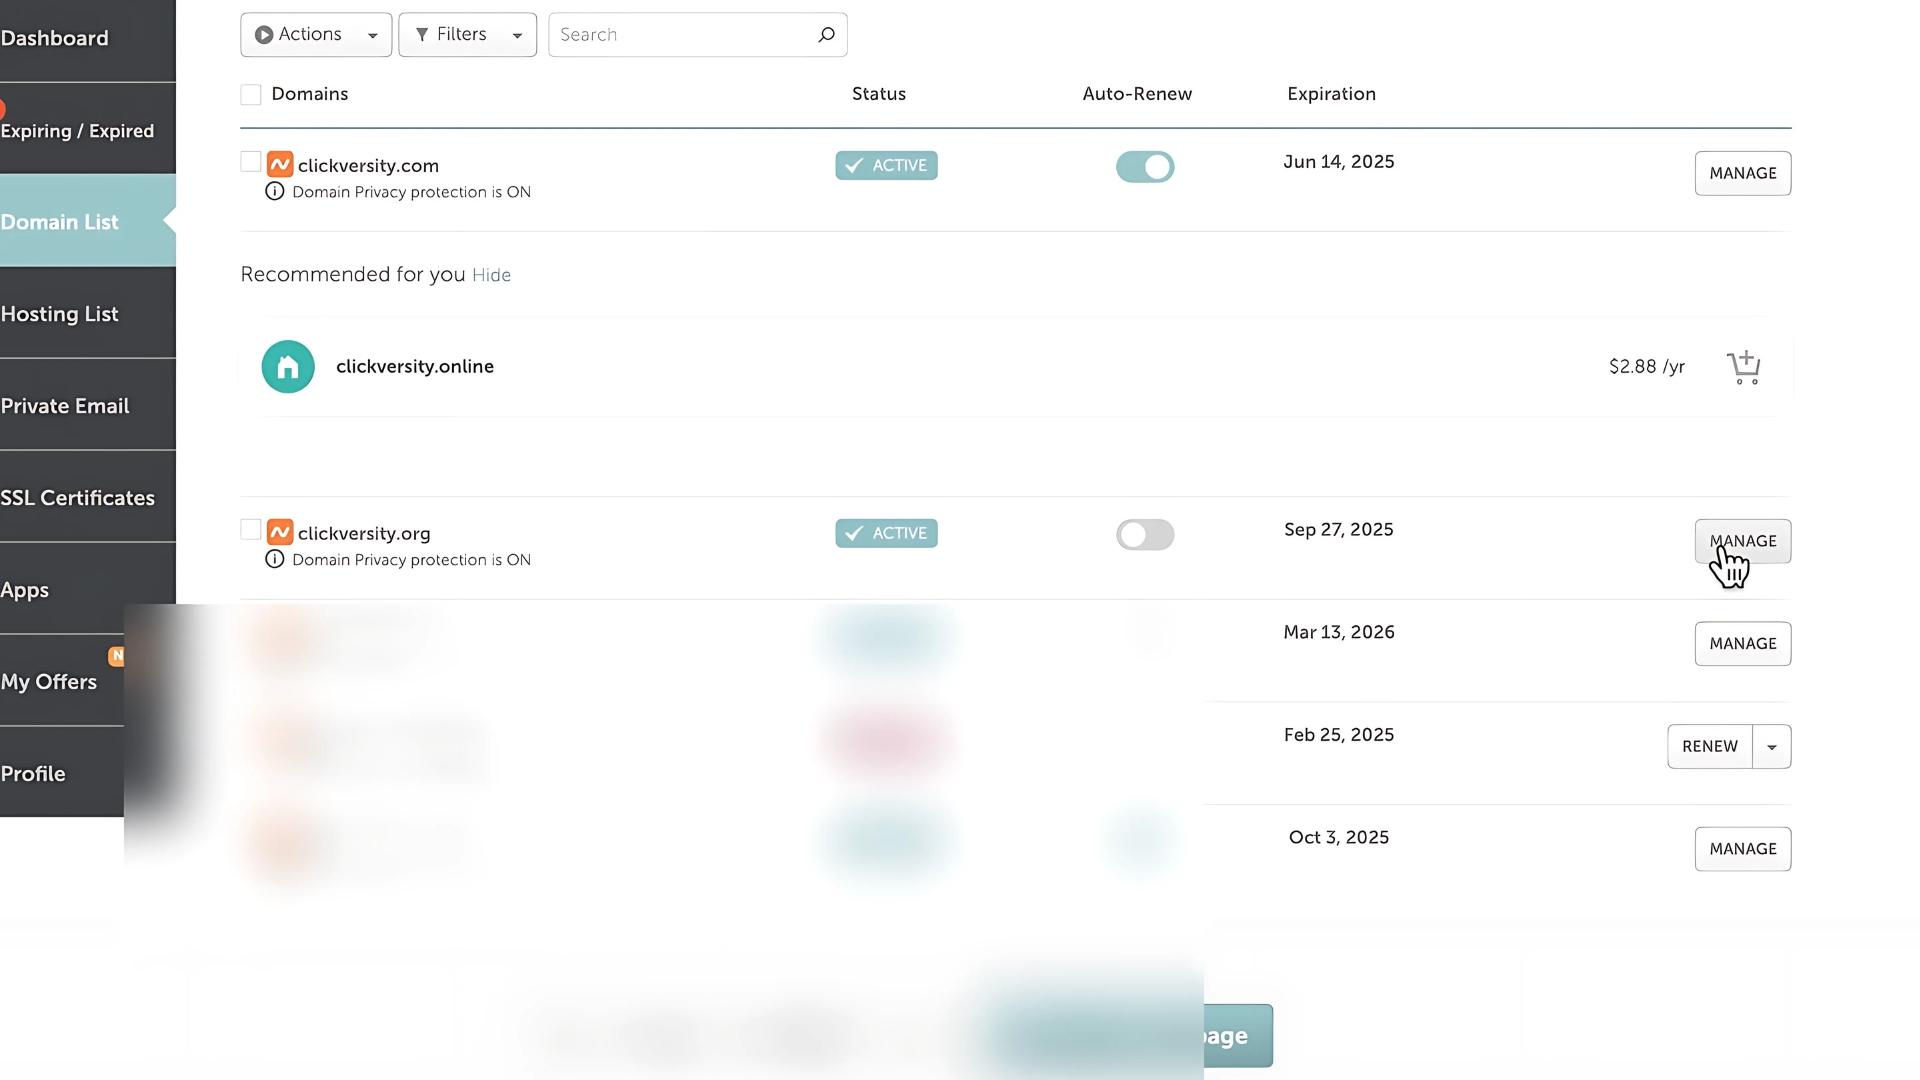
- Click the Advanced DNS tab
- Scroll down to the Host Records section
- Click Add New Record
- Choose CNAME Record
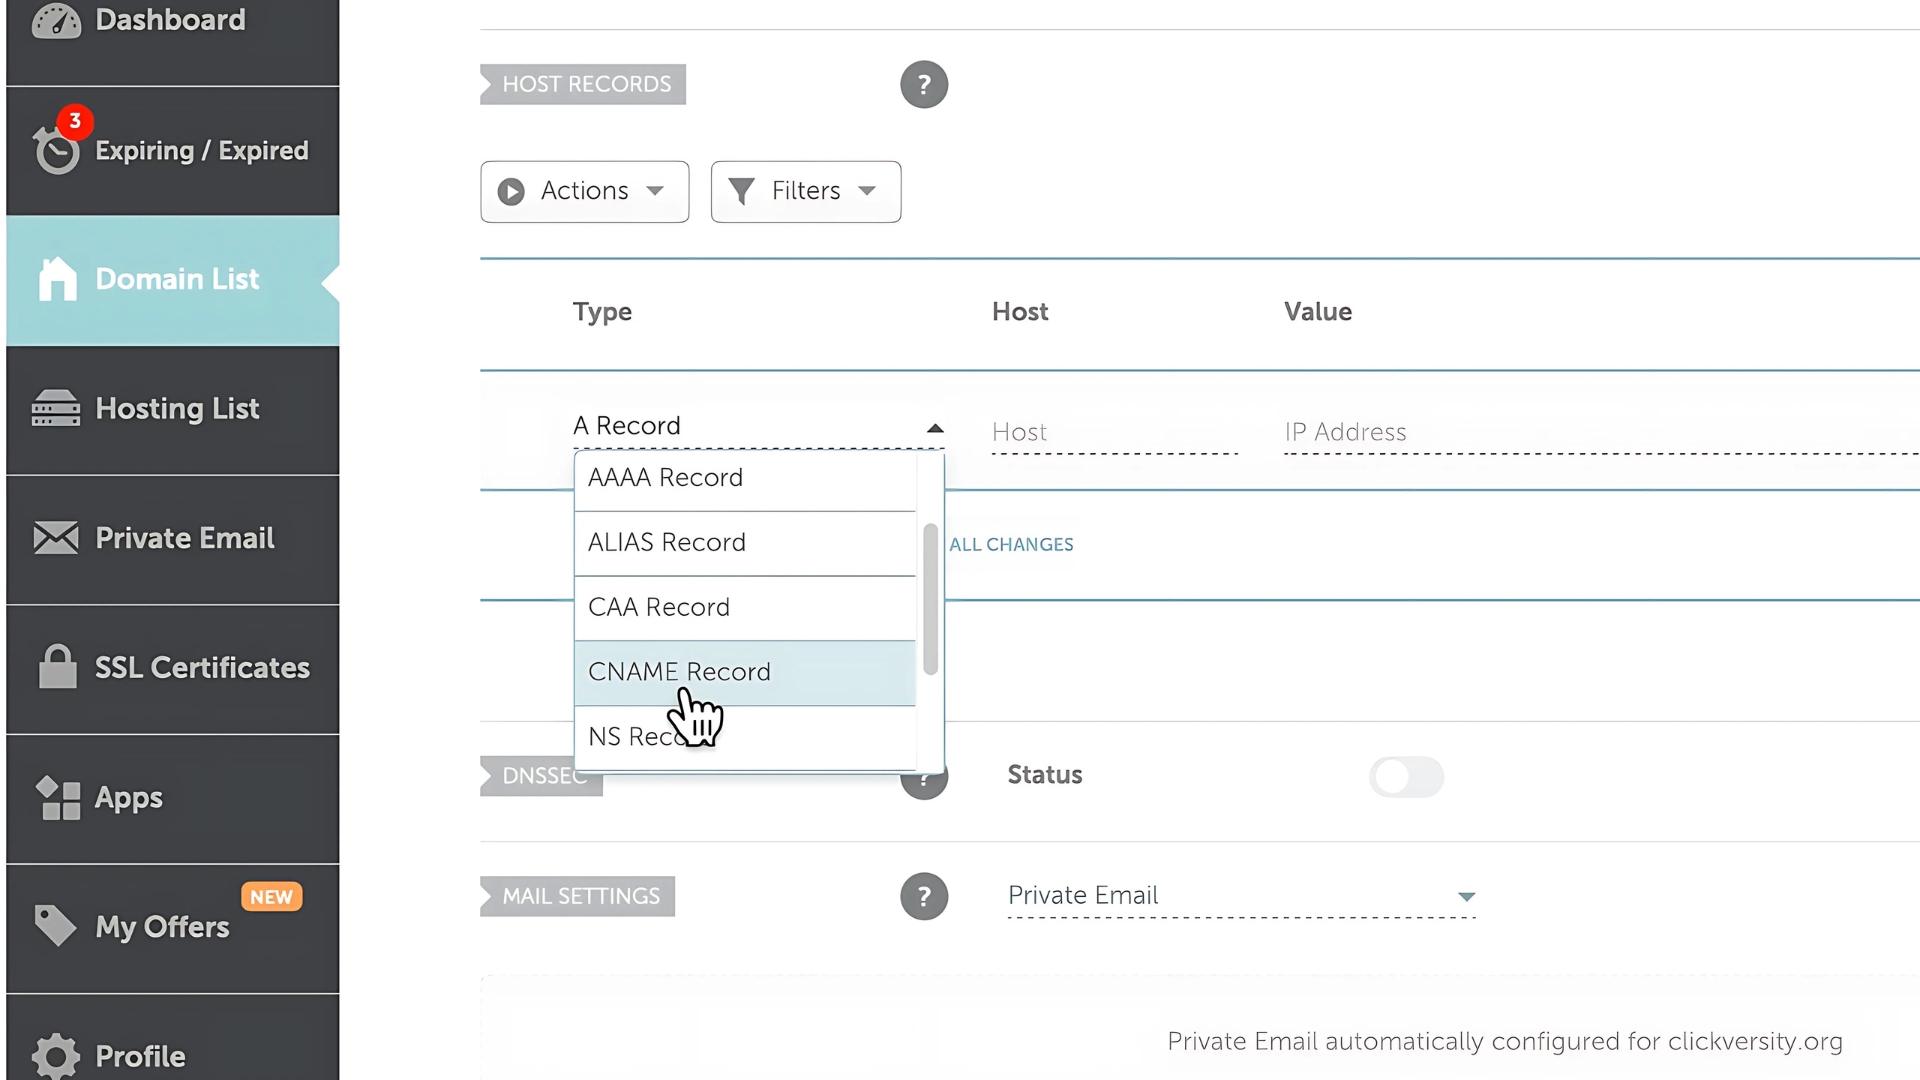
Now you’ll enter two CNAME records from Systeme.io.
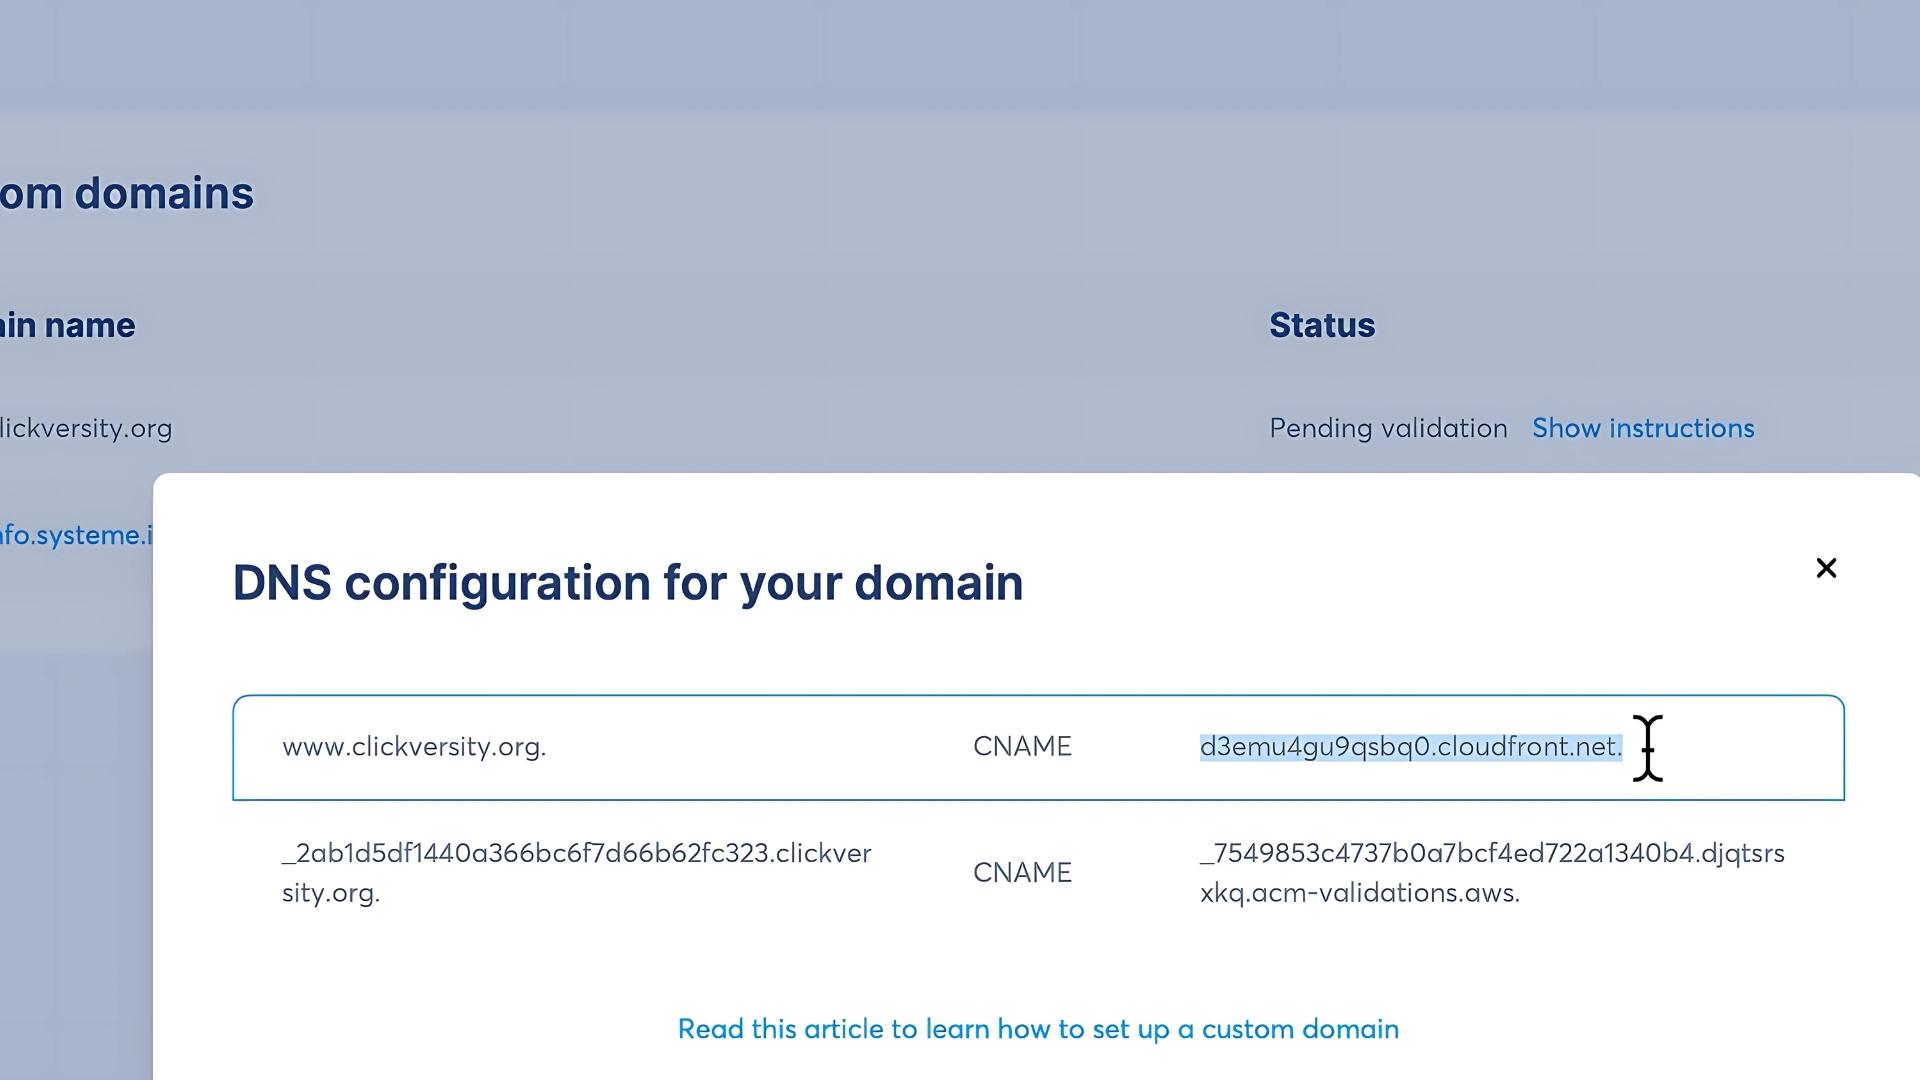
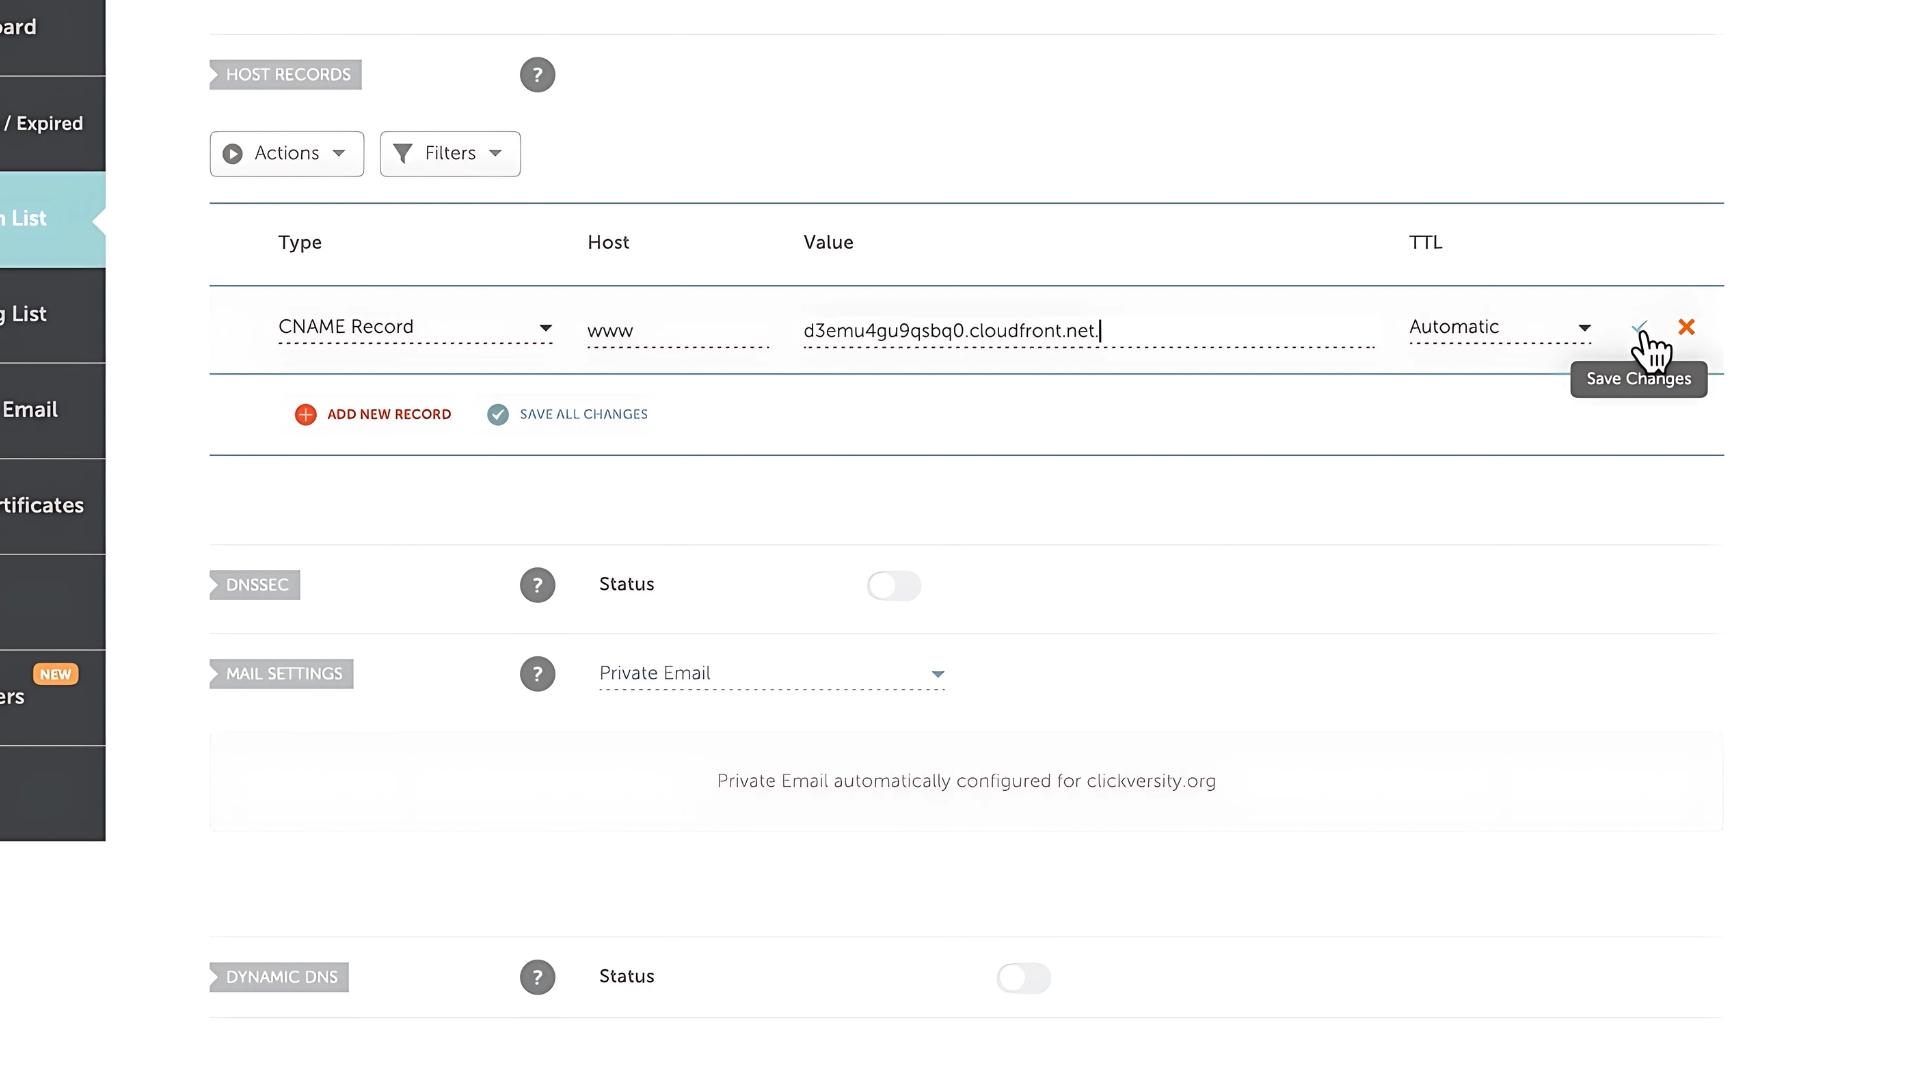
First CNAME Record:
- Host: www
- Value: (copy the value from Systeme.io)
- TTL: Leave it as Automatic
- Click Save Changes
Second CNAME Record:
- Host: (Systeme.io will provide it)
- Value: (copy it from Systeme.io)
- TTL: Leave it as Automatic
- Click Save Changes again
And that’s it — DNS setup complete.
To make sure you’re pasting the right values into the correct CNAME records, you can check the video above.
Step 4 – Wait for Domain Validation
Now it’s just a waiting game.
- Go back to Systeme.io > Settings > Custom Domains
- Check the Status next to your domain — it will say Pending Validation at first
- Wait up to 48 hours for it to be validated (though it usually happens within a few hours)
- Once validated, the status will say Validated or Ready, and you’re good to go
Step 5 – Set Your Domain as Default in Systeme.io
Once your domain is validated, you can make it the default domain for all your funnels and pages.
- Click the three dots next to your domain
- Select Set as Default
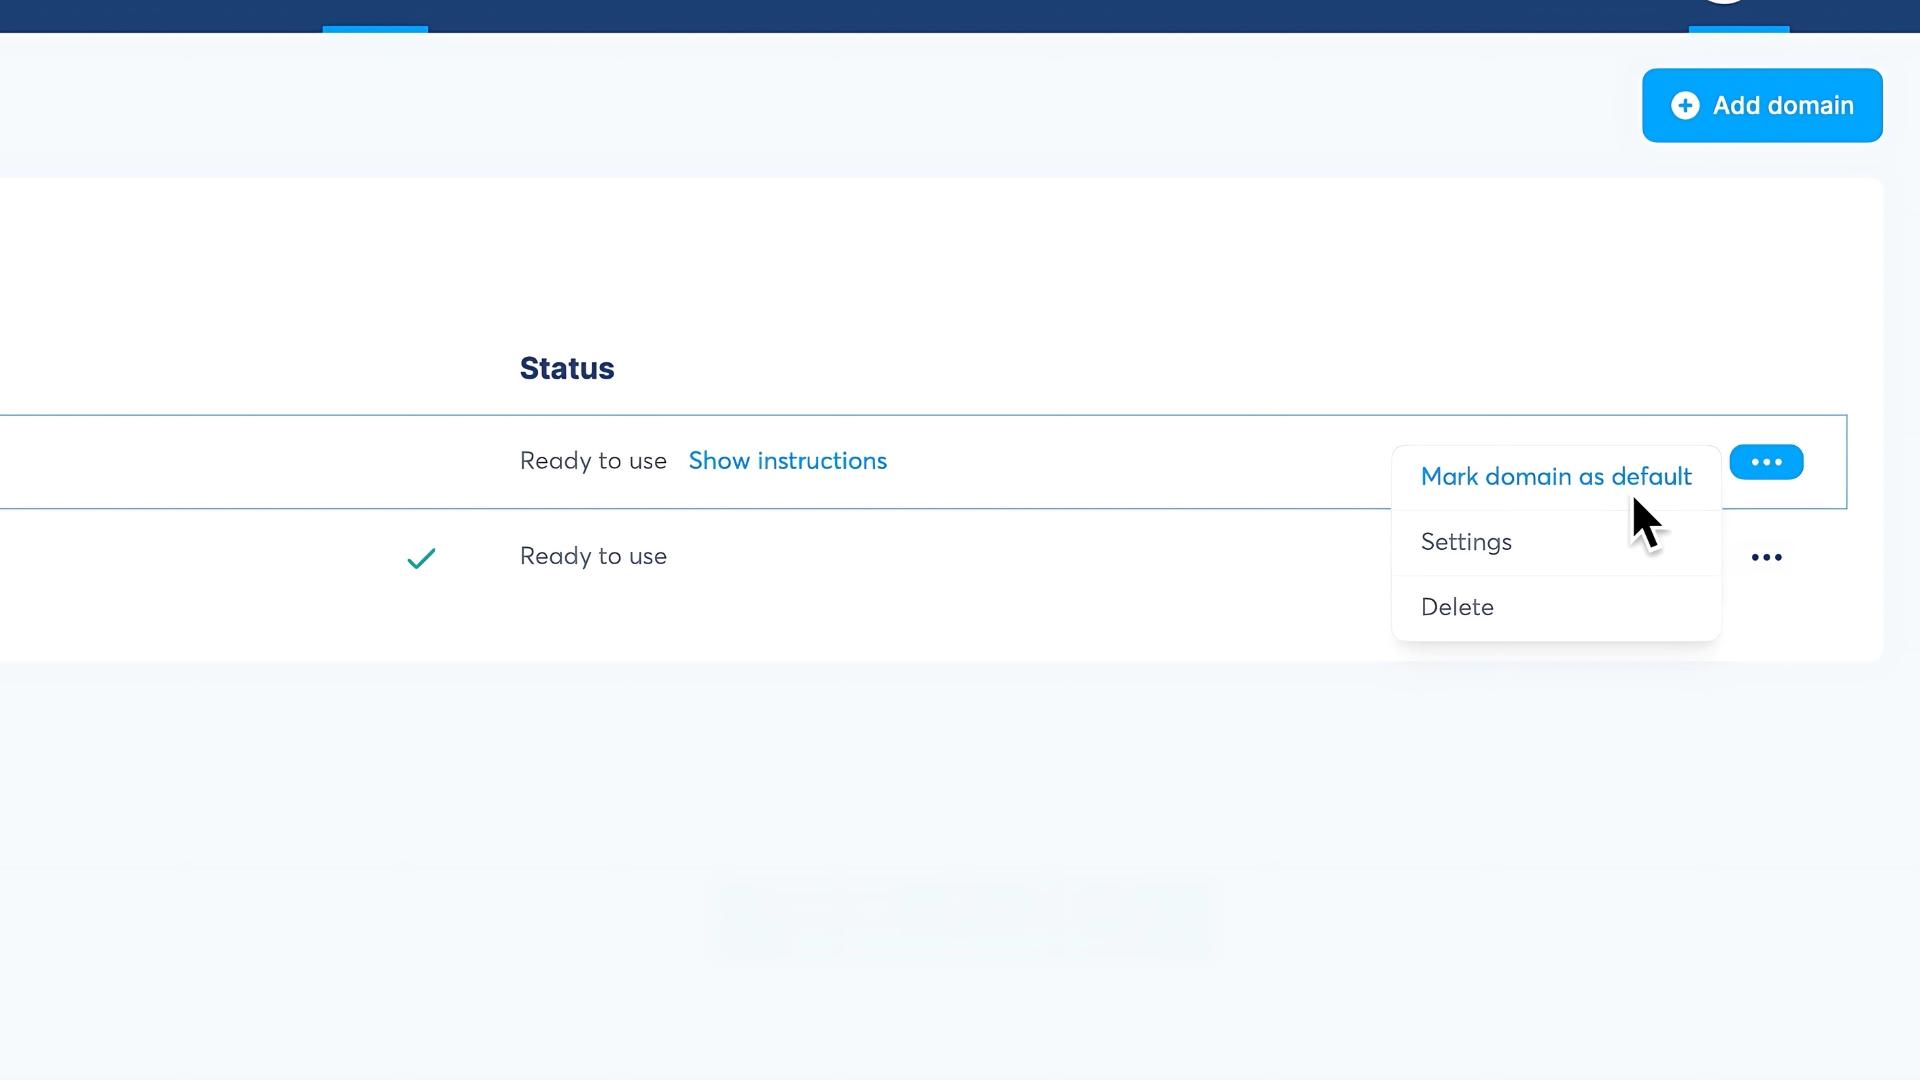
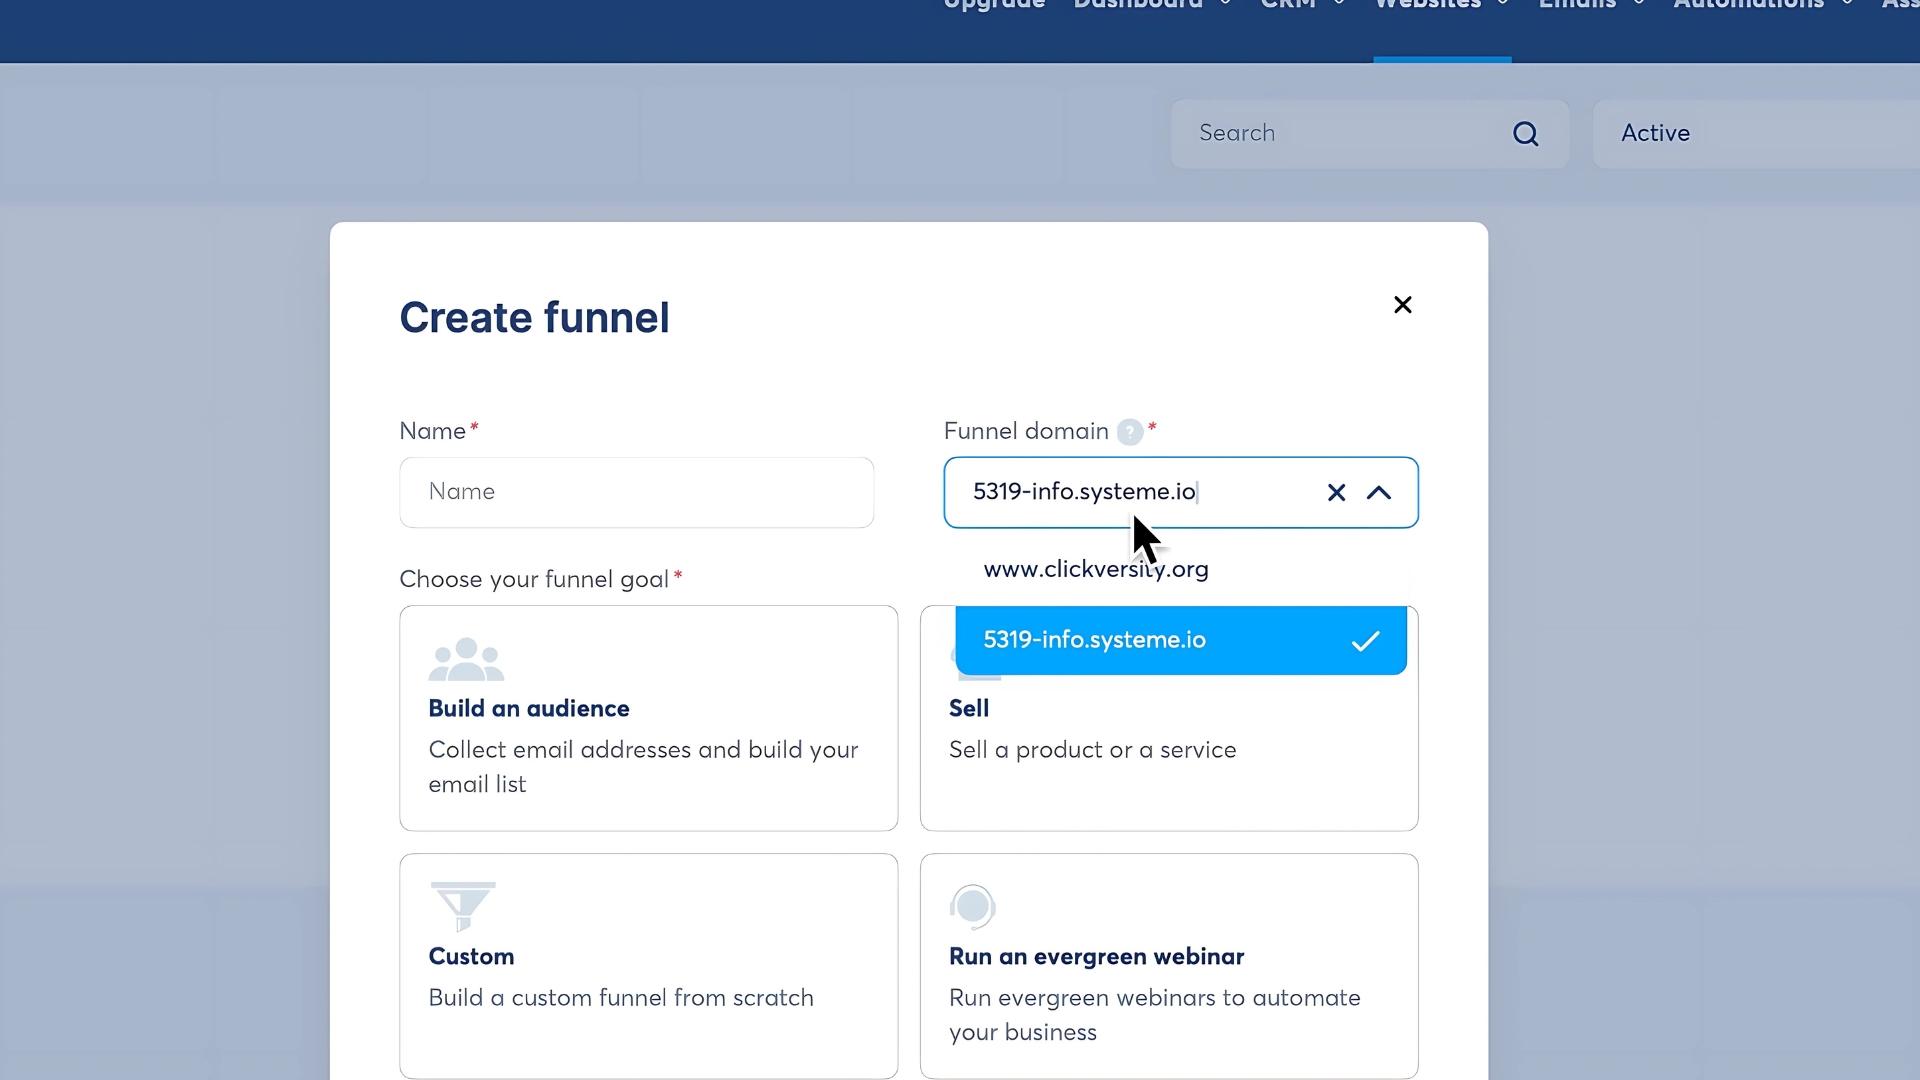
Now, when you create new funnels or websites, your domain will show up as an option under Funnel Domain.
Just click it when creating new pages, and everything will work under your own brand name.
Conclusion
And that’s it — your custom domain is now live and connected to Systeme.io! 🎉
Now your funnels and website look professional — and the cost is like $10 a year!
Your business is now more trustworthy, and honestly, more likely to stick around because you put some effort (and a few bucks) into it.
If you found this guide helpful, consider sharing it or subscribing to my YouTube channel for more step-by-step tutorials like this.
Thanks for reading, and enjoy your newly branded Systeme.io setup!


