
So you’ve been making Canva designs and someone told you — hey, you could sell those.
And you could. Canva templates are genuinely one of the easiest digital products to create and sell online.
But then you Google where to sell them.
Etsy. Gumroad. Payhip. Everyone recommends the same platforms.
And sure, they work. But they all take a cut. Etsy stacks three different fees on top of each other. Gumroad takes 10% of every sale. And the bigger platforms like Kajabi or Podia? Those start at $89 a month — and that’s with a discount.
What if you could skip all of that?
Your own sales page. Your own checkout. Zero fees. You keep everything.
That’s what I’ll show you in this guide. And the whole thing costs nothing.
Table of Contents
What you need to make this work:
One — a Canva template to sell. We’ll create this first.
Two — a sales funnel to sell it through. We’ll build this in Systeme.io.
That’s it. Let’s go.
Step 1 — Create your Canva template
Go to canva.com and log in. If you don’t have an account, create one — it’s free.
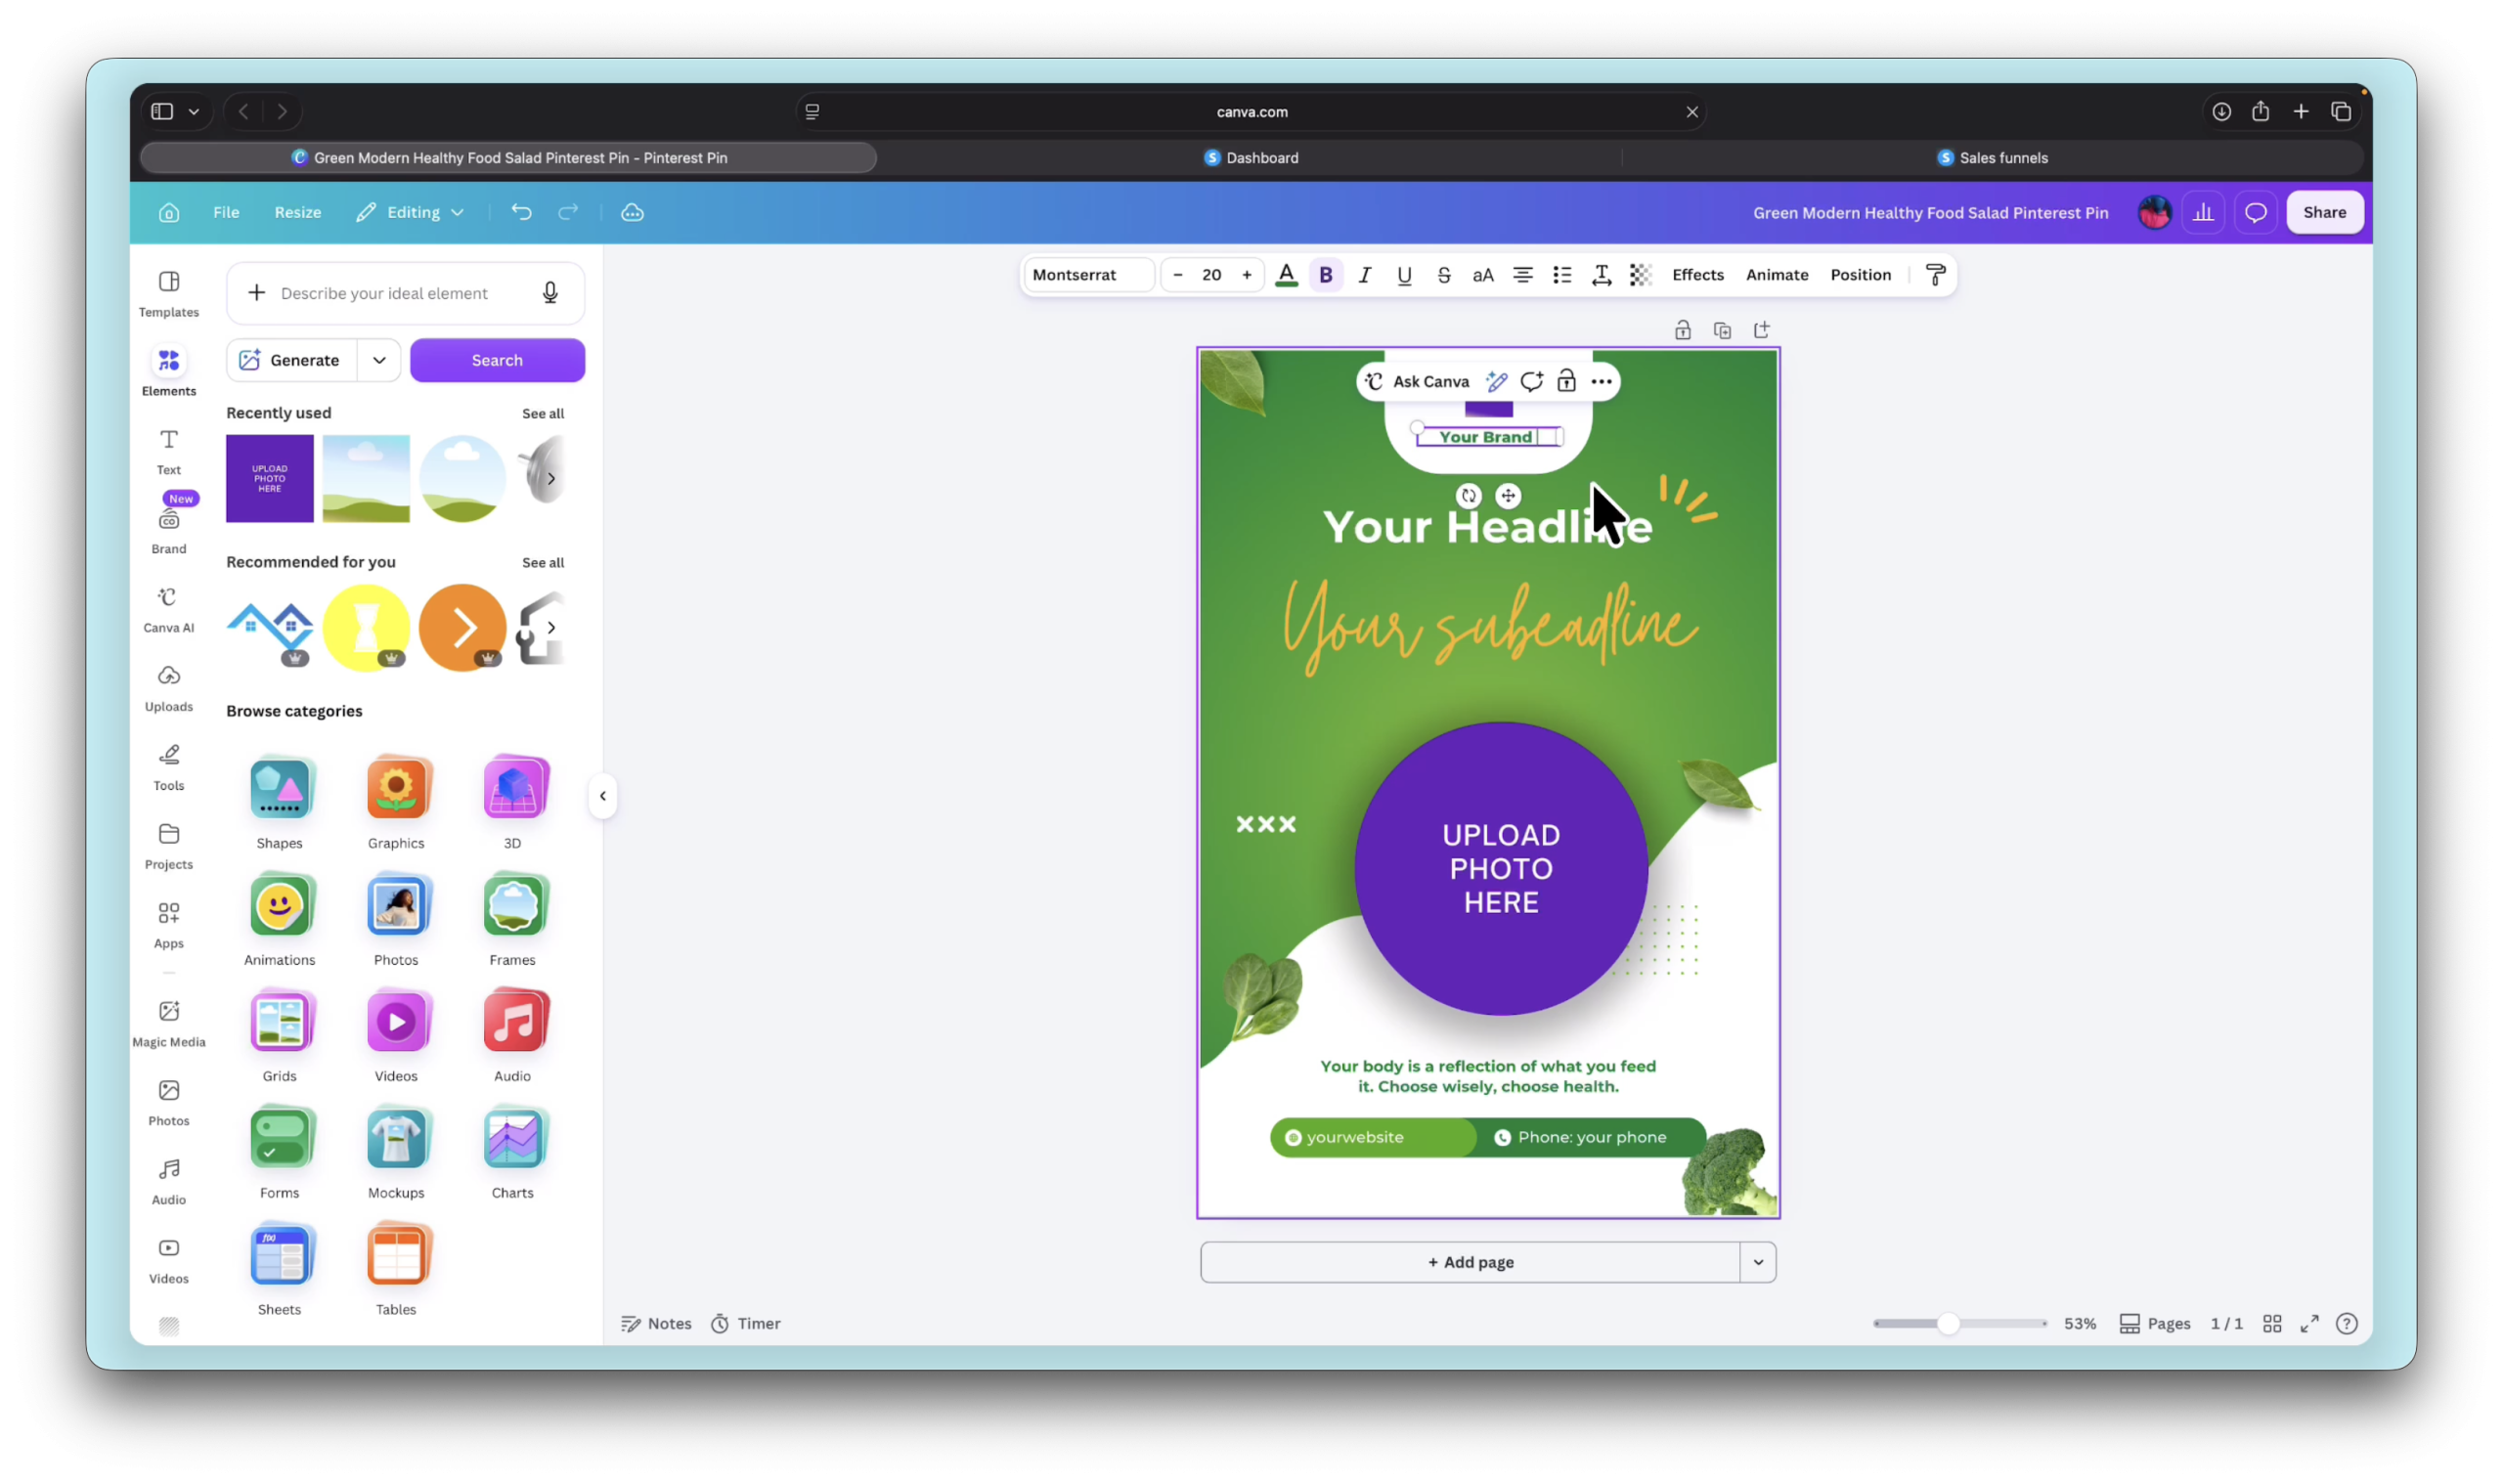
Go to Templates and search for whatever type of template you want to sell. Pinterest pins, Instagram posts, media kits, presentation slides — anything works.
Find something you like, open it, and start making it your own. Replace the specific content with placeholder text so buyers know where to add their own stuff.
Things like:
- “Your headline here”
- “Your sub-headline”
- “Upload your photo here”
- “Your brand name”
Use frame elements for image placeholders — they let buyers drag and drop their own photos and get them cropped automatically. Clean and professional.
Don’t overthink the design. If you can make something useful and good looking, people will buy it.
Step 2 — Get the right sharing link (most people get this wrong)
This is probably the most important step in the whole guide.
When your template is ready, most people click Share and copy that link.
Don’t do that.
If you share that link with buyers, they’ll all end up working on the same project — your original. If 10 people buy and you send them that link, they’re all editing the same thing at the same time. It’s a mess.
What you need instead is a Template Link.
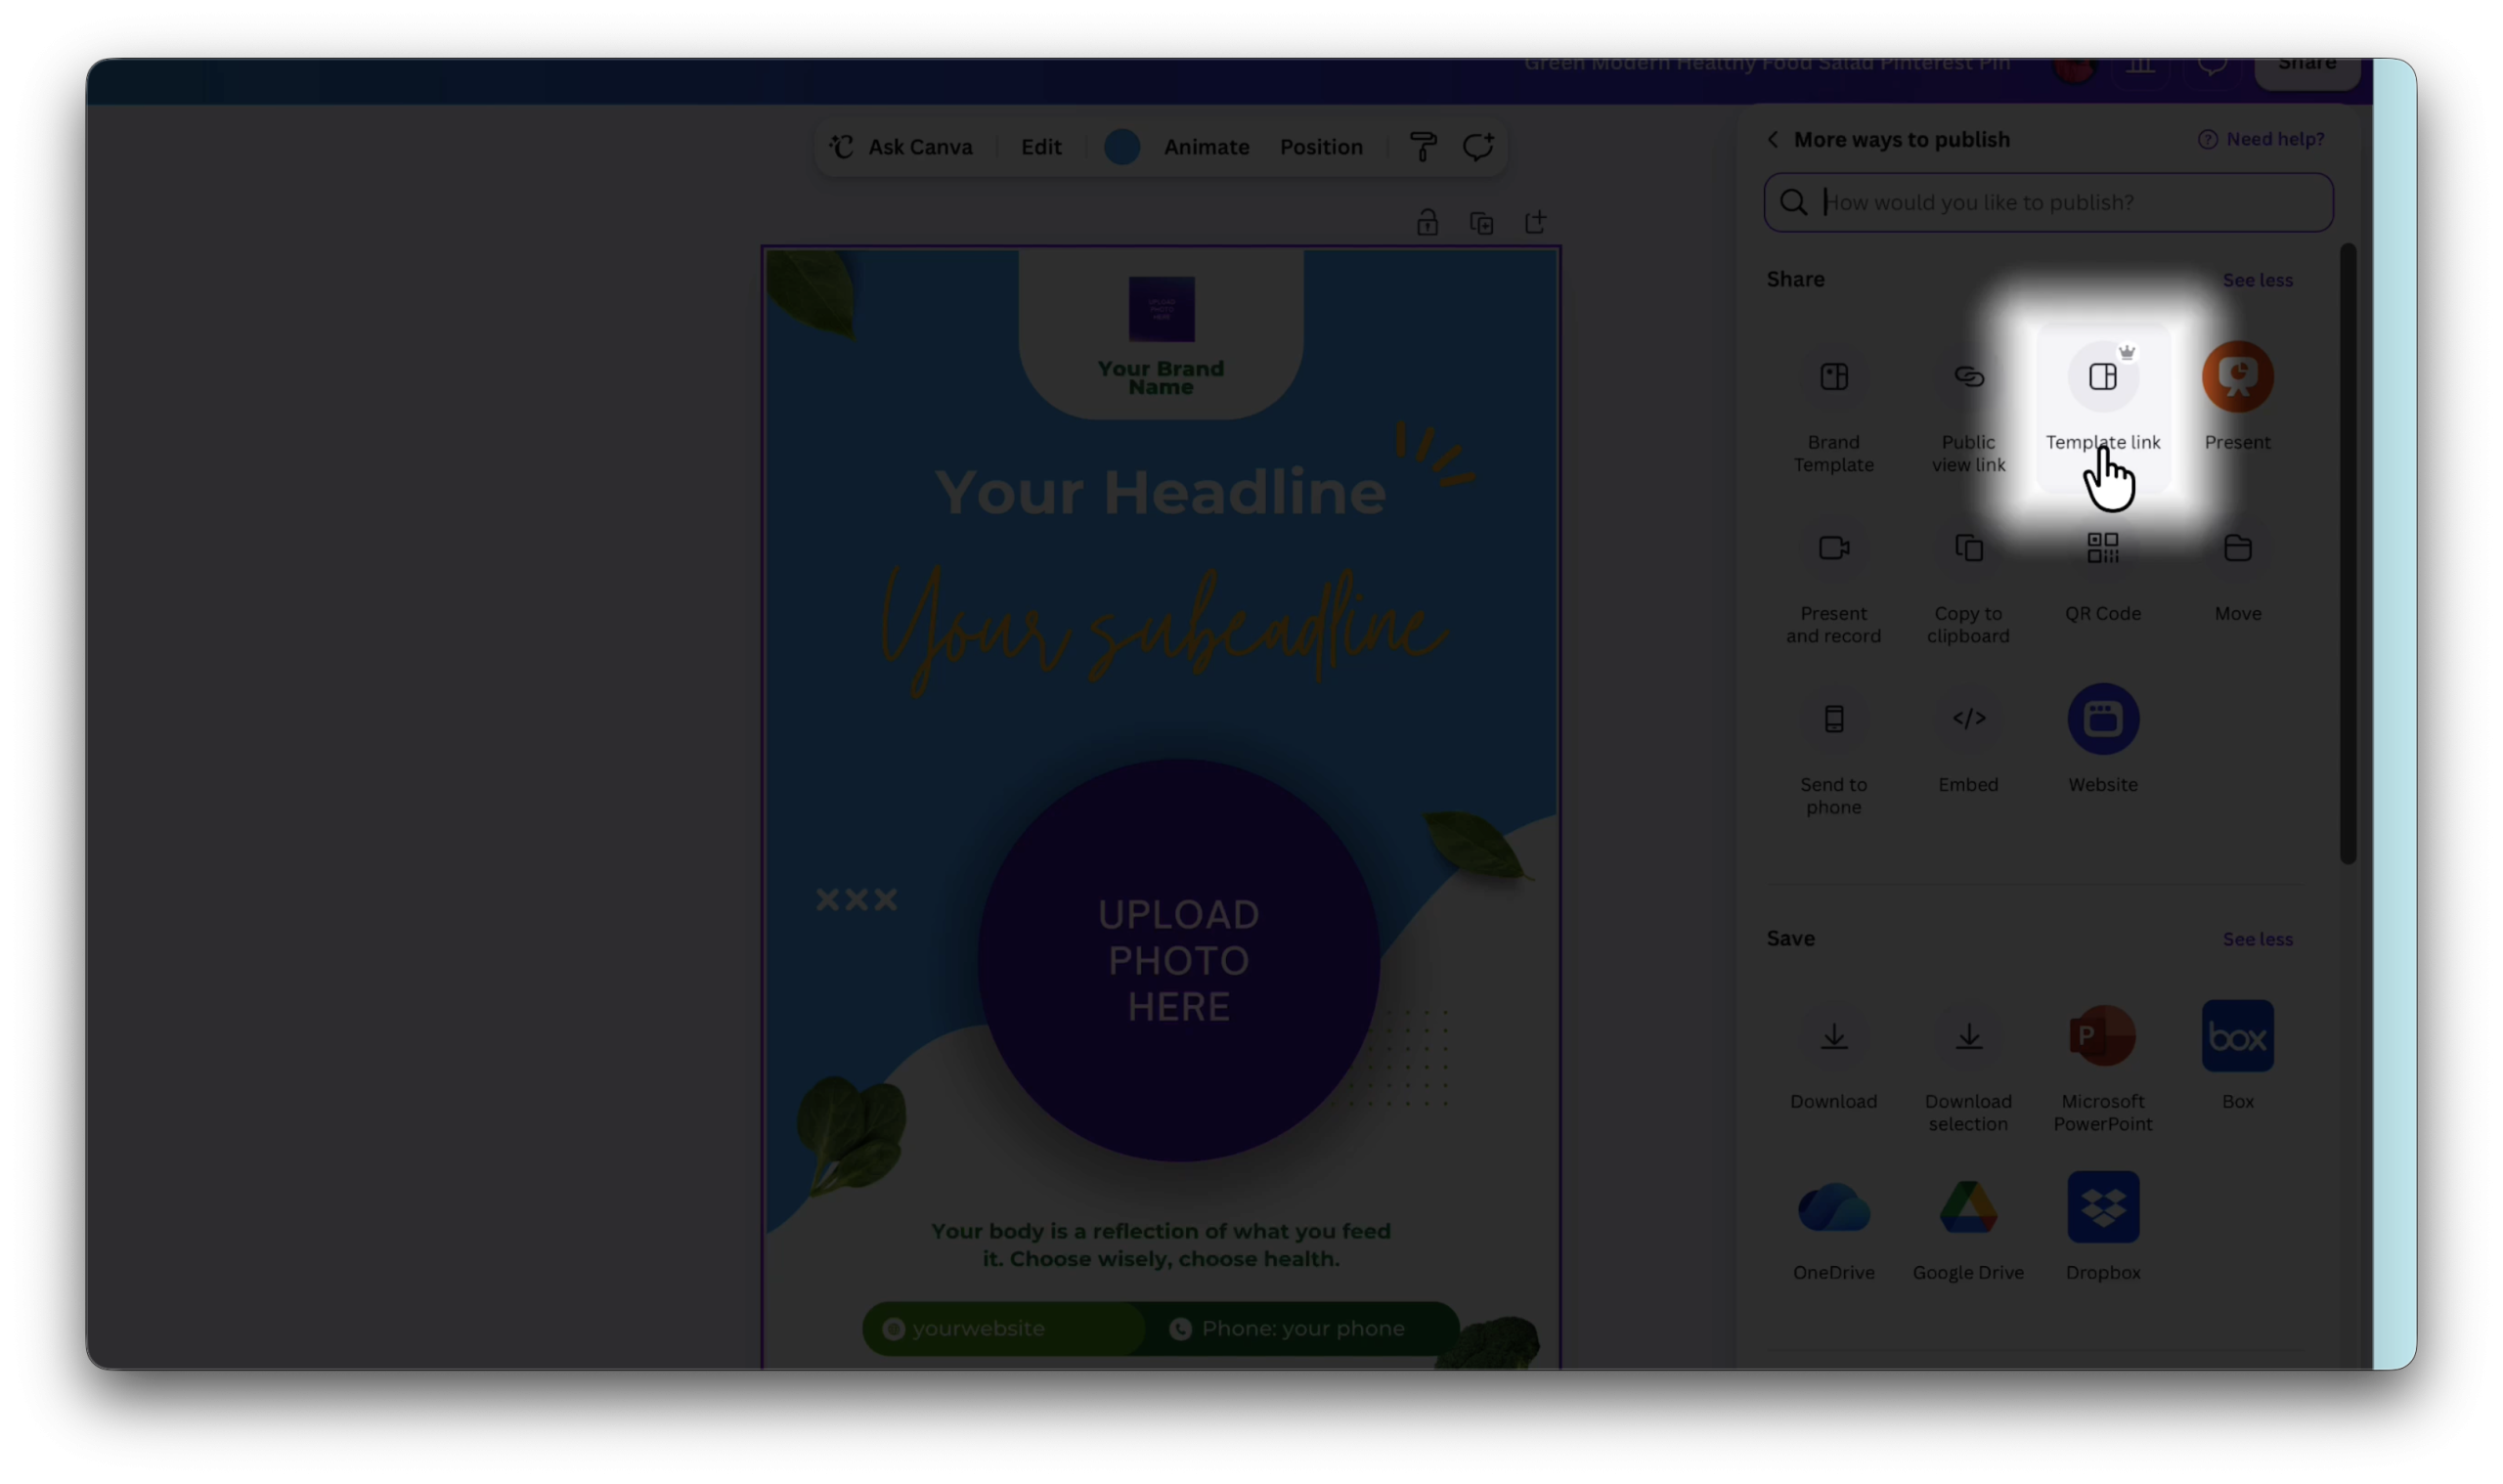
Click Share → then click See All → and look for Template Link.
Click Create a Template Link, copy it, and test it in a new browser tab. You should see a screen saying something like “A template was shared with you — Start designing now.” That’s exactly what your buyers will see.
That’s the link you’ll use to deliver the product.
💡 Canva Pro required for template links: The Template Link feature is only available on Canva Pro. But Canva gives you a 30-day free trial — and if you make even one sale in that period, you’re already covered. After that it’s worth keeping if templates become a regular income stream.
Save that template link somewhere. You’ll need it later when setting up the thank you page.
Now let’s build the funnel.
Step 3 — Build your sales funnel in Systeme.io
For the funnel we’ll use Systeme.io.
It handles everything — sales page, checkout, payment processing, product delivery — all in one place. And the free plan is actually free. Not a trial. Not free-but-limited. Just free, forever.
Systeme.io — sales pages, checkout, payments, and product delivery all in one place. Free plan, no credit card, no catch. Create your free account here →
Go to Sites → Sales Funnels → Create.
Name your funnel — something like “Canva Template Funnel” works fine. Choose your domain (Systeme.io’s free domain is totally fine to start with), set the goal to Sell, and click Save.
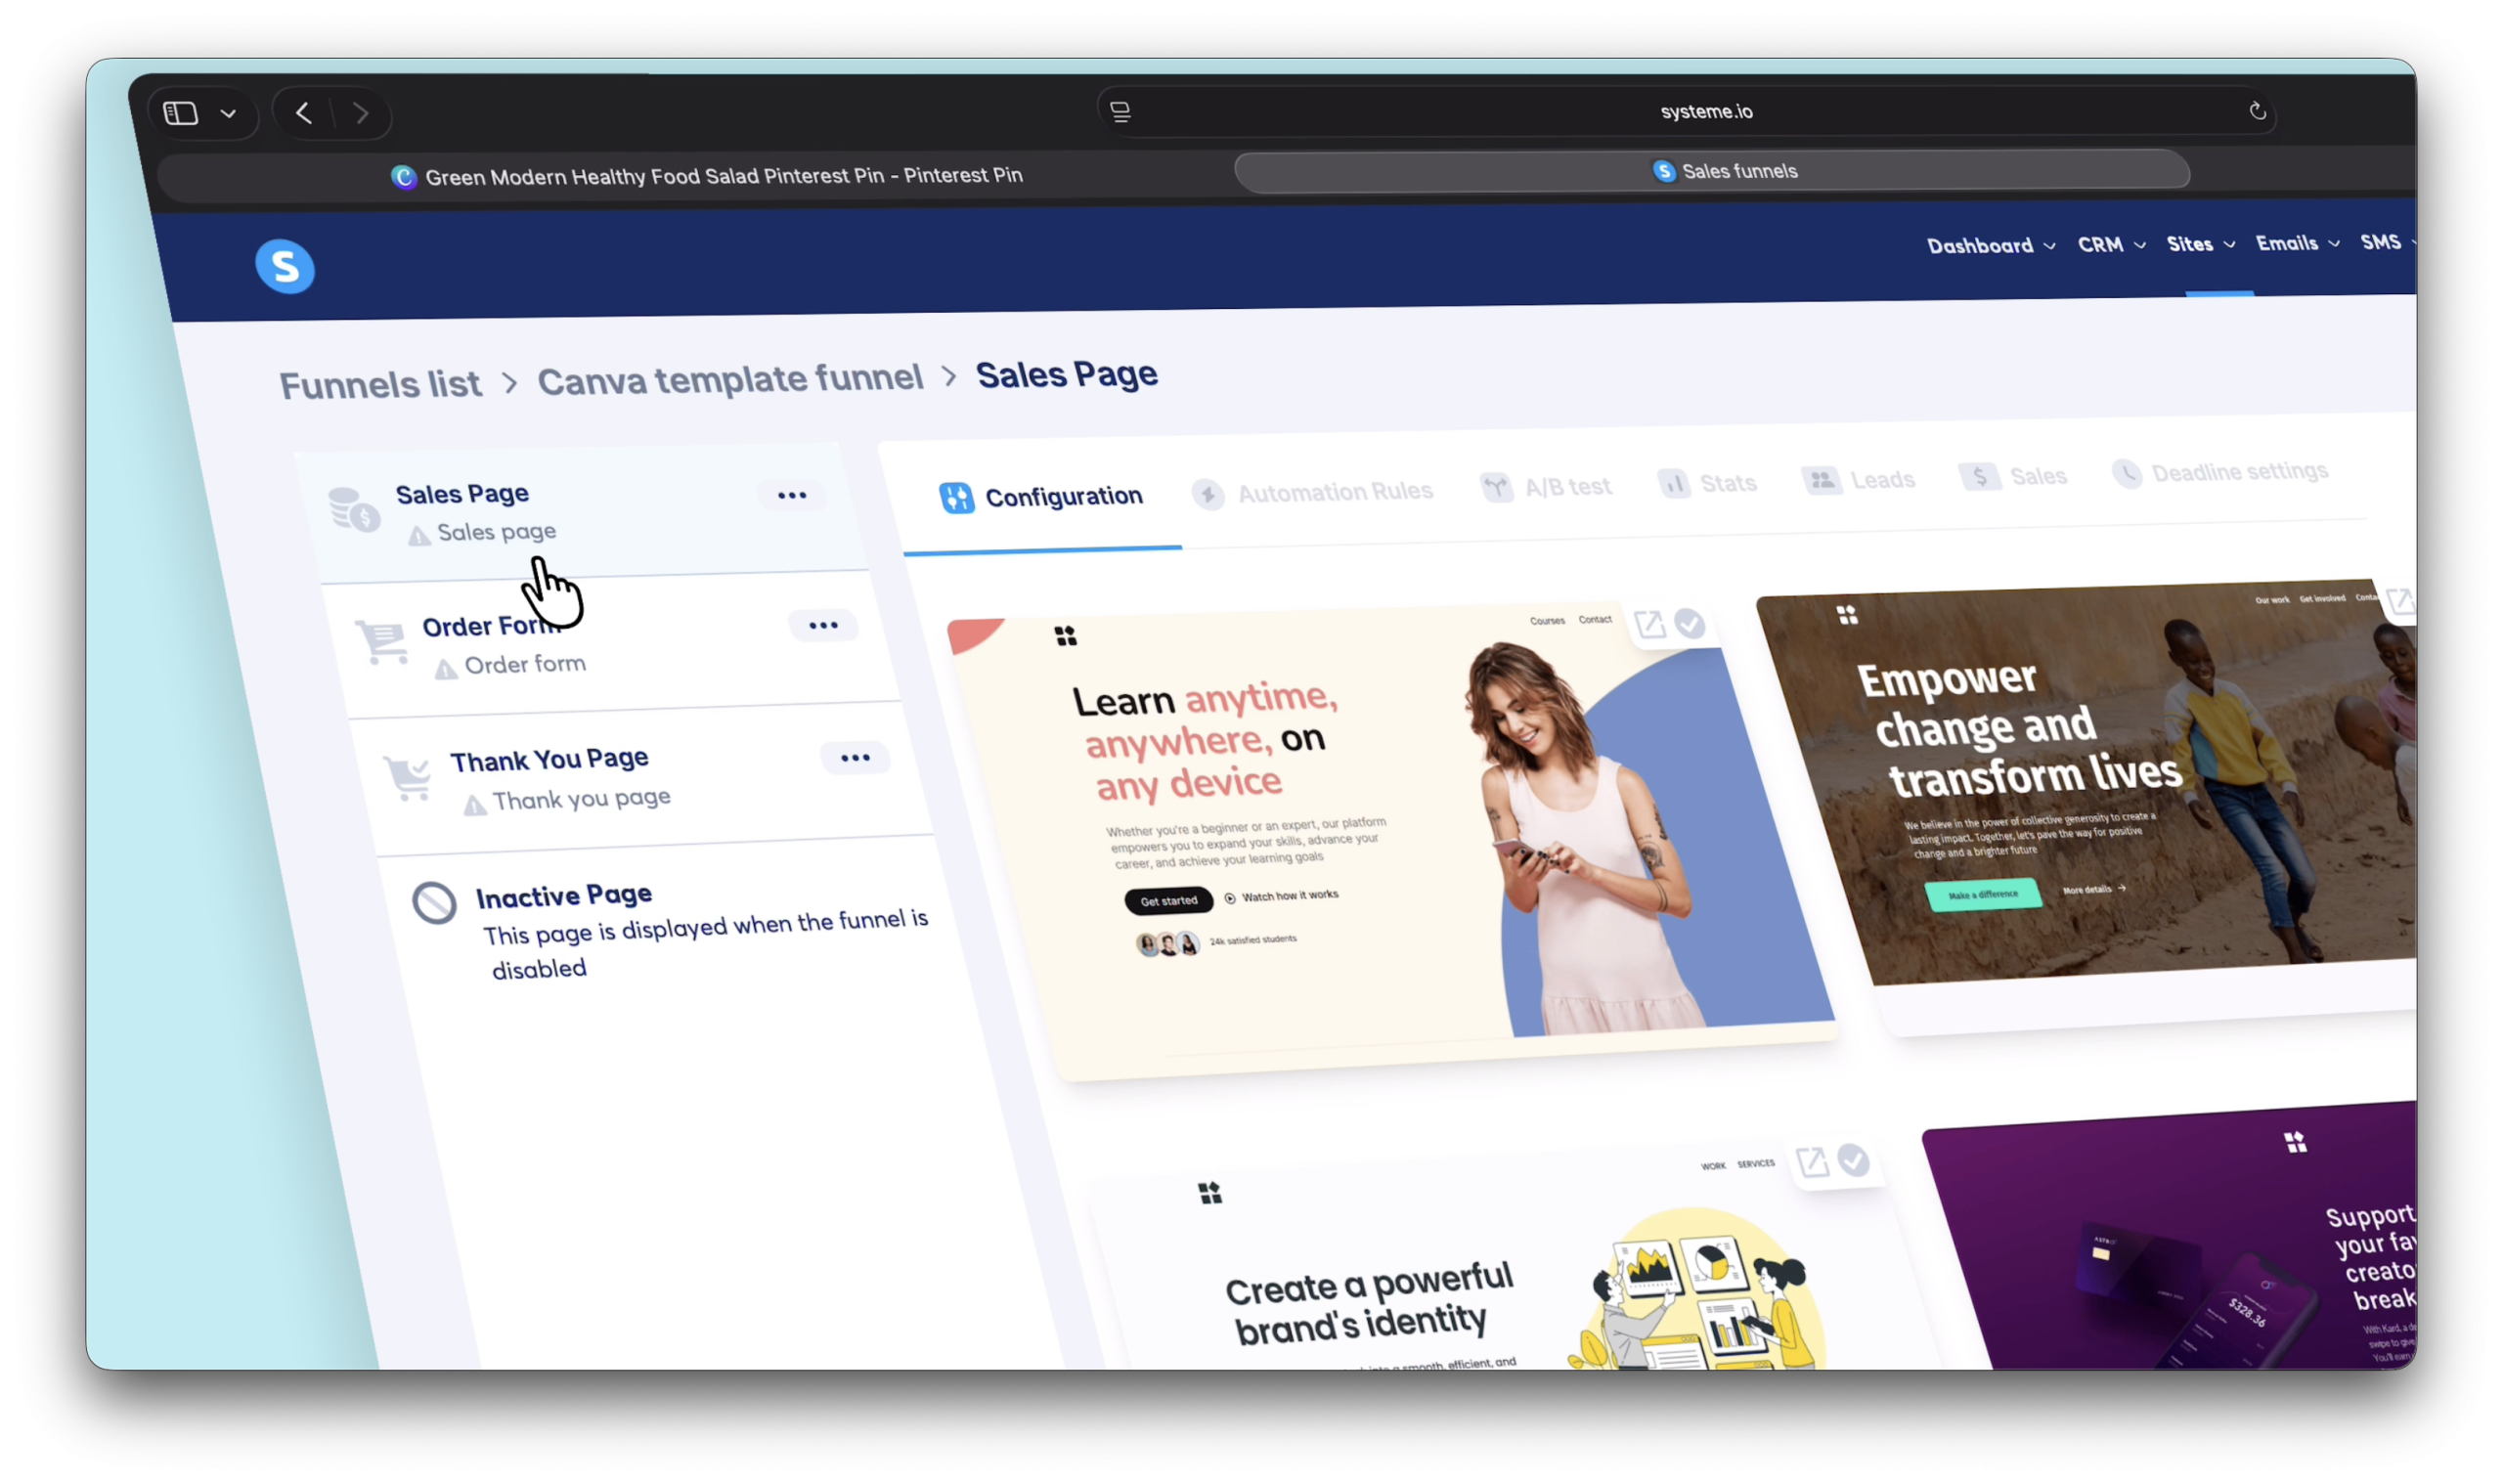
You’ll see two steps in the left sidebar — Order Form and Thank You Page.
We need to add one more — a Sales Page. This is the first thing buyers see. Without it you’re sending people straight to a checkout with no context, and that doesn’t convert well.
Click Add Step → name it Sales Page → set the type to Sales Page → Save.
Now drag the Sales Page to the top so the order is:
Sales Page → Order Form → Thank You Page
Setting up the sales page
Click on the Sales Page step and pick a template. Scroll through the options and find something clean that fits your product vibe.
Update the URL slug to something readable — like /canva-template or /pinterest-template. Then hit Edit Page.
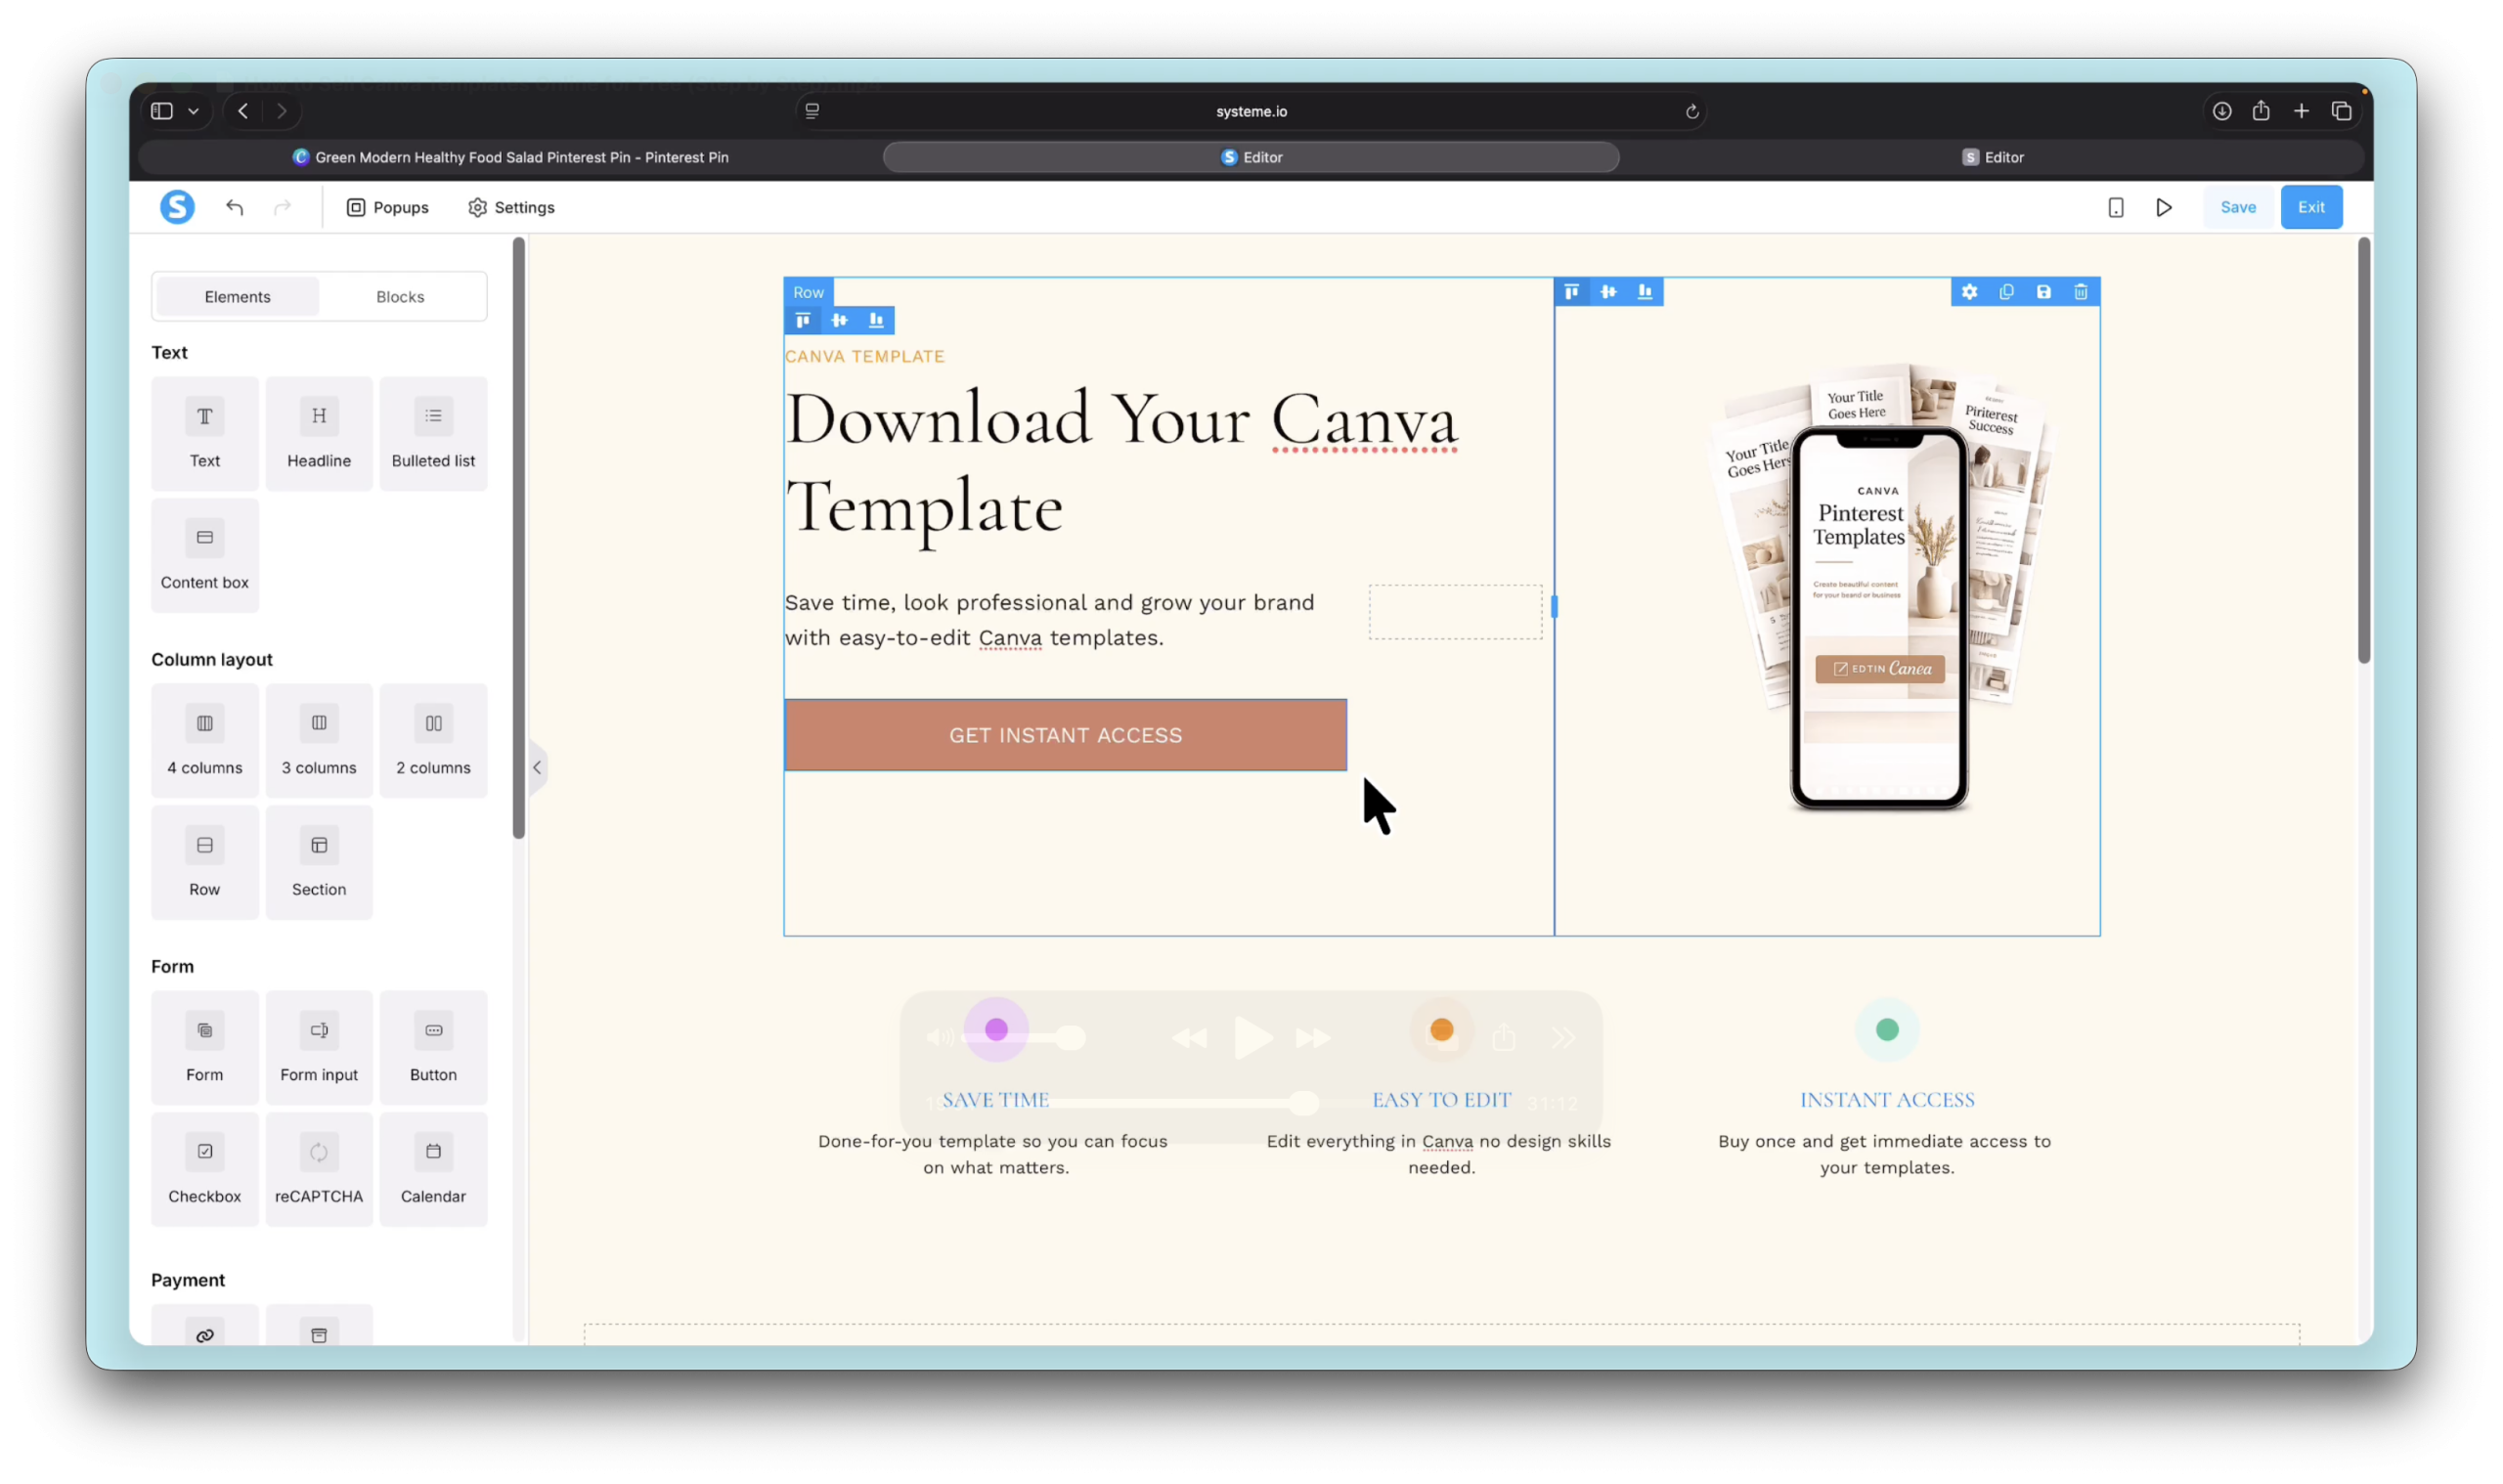
A few things to focus on in the editor:
Change the headline to something benefit-driven. Not “Pinterest Pin Canva Template” — something like “Save time and look professional with ready-to-edit Pinterest templates.” Tell people the result, not just what it is.
Replace the product image with a preview of your actual template.
Make sure your Buy button is set to go to the next step — that’s how buyers get taken to the order form. Check this before saving.
Save and exit.
Setting up the order form
Click on Order Form, pick a template that visually matches your sales page — similar colors, similar feel. You want all three pages to look connected.
Update the URL to something like /checkout.
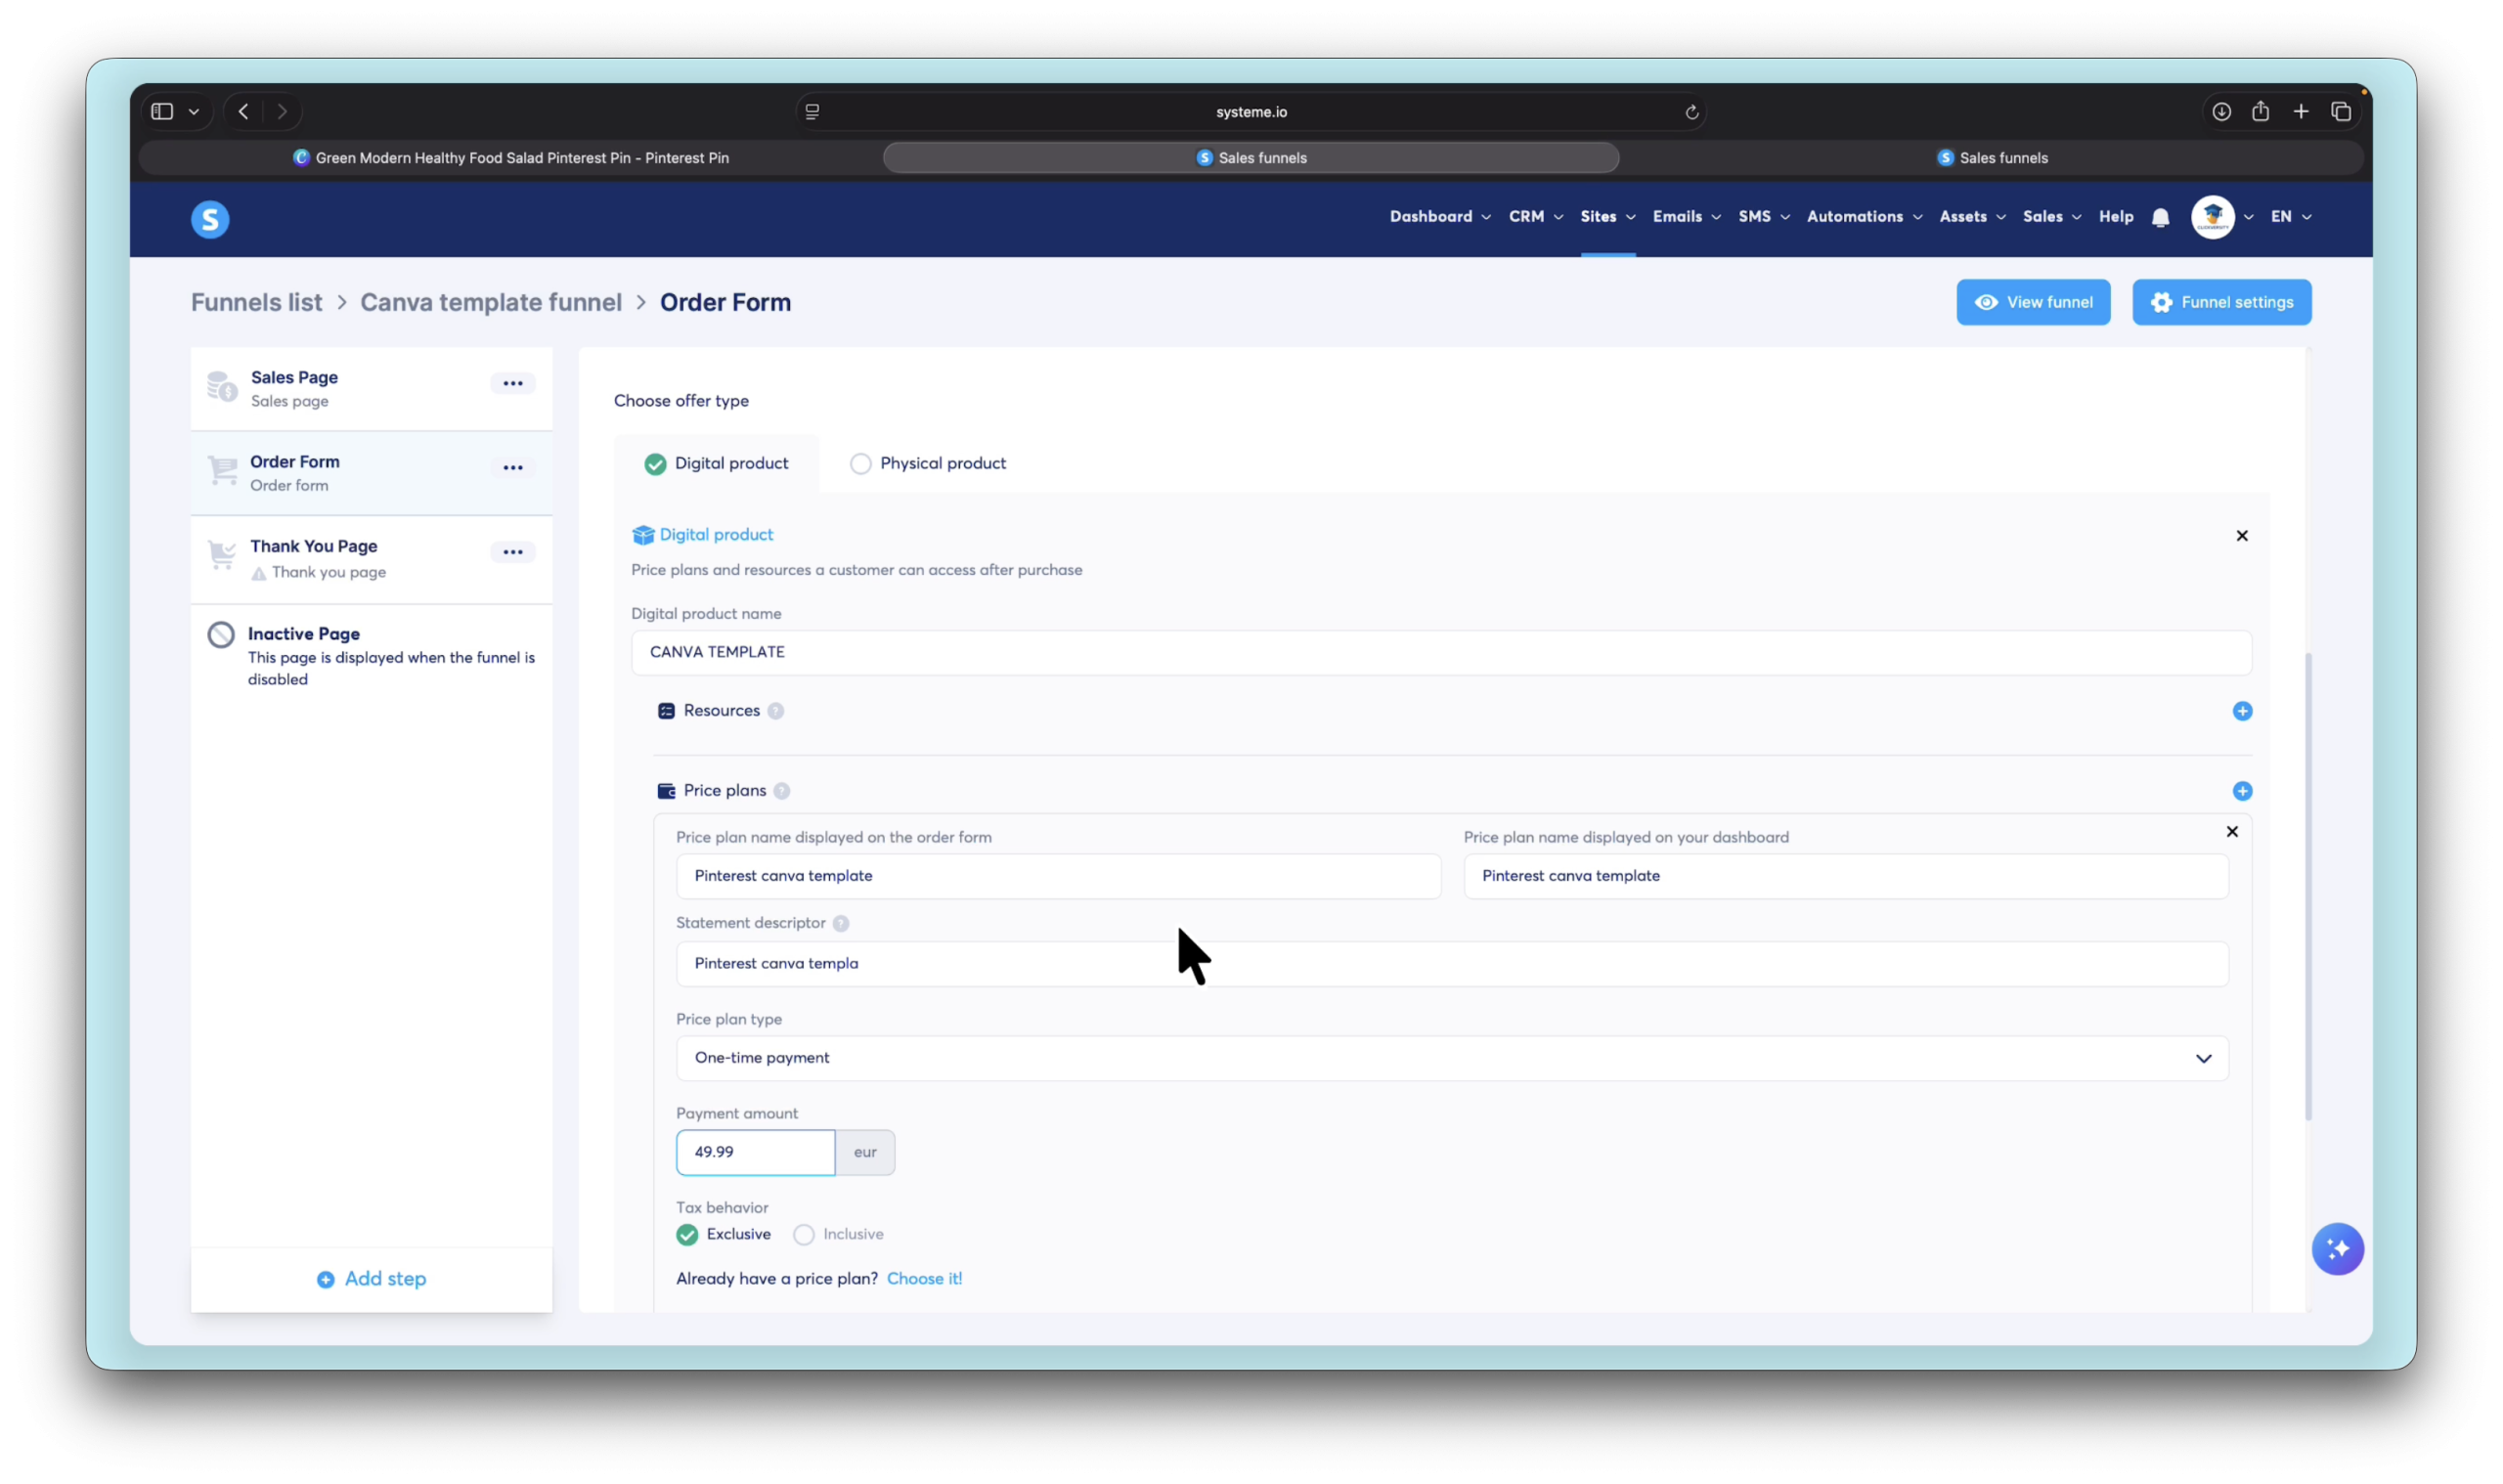
Before touching the design — scroll down and set up your product.
Select Digital Product, name it (e.g. “Pinterest Canva Template”), and add a price plan. For a template, One-Time Payment is what you want. Set your price — $19, $49, whatever feels right for your market — and save.
Now click Edit Page to customise the design.
For the form fields — keep it to first name, last name, and email only. Delete phone number, company name, anything extra. Every unnecessary field is a reason for someone to abandon the checkout.
Save and exit.
Setting up the thank you page
Last one.
Click the Thank You Page step and pick a template that matches your other two pages. Same vibe, same colors. Keep it consistent.
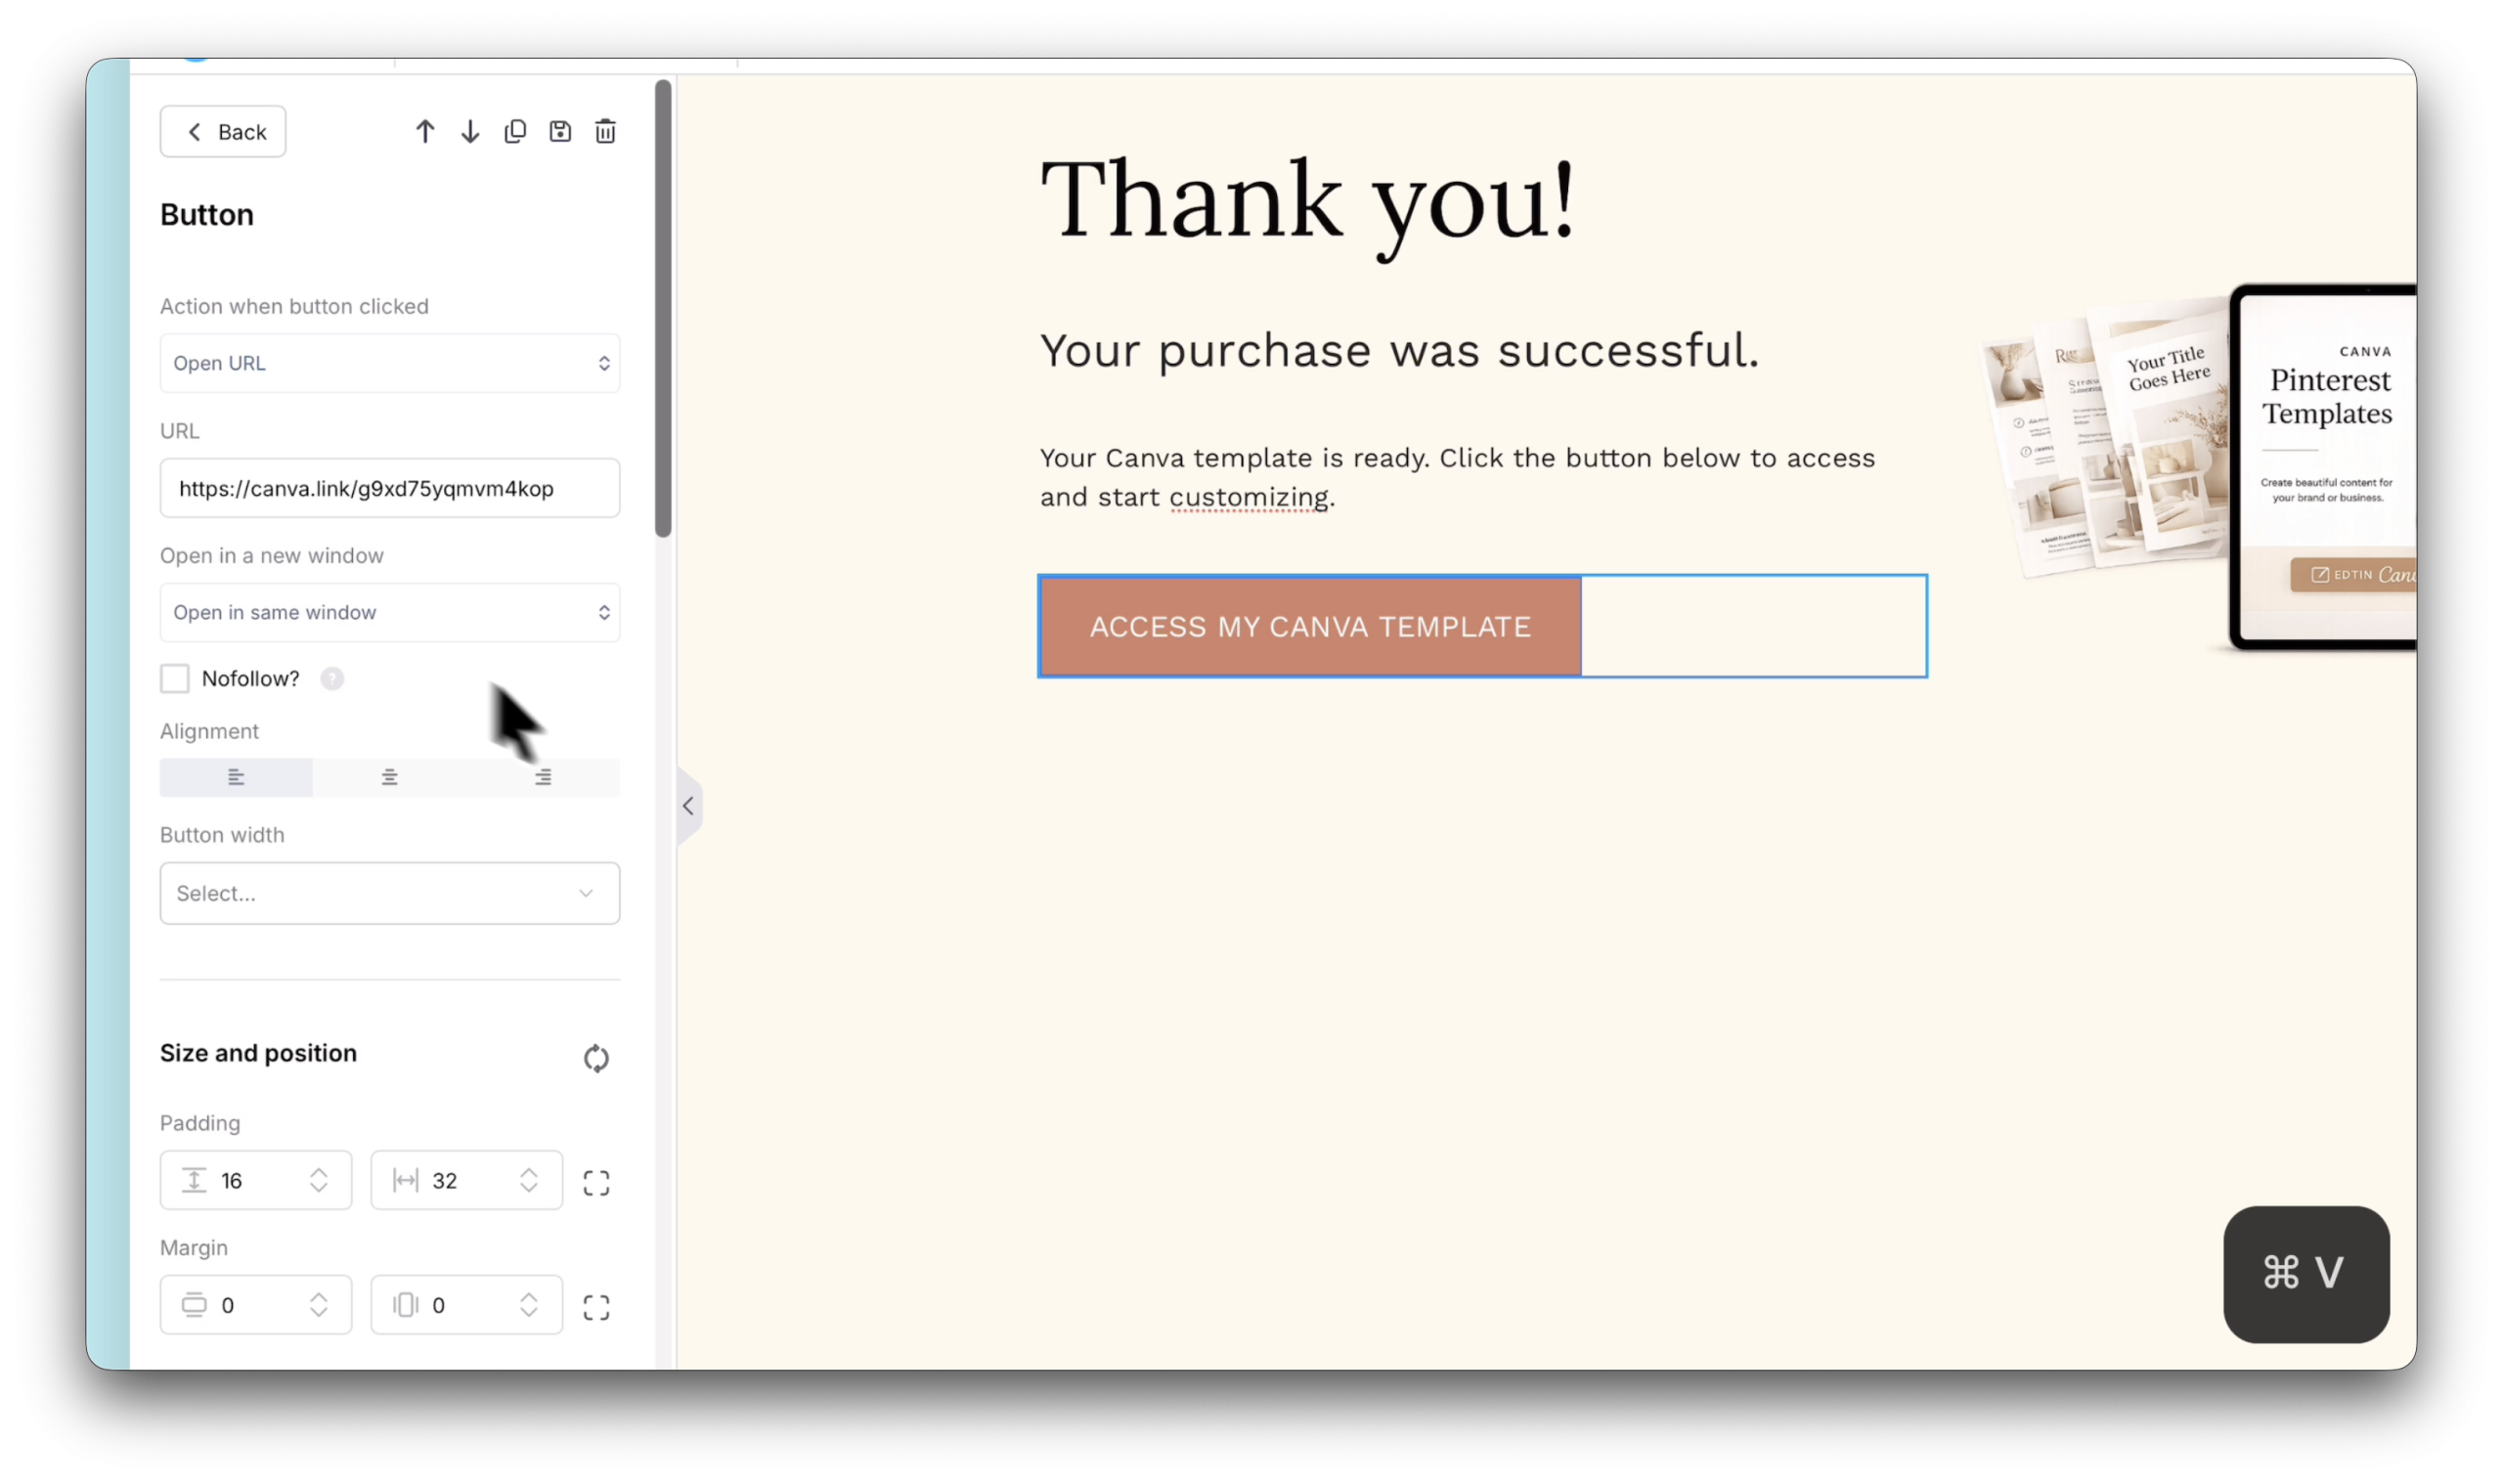
Update the URL to /thankyou and hit Edit Page.
Change the headline to something short and warm — “Your purchase was successful” or “You’re in — here’s your template.”
Now add a button that gives buyers access to the template.
Click the button → set the action to Open URL → paste your Canva Template Link here.
That’s it. When someone lands on this page after buying, they click the button and they’re taken straight into Canva to start using the template.
Save and exit.
Testing everything before going live
Don’t skip this.
Go back to the funnel overview and click View Funnel.
Read through the sales page like a first-time visitor. Does it make sense? Is the buy button easy to find? Click it and check the order form loads.
To test checkout without charging yourself — go back to the Order Form settings and add a coupon. Something like TEST100, set it to 100% discount. Save it.
Now fill in the order form, apply the coupon, and click Buy.
You should land on the thank you page. Click the template button and make sure it opens the right Canva template link.
If it works — you’re done.
That’s the whole thing.
Canva template → template link → three-page funnel → automated delivery.
No Etsy. No Gumroad. No monthly platform fees. You keep every dollar.
The setup takes maybe 30–45 minutes the first time. Once you’ve done it once, the second template takes half that.
And if you don’t want to build all of this from scratch — I’ve got a free funnel template ready to import directly into your Systeme.io account — grab it using the button below.
Don’t want to set all of this up from scratch? I built the exact funnel from this tutorial as a free template. One click and it imports directly into your Systeme.io account — ready to customize with your own template and price.
Get the Free Funnel Template →Free · Imports in one click · No Systeme.io account needed to grab it
Create your free Systeme.io account and build your Canva template sales funnel today. No monthly fees, no percentage cuts — you keep everything you make.
Start for Free with Systeme.io →Free forever · No credit card required · Full sales funnel included