
So someone just opted into your funnel.
They filled in their name and email, clicked the button — and now what?
If you don’t have automation set up, the answer is… nothing. They just sit there in your dashboard and never hear from you.
That’s a problem.
In this guide I’ll show you how to set up email automation in Systeme.io so that the moment someone opts in, they automatically receive your lead magnet, welcome email, or whatever you want to send them — without you doing anything manually.
Table of Contents
Here’s how the whole thing works
The flow is simple:
Someone opts in → Systeme.io records their contact → your automation triggers → they receive your email.
Once it’s set up, it runs on its own. Every single time. That’s the whole point.
There are three things to set up: the email campaign, the automation rule, and a quick test to make sure everything actually works.
Let’s go through each one.
Systeme.io is completely free to start — no credit card needed. Email automation is included on the free plan. Create your free account here →
Step 1 — Create your email campaign
First things first — before setting up any automation, you need the actual email ready to send.
Go to Emails → Campaigns in your Systeme.io dashboard.
You’ll see it’s empty if you haven’t created one yet. Click Create, give the campaign a name — something like “Free PDF” or “Welcome Sequence” — and select your sender email address.
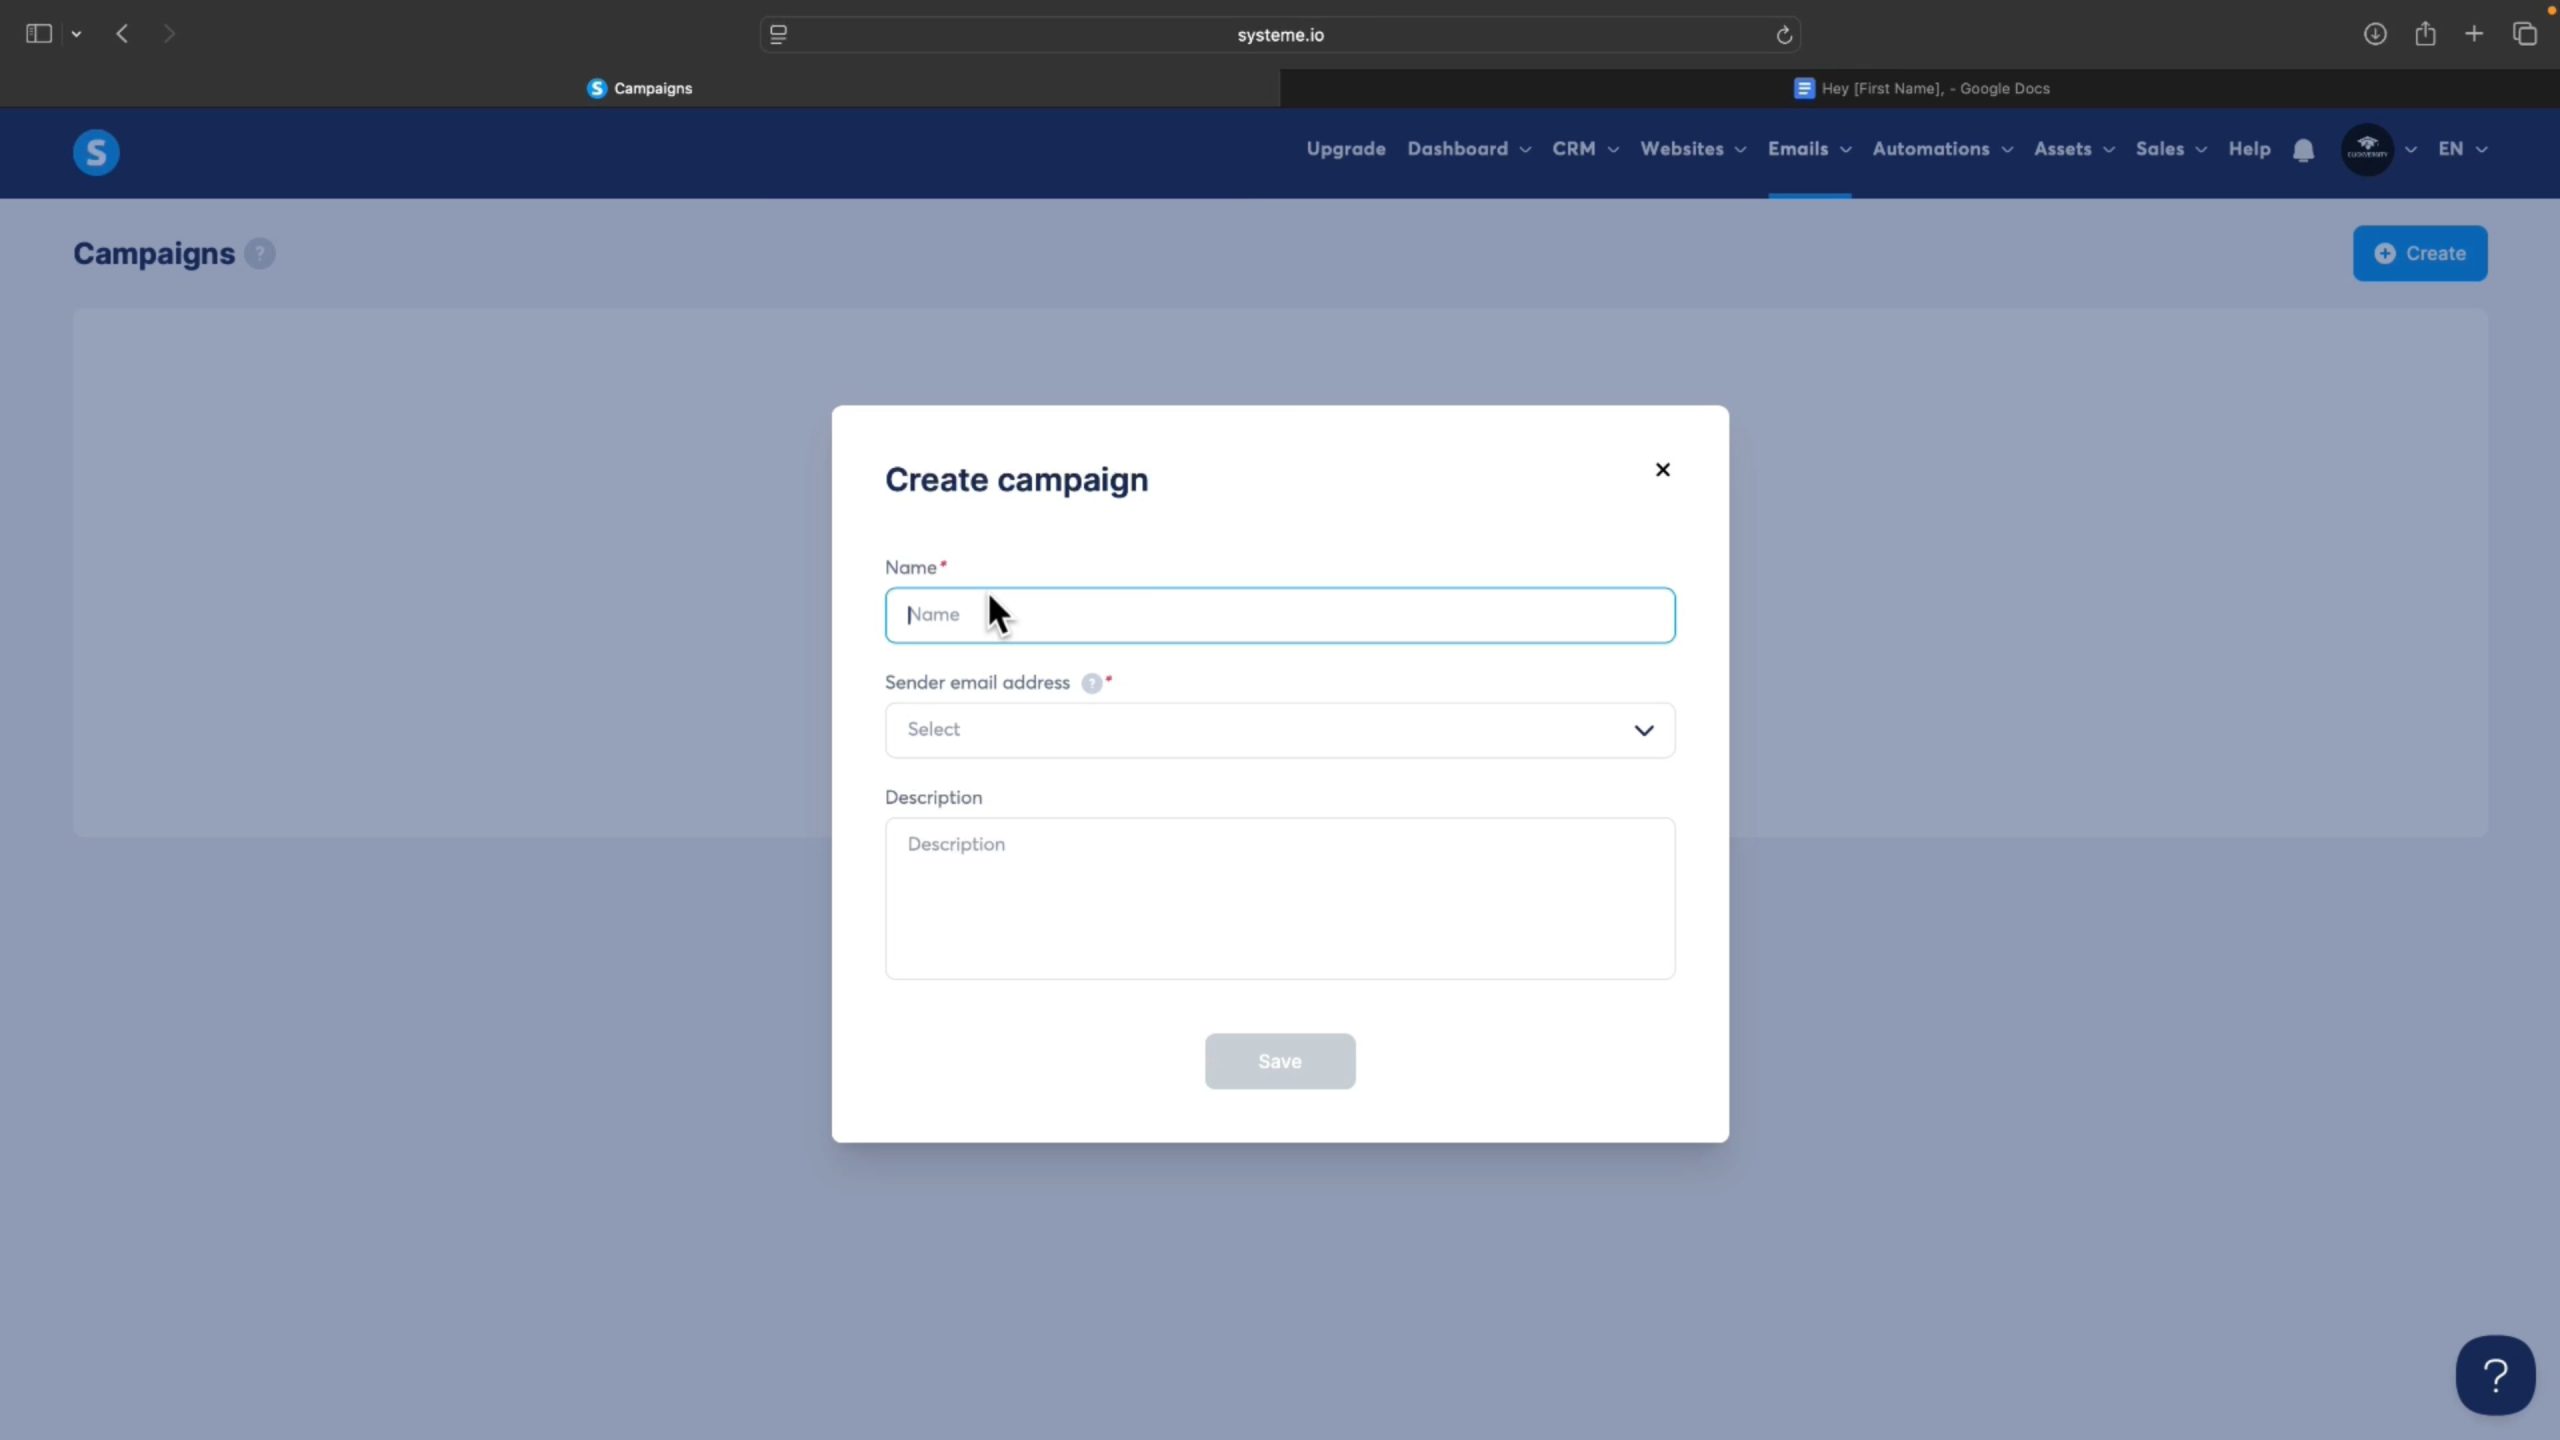
Once the campaign is created, click on its name and hit Create again to add your first email.
Set the subject line — something clear and direct like “Download your free keto recipes here” works perfectly. Add your sender name and email, then click Save.
You’ll be taken straight into the email editor.
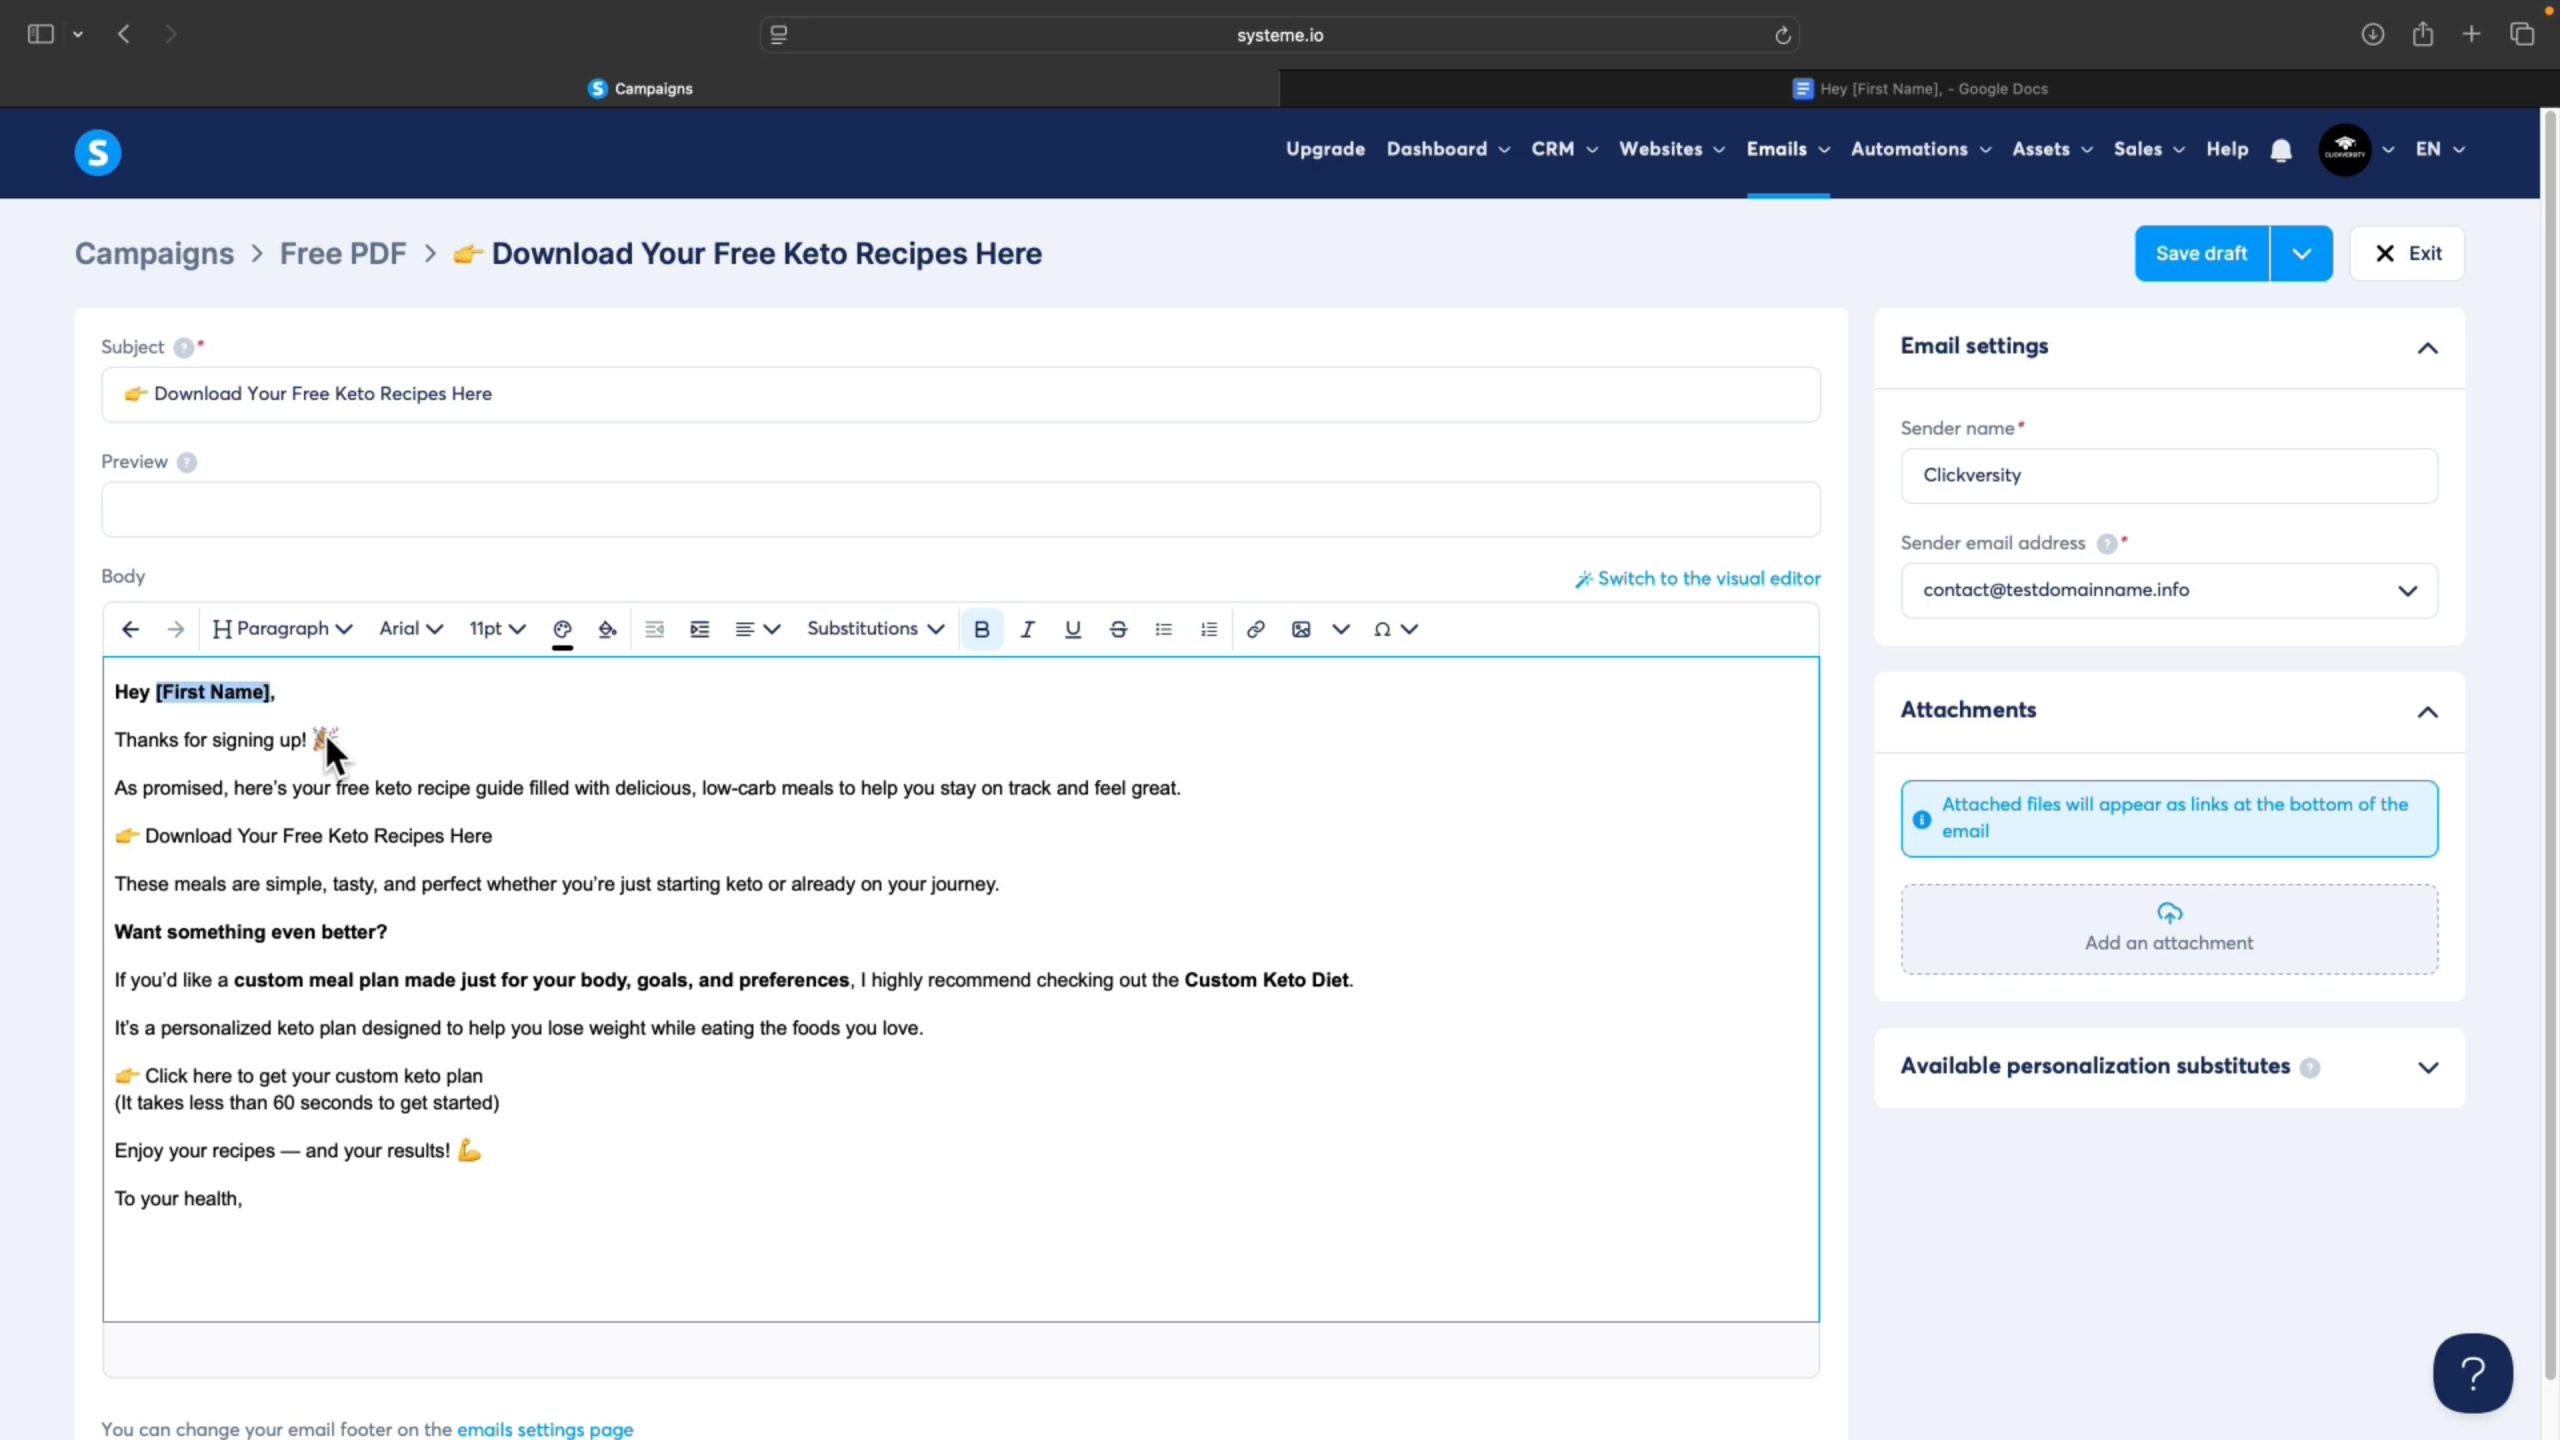
One thing worth doing here — use the {first_name} placeholder in your greeting.
So instead of just “Hey,” it becomes “Hey John” or “Hey Sarah” depending on who opted in.
It’s a small thing but it makes your emails feel way more personal. And more personal = more clicks.
Once your email is written, hit Save and Publish.
You’ll also see an option to set a delay before sending. Keeping it at zero sends the email immediately after someone opts in — which is usually what you want for a lead magnet. But you can set it to 1 minute, 1 hour, or even 1 day if that suits your setup better.
If you’re planning an email sequence with multiple emails, you can also set each one to send after the previous. So email 2 sends after email 1, email 3 sends after email 2 — and so on.
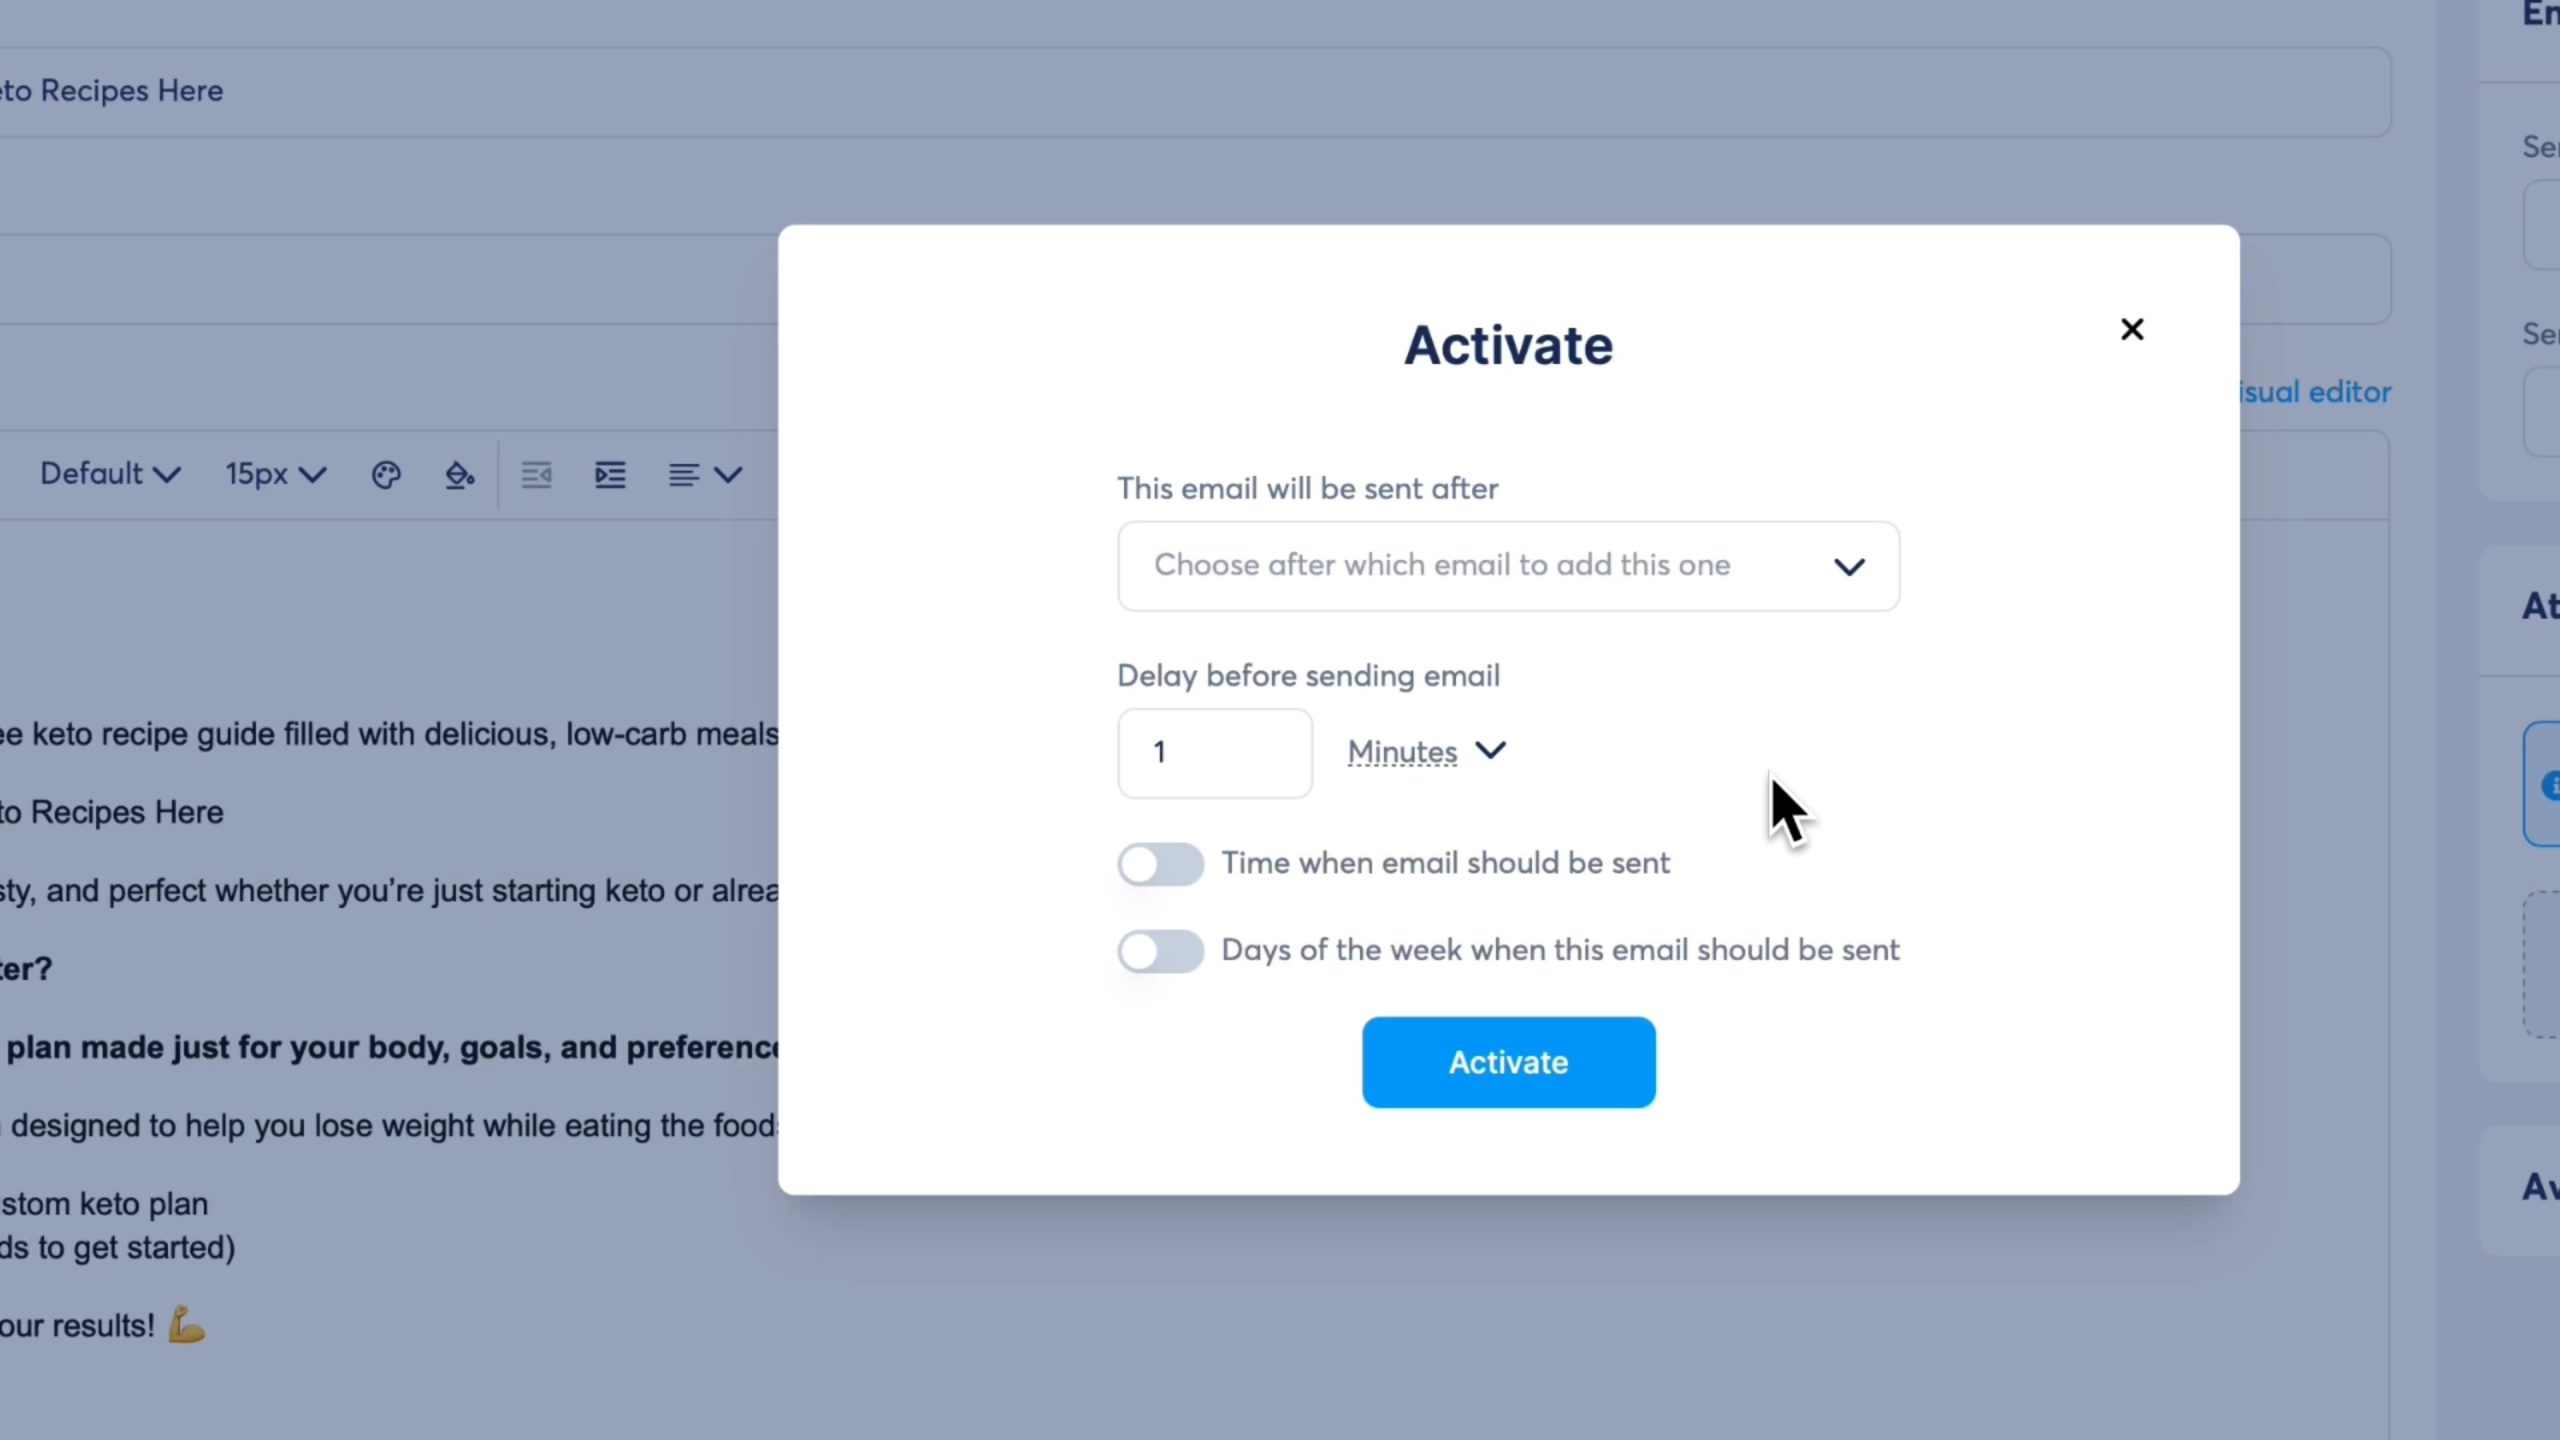
Activate the email and exit the editor. You should see it listed in your campaign with a green status and the delay you set.
Good. Campaign is done.
Now the important bit.
Step 2 — Set up your automation rule
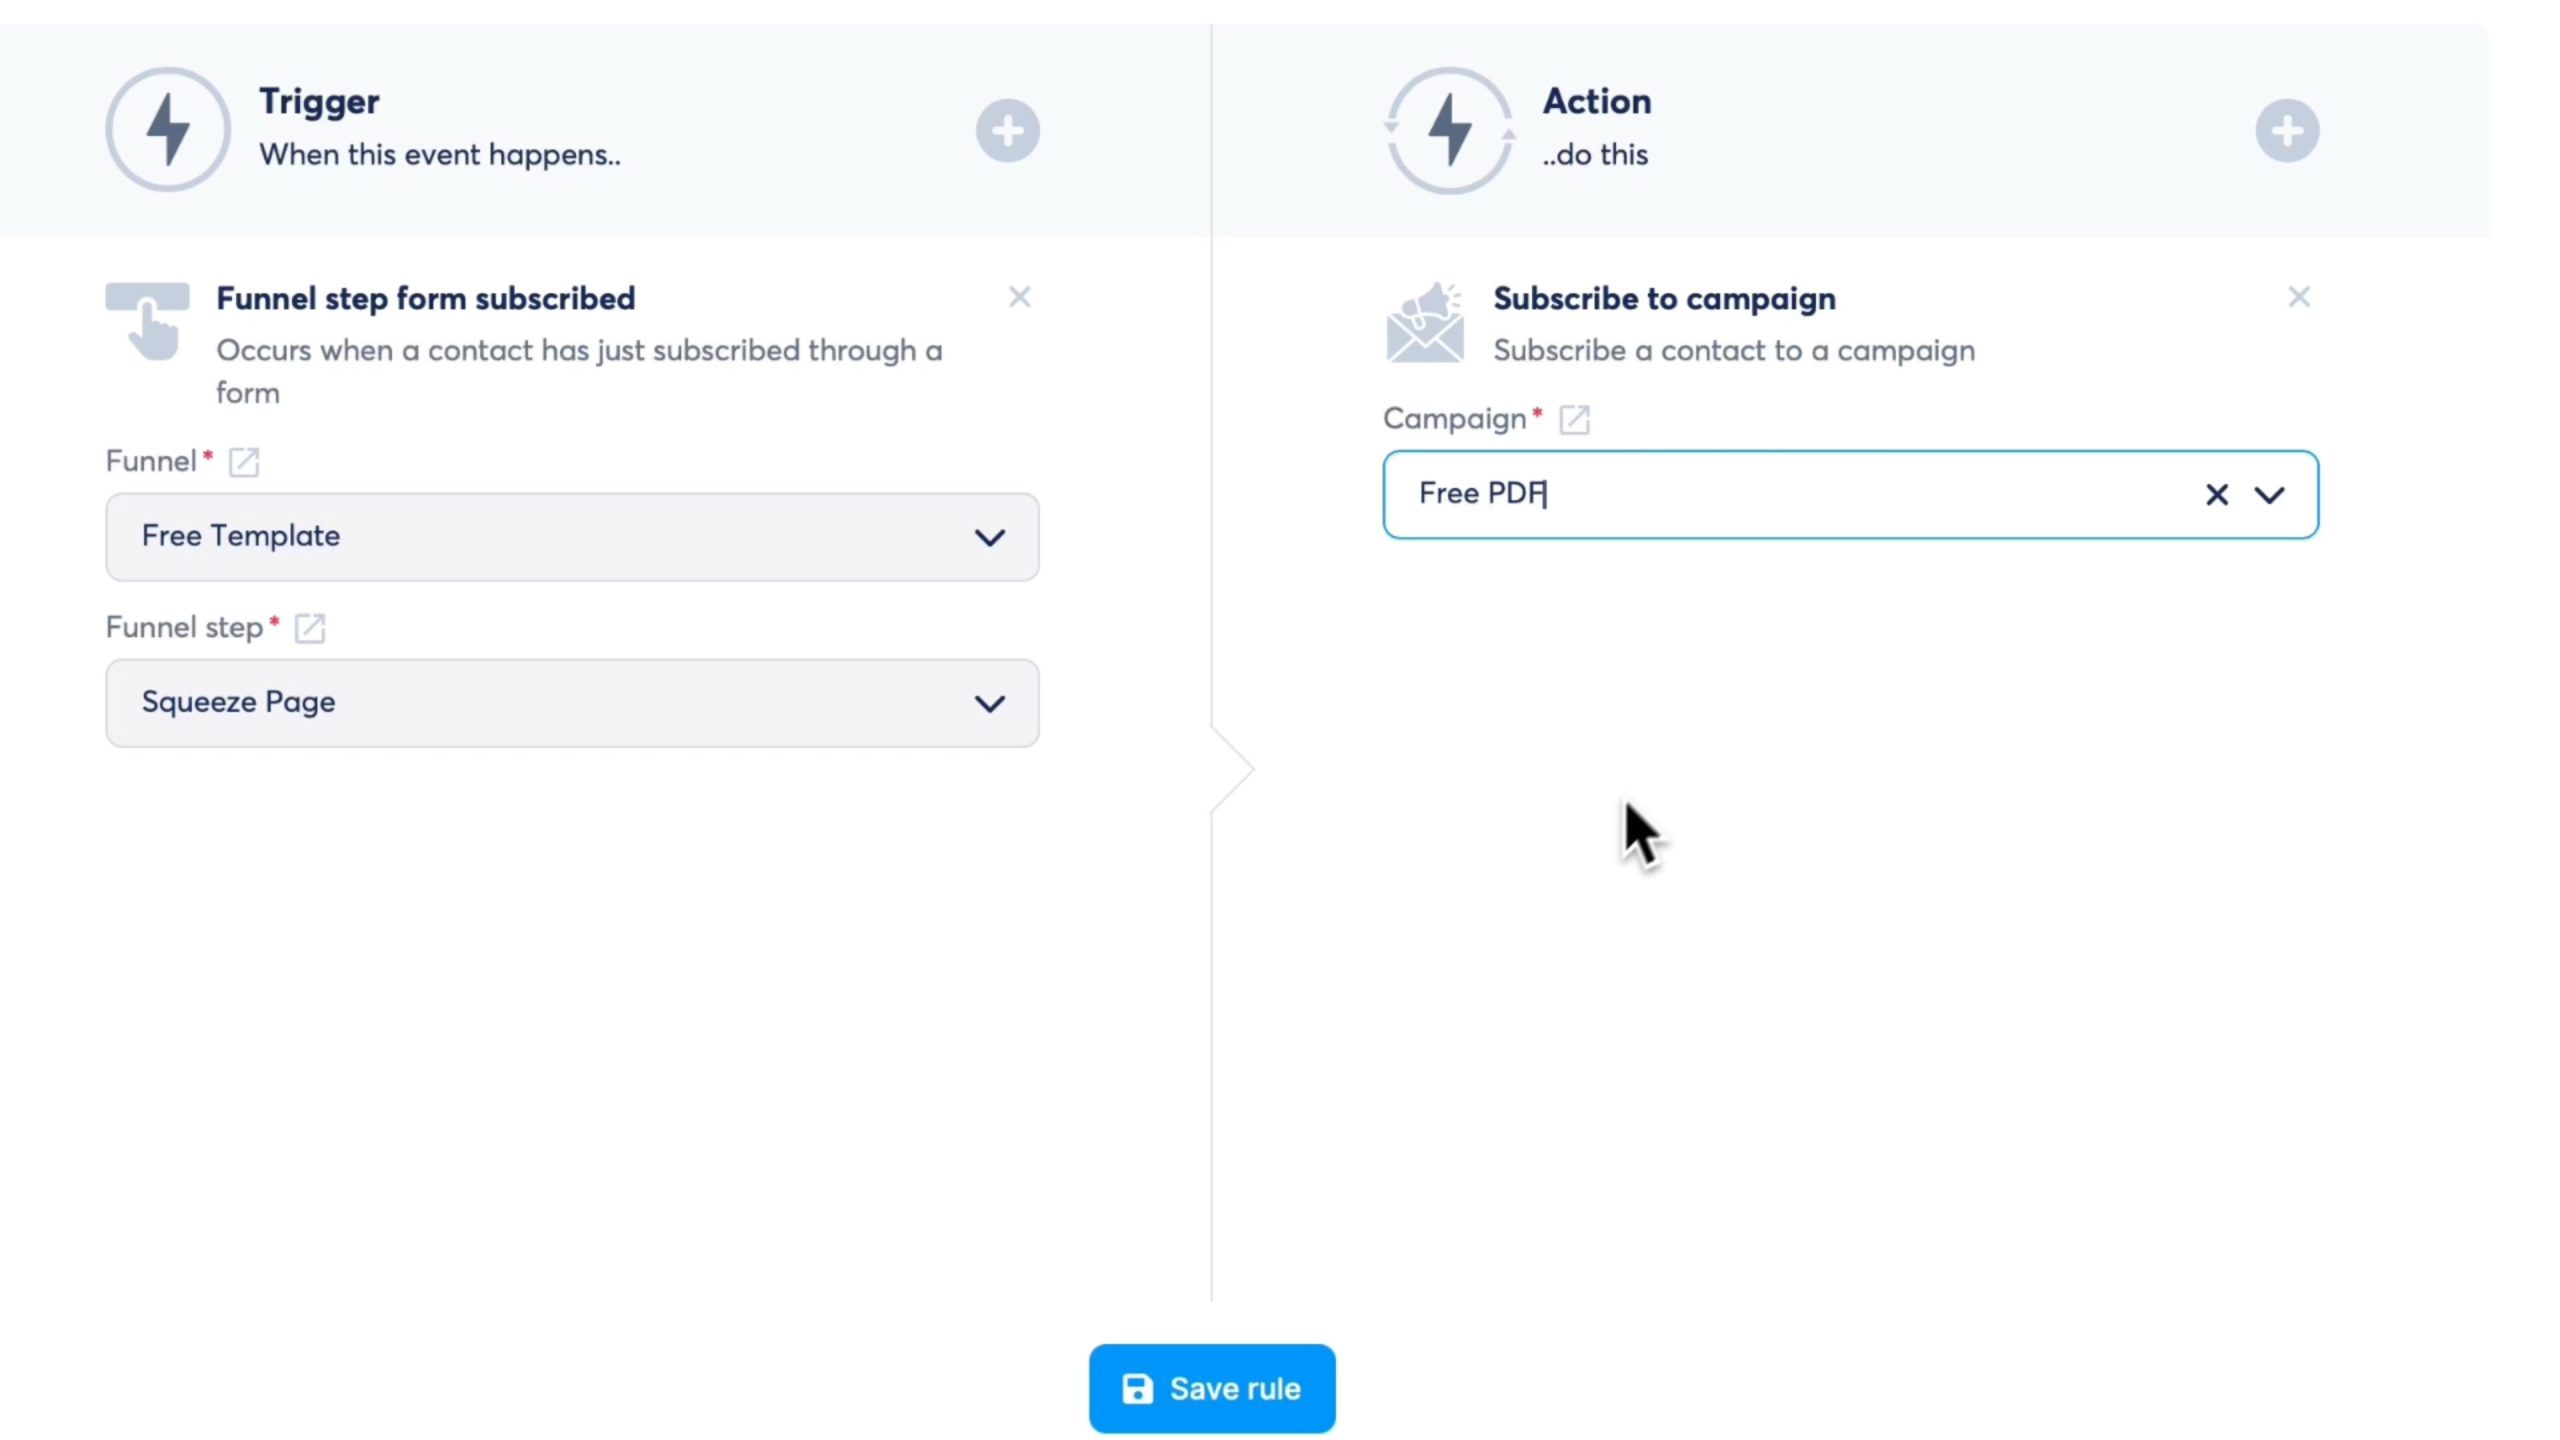
Go back to your funnel. Click on Automation Rules.
This is where you tell Systeme.io what to do — and when.

Click Add Rule and set your trigger.
The trigger is the event that starts everything. In our case it’s Funnel Step Form Subscribe — meaning the automation kicks in the moment someone fills out and submits your opt-in form.
Make sure you’ve got the right funnel selected and the right page (your squeeze/opt-in page) chosen.
Click Add Rule → set the trigger
Choose “Funnel Step Form Subscribe” as the trigger. Make sure the correct funnel and opt-in page are selected.
Add an action
Click the + icon to the right of your trigger and select “Subscribe to Campaign.” Then choose the campaign you just created.
Save the rule
Hit Save Rule and you’re done. The automation is live — anyone who opts in from this point on will automatically receive your email.
Step 3 — Test it
Don’t skip this.
Go to your opt-in page, fill out the form with a real email address you have access to, and click submit.
Wait the delay time you set (1 minute if you followed along) and check that inbox.
If the email arrives — with your name in the greeting — everything is working.

That’s the whole setup.
Email campaign → automation rule → test.
Once it’s running you never have to think about it again. Every new subscriber gets your email automatically, whether you’re working, sleeping, or doing something completely unrelated.
That’s what makes email automation so powerful — especially when you’re building an affiliate marketing business on the side.
Don’t want to build everything from scratch? Grab the free funnel template I use in this tutorial — it comes with an 8-step launch checklist so you can go live in under 15 minutes.
Grab the Free Funnel Template →Free · No credit card · Ready to import into Systeme.io


